

1. Introduction
In this lab, you will create 3 VPCs/VNets, one in each cloud, i.e., Azure, AWS and GCP. The purpose of creating these VPCs/VNets is to familiarise yourself with the user interface (UI).
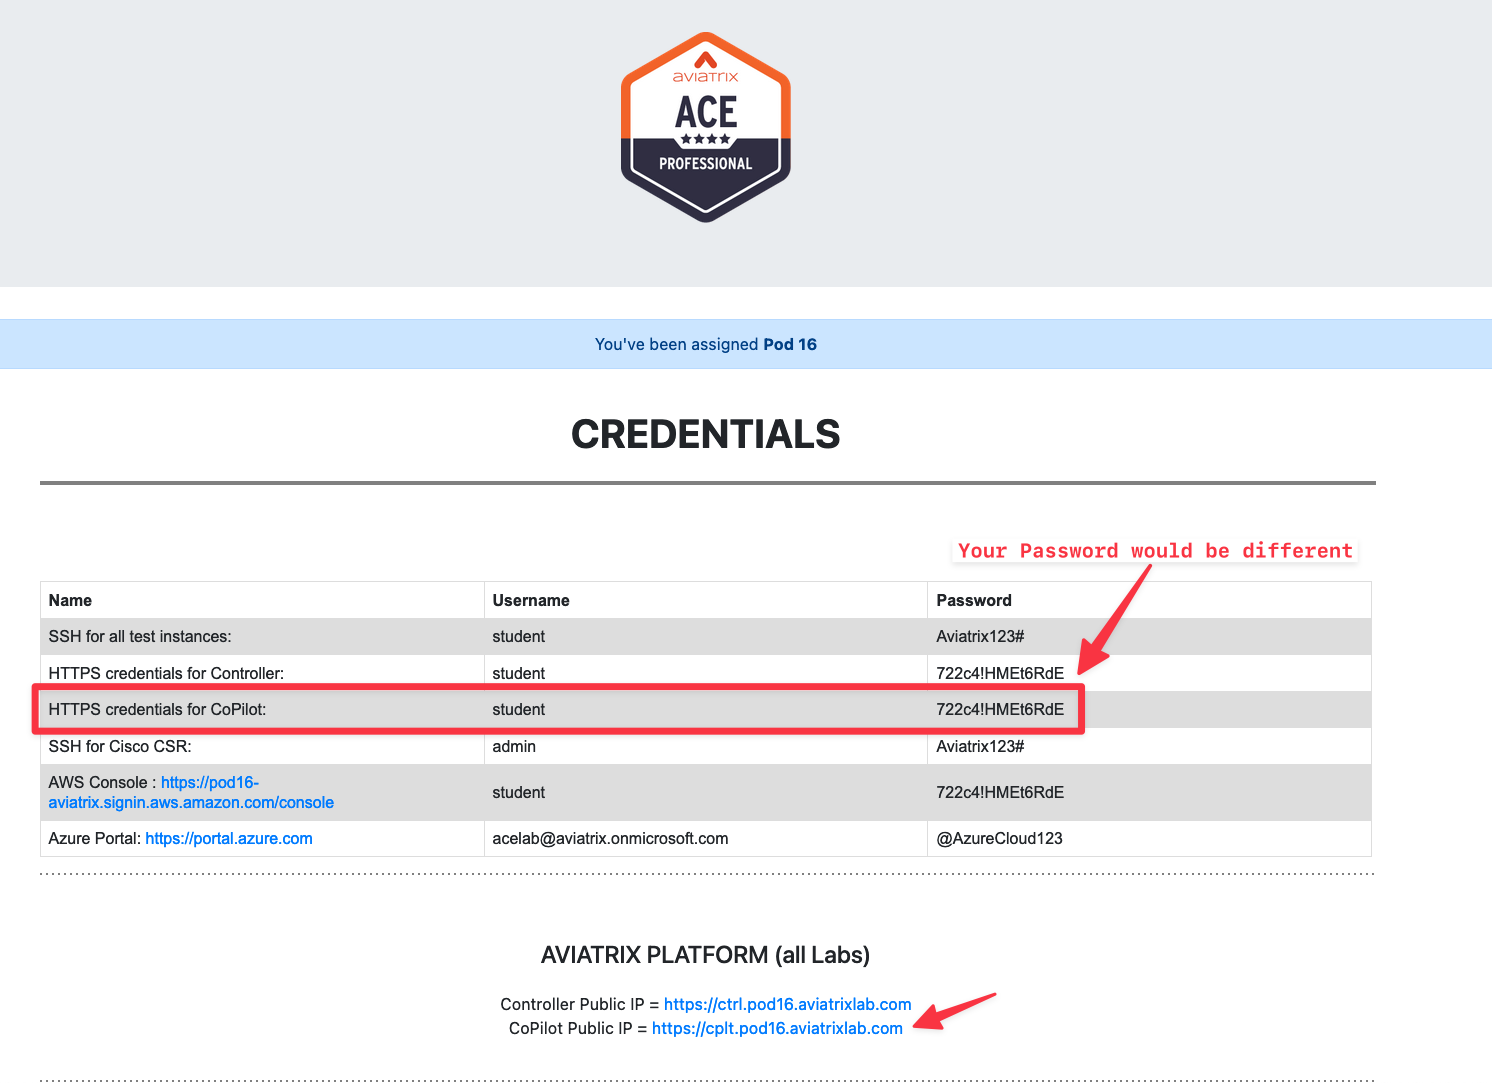
Refer to your Pod assignment for CoPilot login information, as depicted below. Click on the URL of the CoPilot and log in using the credentials assigned to your POD.
2. Azure VNet
2.1. Create Azure VNet
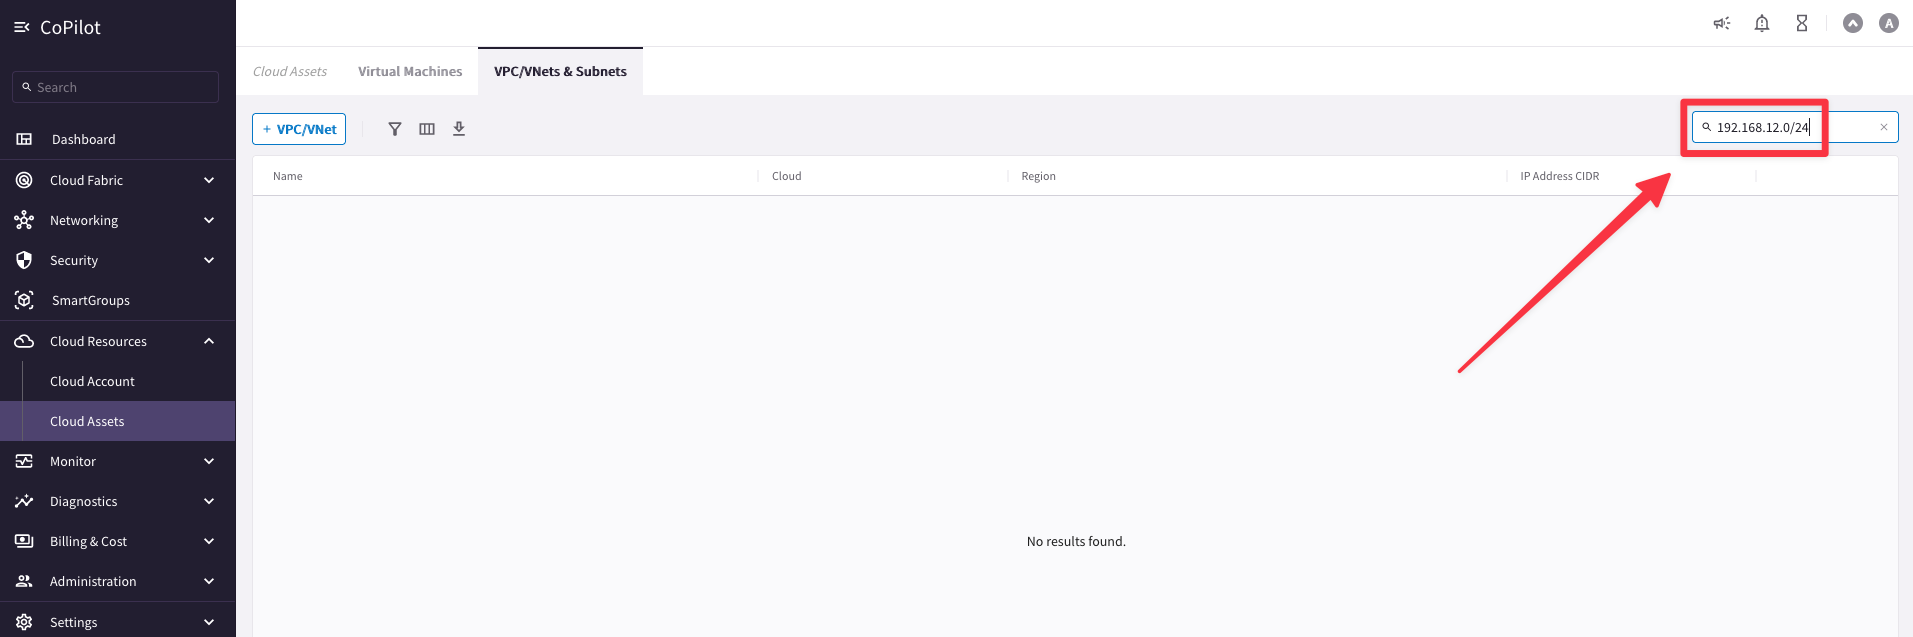
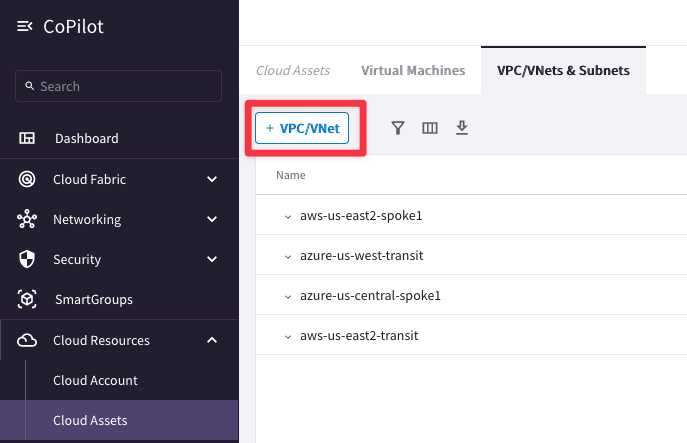
Go to CoPilot > Cloud Resources > Cloud Assets > VPC/VNets & Subnets
Verify if the CIDR range 192.168.12.0/24 is overlapping, as shown below.
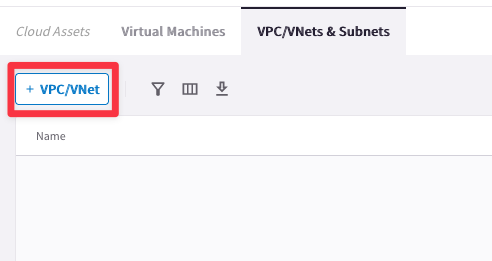
Let’s create an Application/Spoke VNet. Click on the button “+ VPC/VNET”
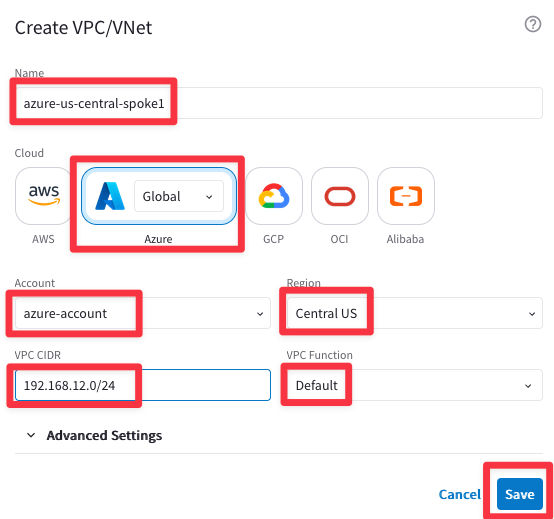
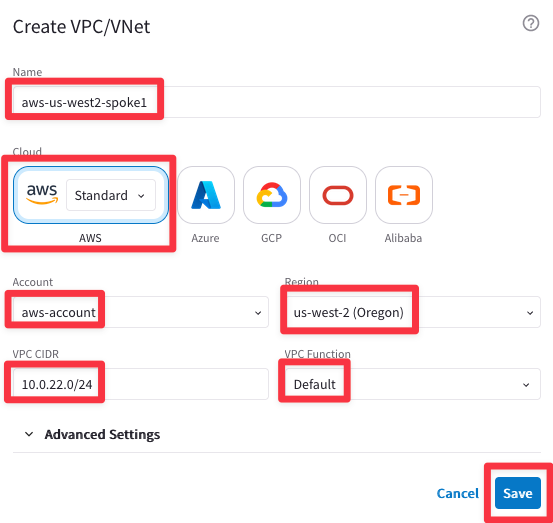
Insert the following values:
- Name = azure-us-central-spoke1
- Cloud = Azure Global
- Account = azure-account [use the drop-down window]
- Region = Central US [use the drop-down window]
- VPC CIDR = 192.168.12.0/24
- VPC Function = Default [use the drop-down window]
Then click on Save.
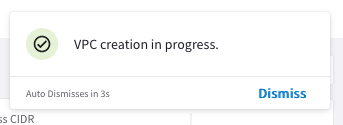
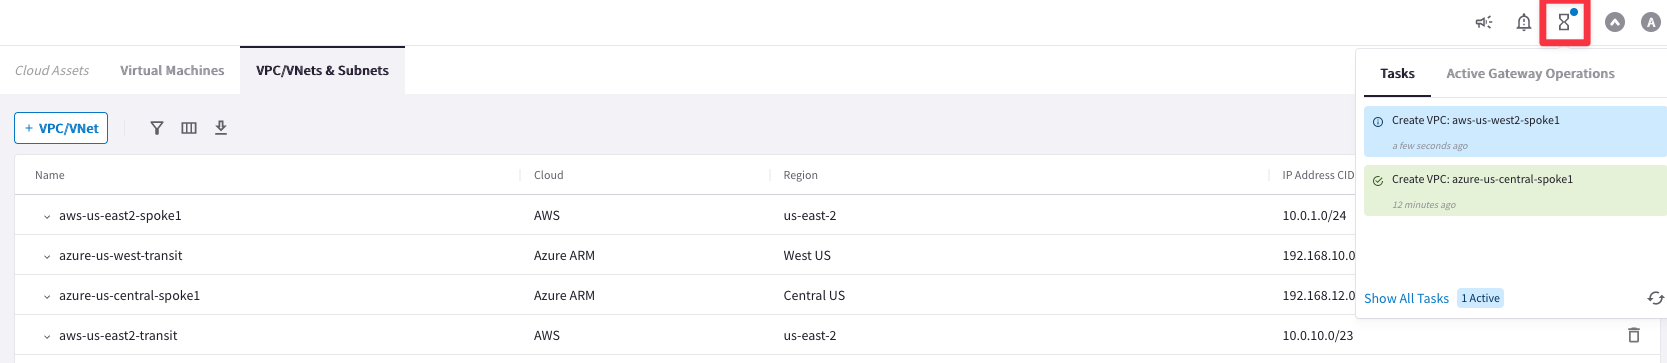
You will immediately notice a message on the top-right corner.
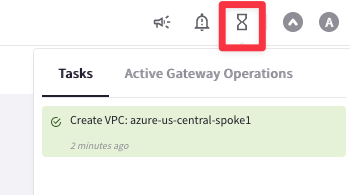
From the CoPilot search bar, type “task” and then click the search result “Notifications / Tasks”. Observe the VNet creation Task and wait for it to complete.

You can also verify the completion of the VNet through the hourglass icon in the top-right corner to invoke the Tasks tray.
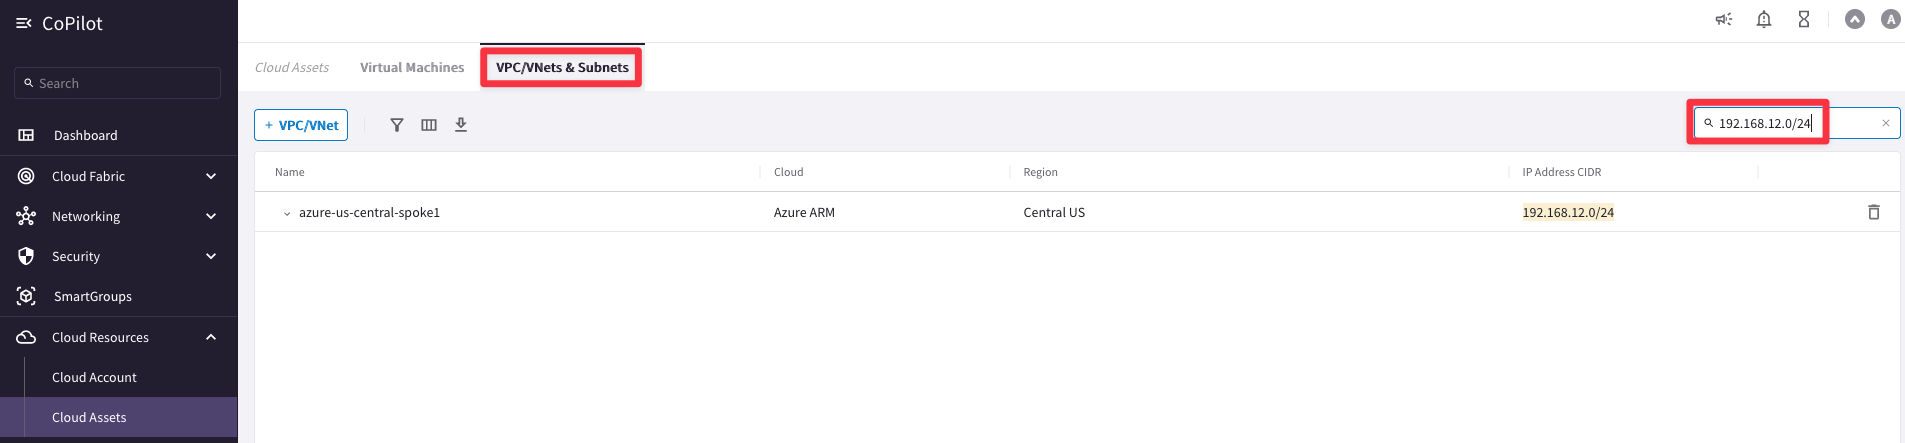
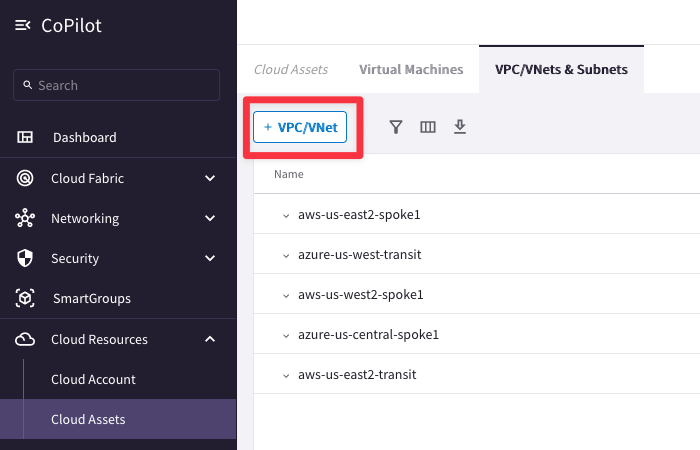
Go back to CoPilot > Cloud Resources > Cloud Assets > VPC/VNets & Subnets
Then verify the VNet creation in the VPC list. If you do not see the 192.168.12.0/24 CIDR immediately, hit the Refresh icon (alternatively, refresh the web page to trigger the visibility). Azure API calls are known to be slower than those of the other CSPs. So you may need to be patient.
2.2. Verify from Azure Portal
Log into the Azure portal. Refer to your pod info for login information.
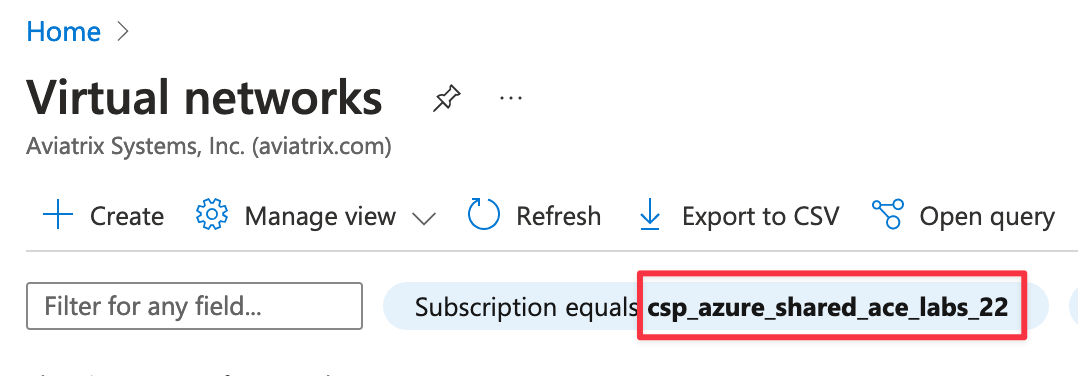
Once you are logged in, navigate to Virtual Networks.
Be sure to filter your Subscription by your pod number, for example, for Pod 22, filter by csp_azure_shared_ace_labs_22.
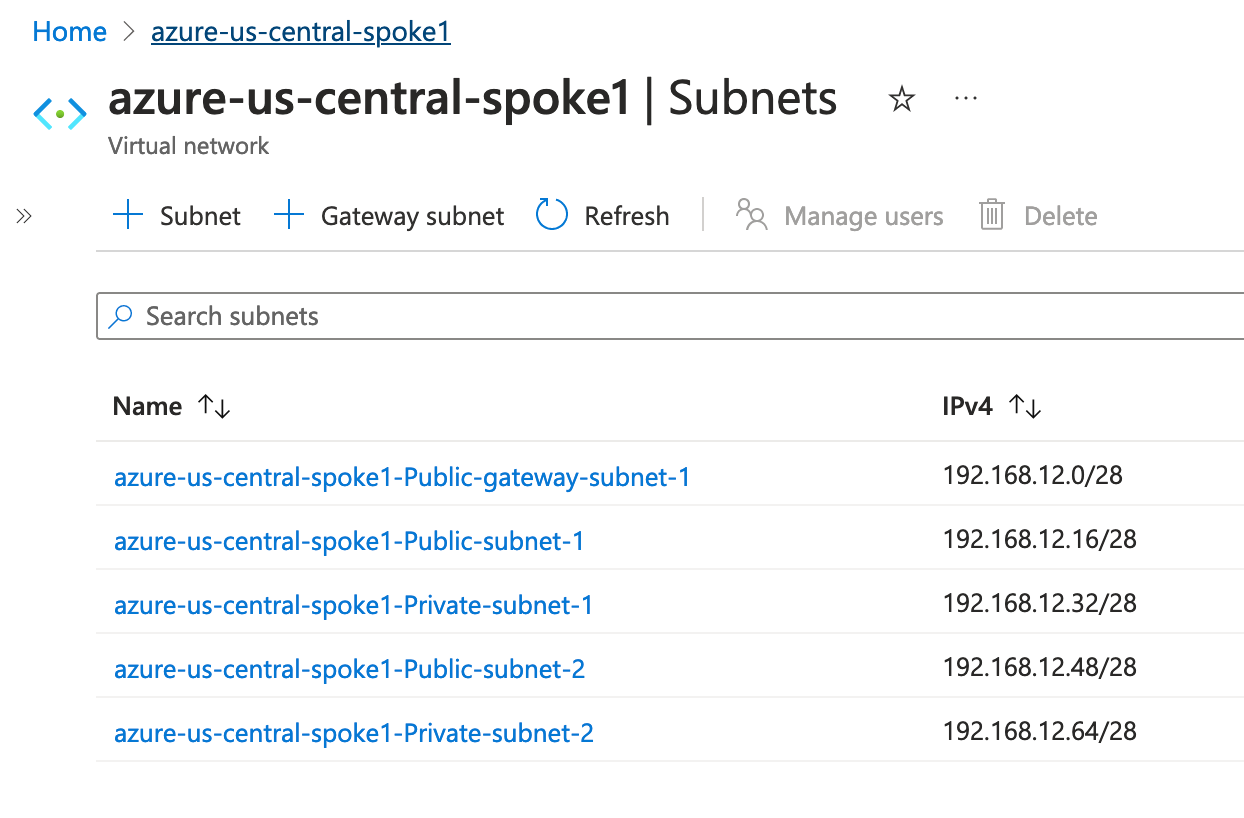
Once in the VNet you just created, navigate to Subnets. Explore all the constructs that were created in Central US.
From the Portal, navigate to Home > Route tables. Explore the route tables.

3. AWS VPC
3.1. Create AWS VPC
Go to CoPilot > Cloud Resources > Cloud Assets > VPC/VNets & Subnets and click on the button “+ VPC/VNET”
Insert the following values:
- Name = aws-us-west2-spoke1
- Cloud = AWS
- Account = aws-account [use the drop-down window]
- Region = us-west-2 (Oregon) [use the drop-down window]
- VPC CIDR = 10.0.22.0/24
- VPC Function = Default [use the drop-down window]
Then click on Save.
Monitor the progress of theVPC creation through the hourglass icon.
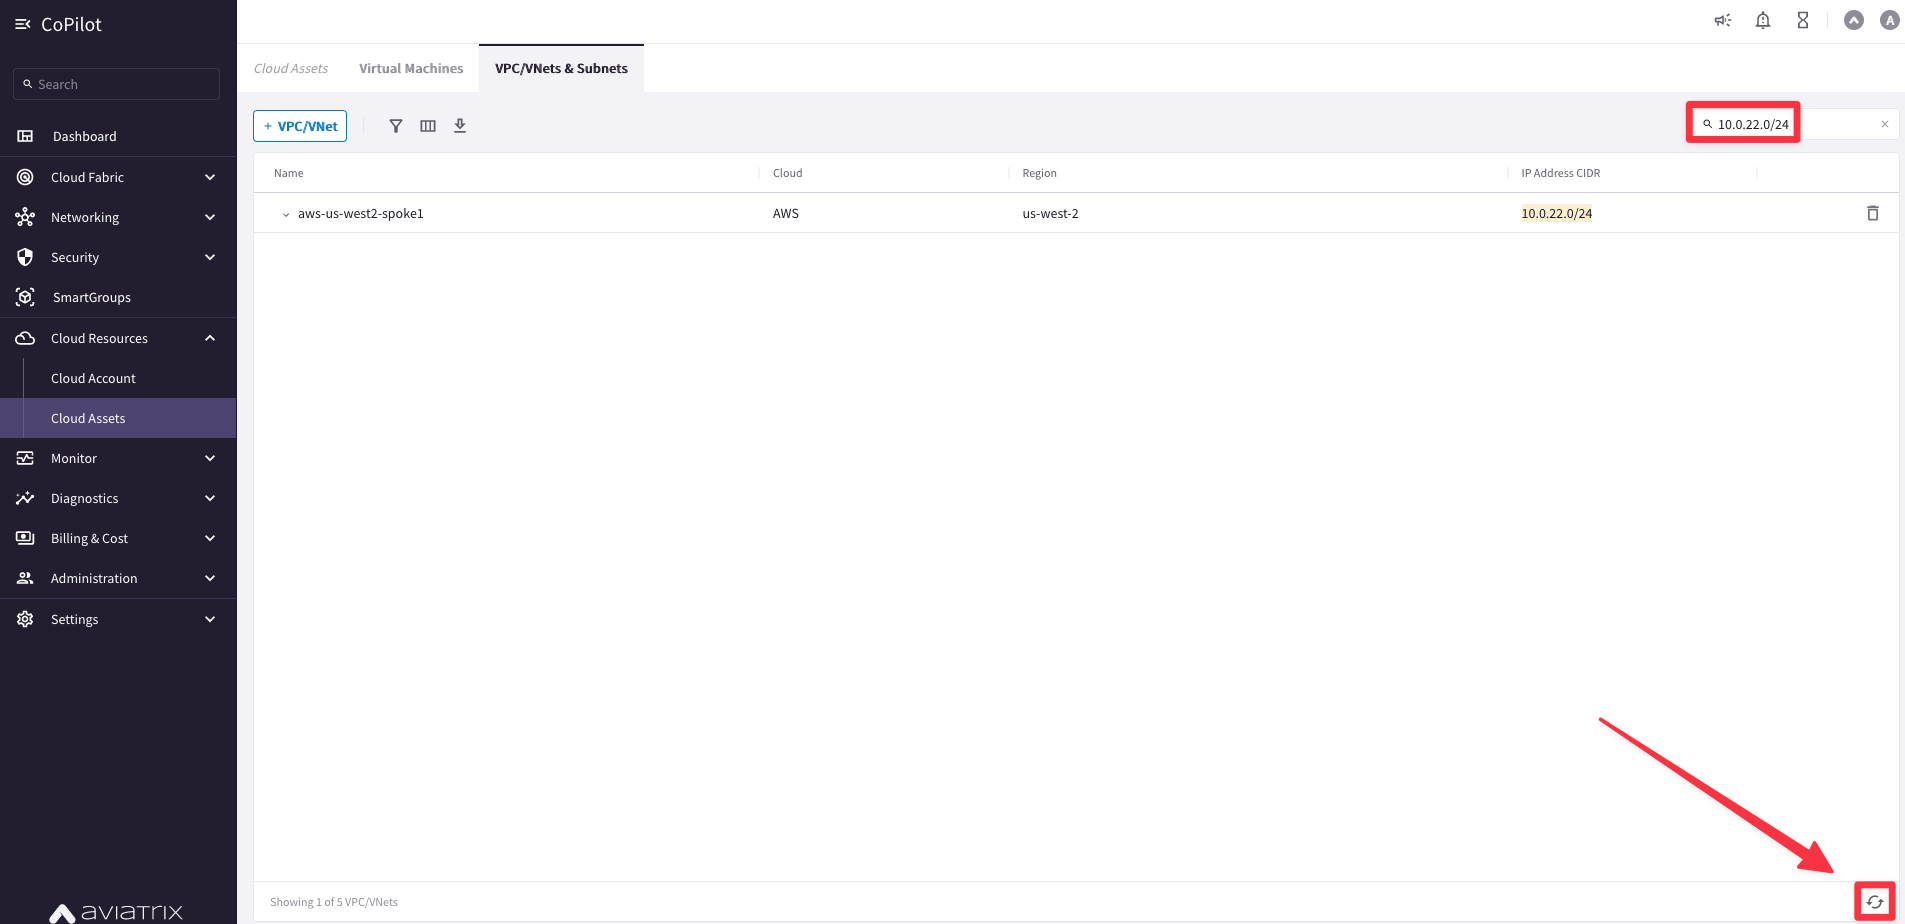
Verify the VPC creation in the VPC list. Hit the Refresh icon if you do not see the CIDR immediately (alternatively, refresh the web page to trigger the visibility).
You can filter by CIDR 10.0.22.0/24
3.2. Verify from aws Console
Log in to the AWS console. Refer to your pod info for login information (this screenshot is for Pod 100):

Change the region to Oregon (us-west-2) in the top-right corner and invoke the VPC service. You can see the VPC created with the CIDR block.
From there, navigate to Subnets.
As you can see, the Controller will create 1 Public Subnet and 1 Private Subnet per Availability Zone. Since us-west-2 has 4 AZs, therefore eight subnets are created.
From there, navigate to Route Tables.
Here, also, you can see the eight route tables that the Controller created. They are mapped to each subnet. The Public Subnets have a 0/0 route pointing to the Internet Gateway, which the Controller deployed.
4. GCP VPC
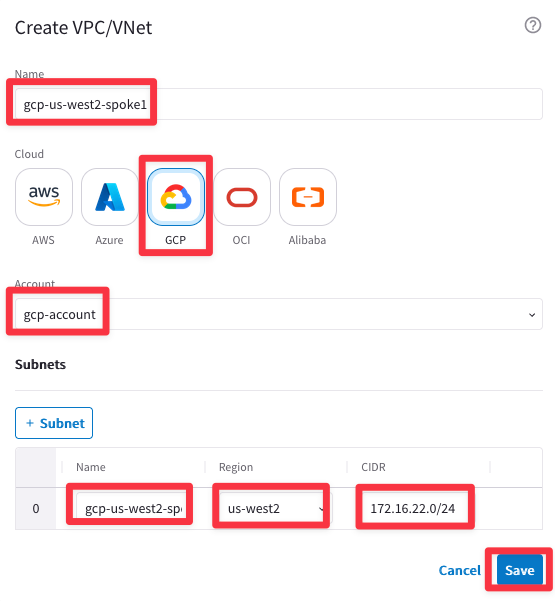
Go to CoPilot > Cloud Resources > Cloud Assets > Click on the button “+ VPC/VNET”
Insert the following values:
- Name = gcp-us-west2-spoke1
- Cloud = GCP
- Account = gcp-account [use the drop-down window]
- Name = gcp-us-west2-spoke1-sub1
- Region = us-west2 [use the drop-down window]
- CIDR = 172.16.22.0/24
Then click on Save.
NOTE: Make sure there are no white spaces at the beginning or end of the VPC name.
Verify the VPC creation in the VPC list. Hit the Refresh icon if you do not see the CIDR immediately.
You can filter by CIDR 172.16.22.0/24.

Note: The VPCs and VNet created in this lab will not be used in subsequent labs.