

1. Objective
This lab will demonstrate how ThreatIQ and ThreatGuard work.
2. ThreatIQ Overview
Aviatrix gateways send NetFlow data to CoPilot. CoPilot uses this data in many ways. FlowIQ is one. ThreatIQ is another. ThreatIQ alerts you on Malicious IPs with bad reputations. These IPs are reported in the ThreatIQ database that CoPilot maintains.
Note: When you enabled a Public Subnet Filtering gateway, very soon afterwards, you may have noticed ThreatIQ alerts starting to be reported for the aws-us-east2-spoke1-test EC2 instance. This is because the PSF gateway intercepts Ingress traffic to the test instance. The test instance was already being hit by Malicious IPs even before the PSF gateway was deployed! It's only thanks to ThreatIQ that now you can see them.
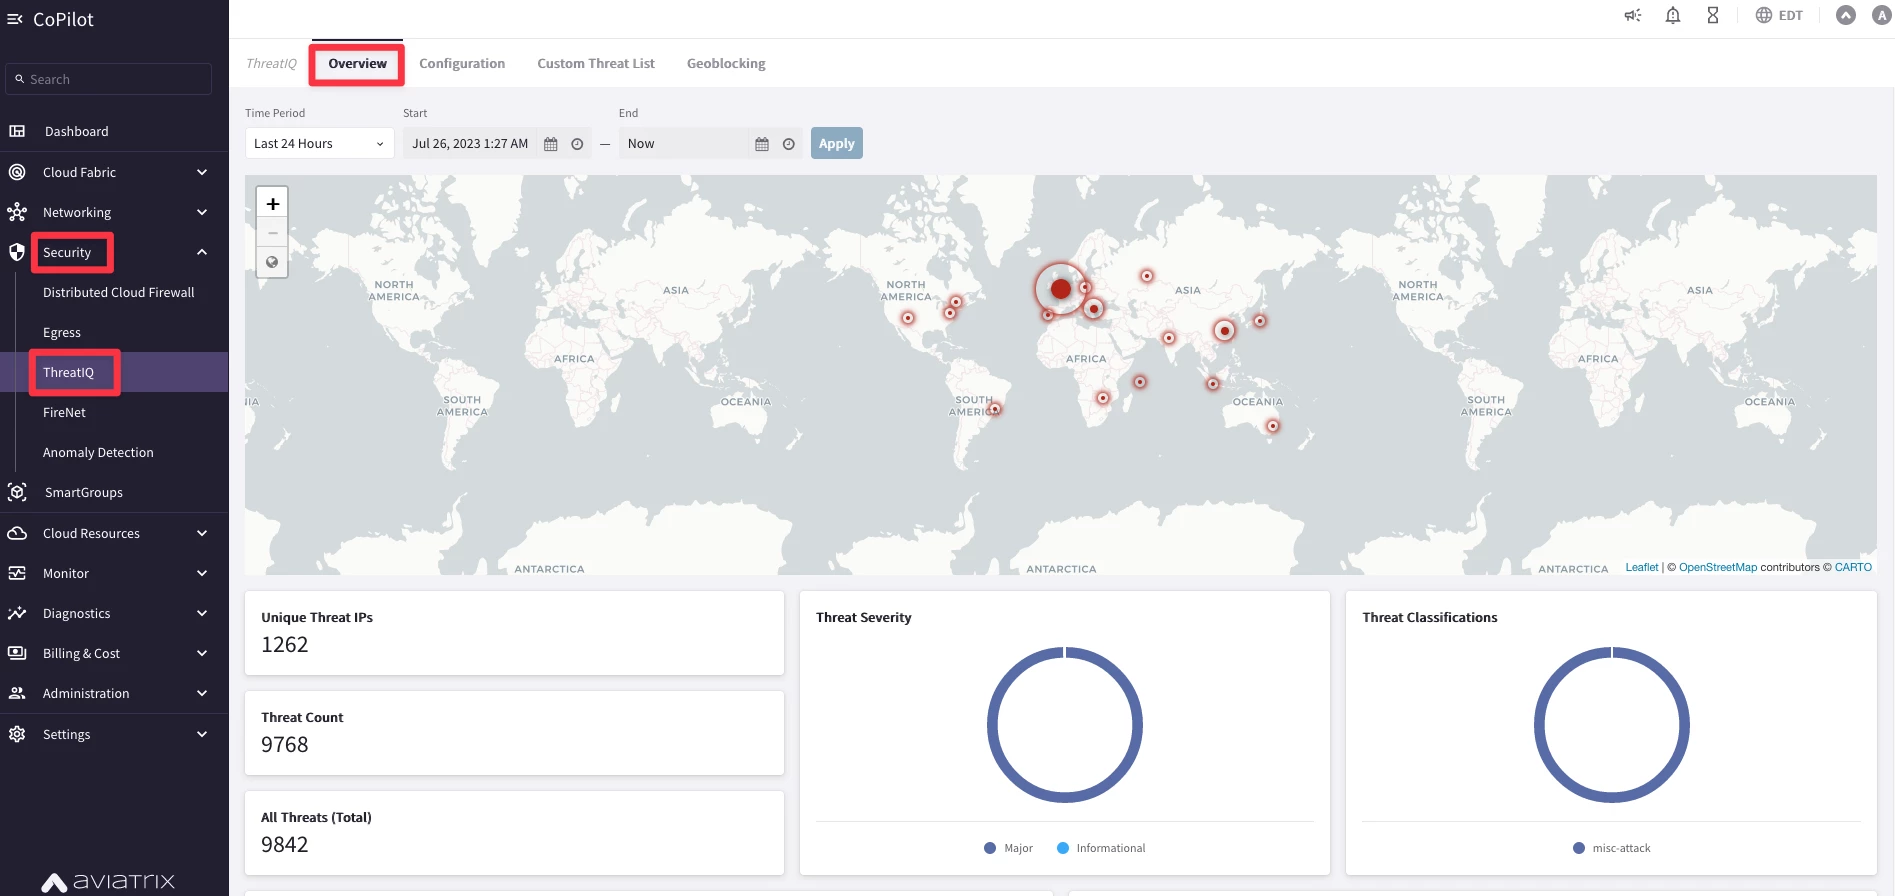
Go to CoPilot > Security > ThreatIQ > Overview (default Tab)
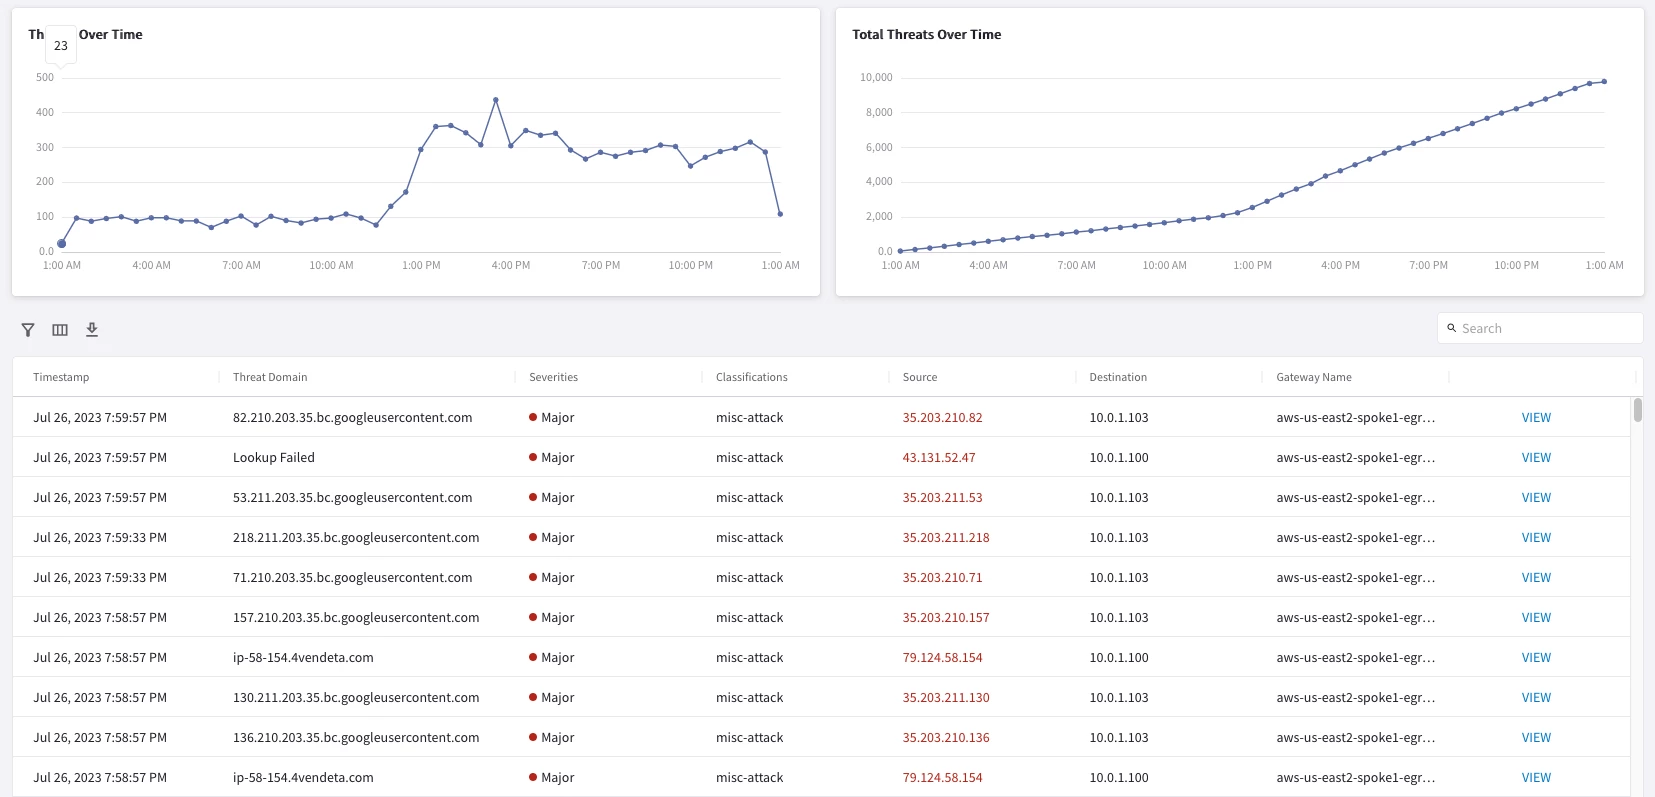
Expect to see something like this:
3. Topology
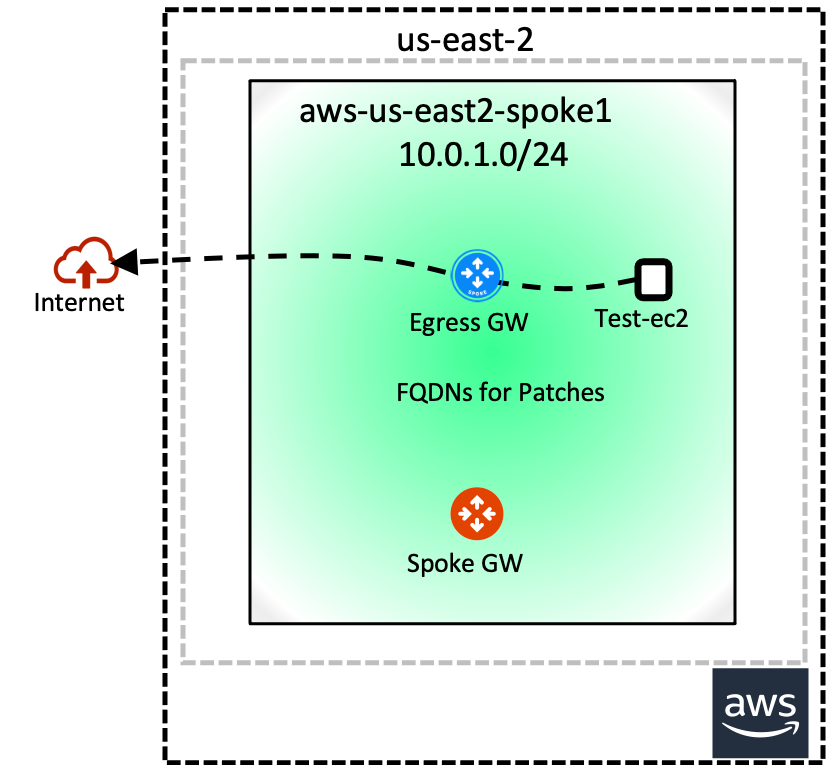
In this lab, we will be using the same topology that was used in Lab 6 with the Egress/Public Subnet Filtering Gateway:
4. Configuration of the Egress FQDN
4.1. Create a New TAG
Go to Controller > SECURITY > Egress Control > (Step 3) Egress FQDN Filter
Under Step 3, click + New Tag.

Create a new tag, "Allow-All", and click OK.
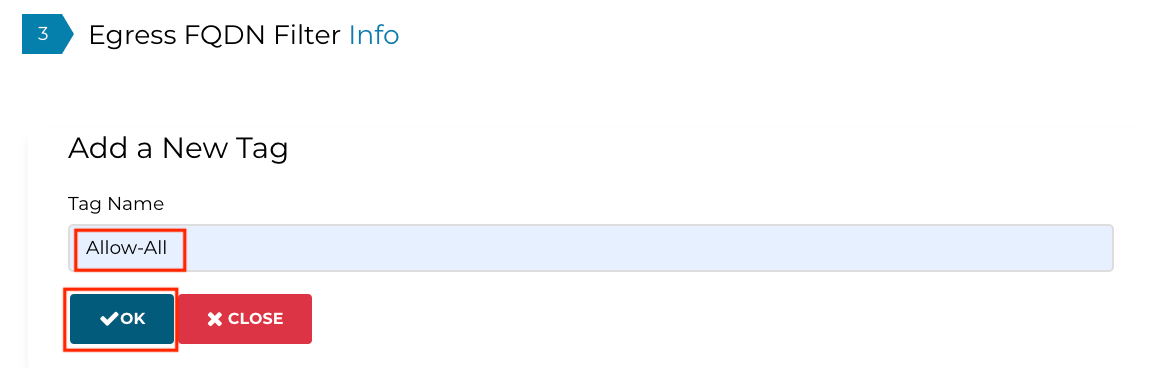
You can create an effective Allow-all list by creating a Deny List that is empty, i.e., it has no rules. But it will be monitored since all traffic goes through the Aviatrix data plane.
Click the Deny button and slide the status to Enabled.

4.2. Replace ‘Allowed-Sites’ Tag Attachment with ‘Allow-All’ Tag
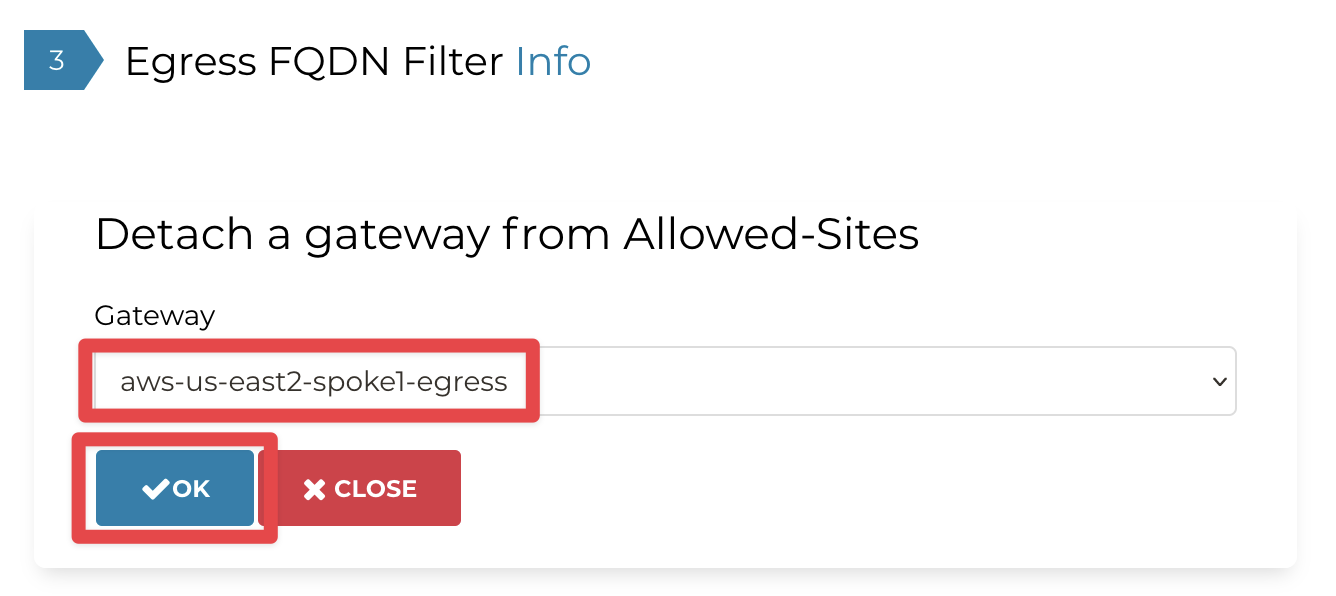
Detach the "Allowed-Sites" Tag from the aws-us-east2-spoke1-egress gateway.
Click DETACH GATEWAY in the "Allowed-Sites" row.

Confirm that you are about to detach aws-us-east2-spoke1-egress-agw from "Allowed-Sites". Click OK:
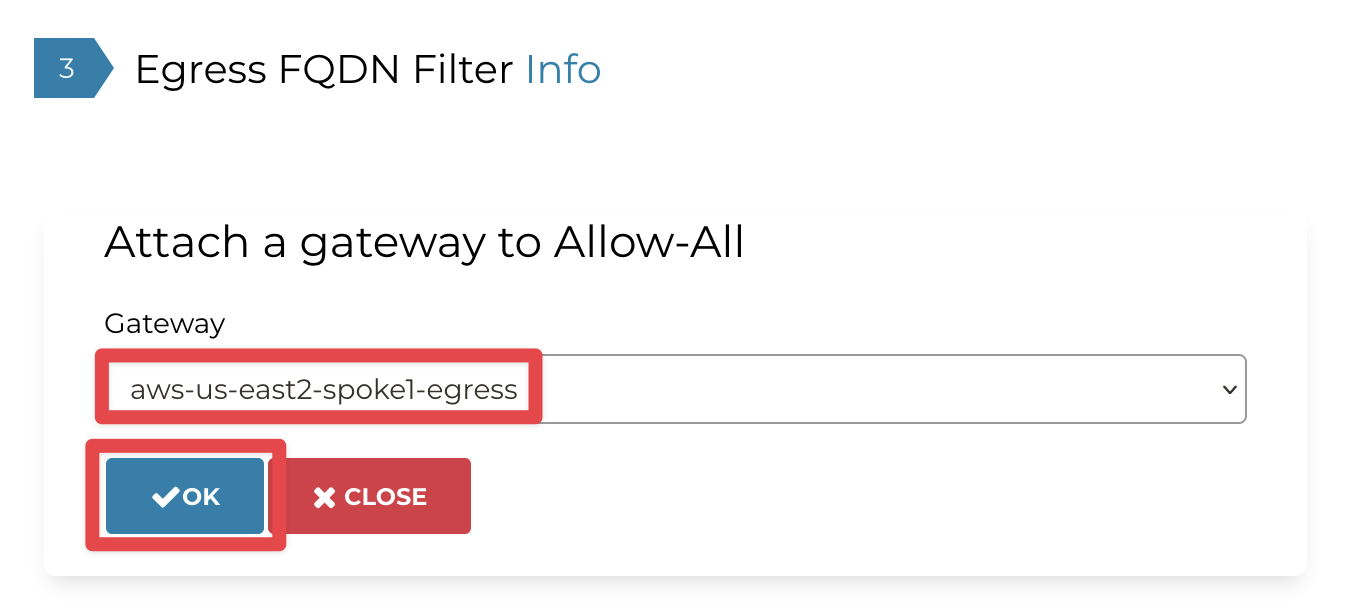
Click on Attach Gateway to attach the gateway to the Tag “Allow-All”.

Select the correct gateway (aws-us-east2-spoke1-egress-agw) from the pulldown menu and click OK:
Confirm you have configured everything correctly in (Step 4) Egress FQDN Gateway View:
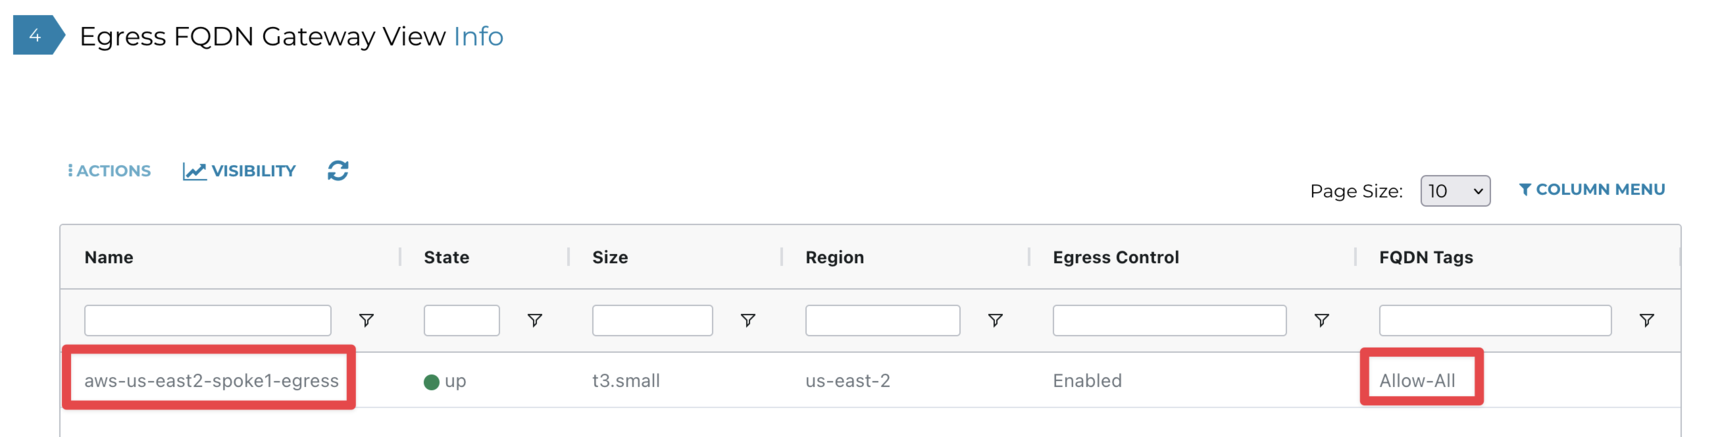
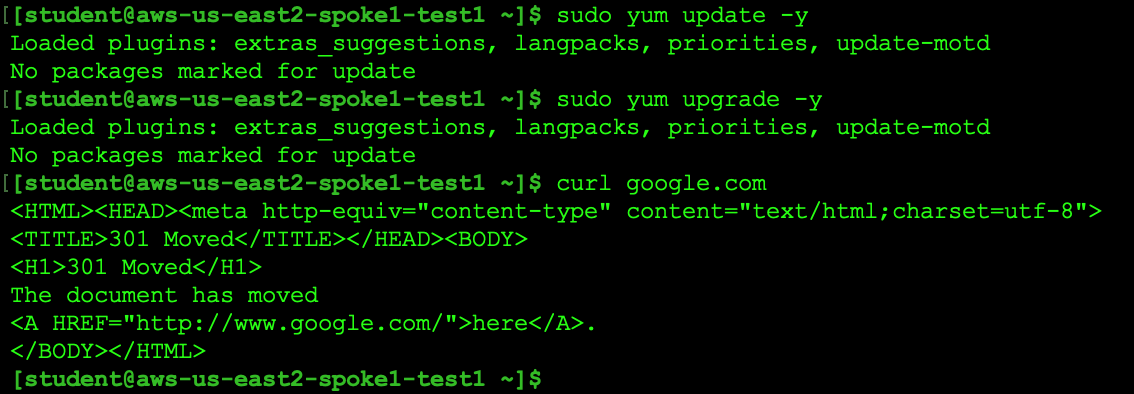
Try patch updates (sudo yum update -y and sudo yum upgrade -y) and curl commands on aws-us-east2-spoke1-test1. All egress traffic should be allowed.
4.3. Enable ThreatIQ and ThreatGuard
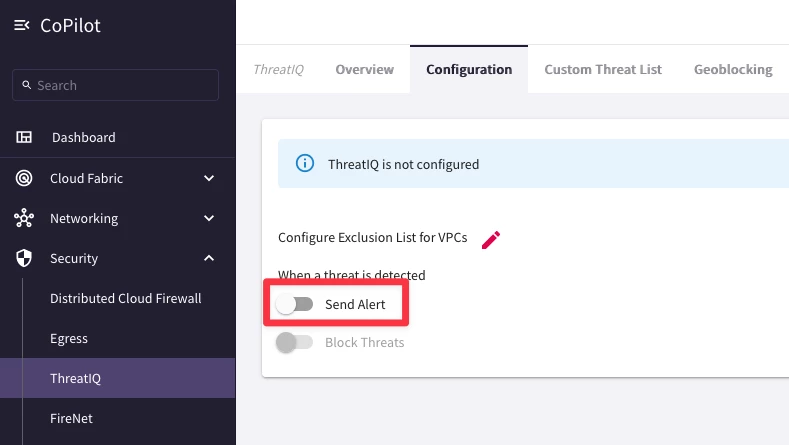
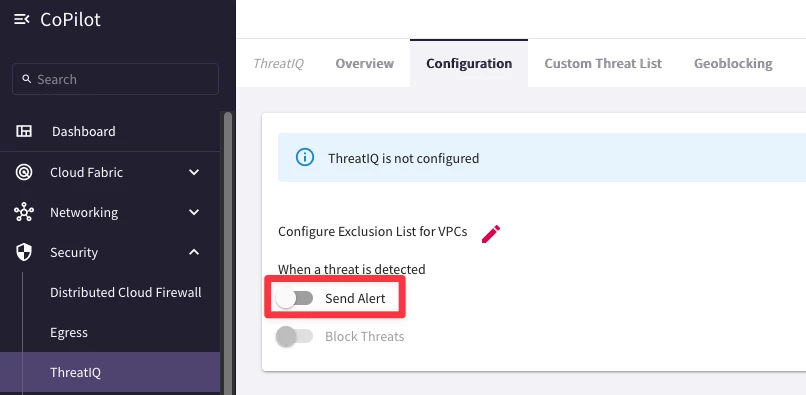
Navigate to CoPilot > Security > ThreatIQ > Configuration
Click on Send Alert:
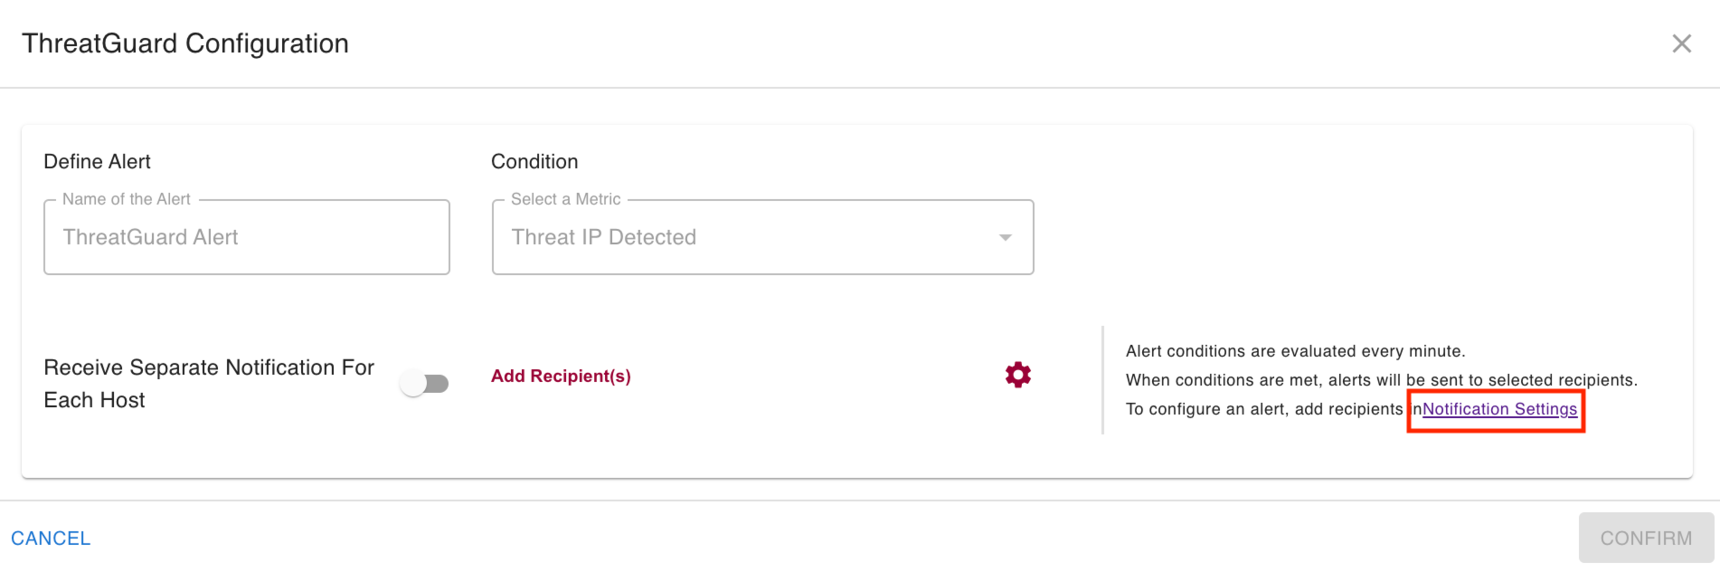
Click on Notification Settings.
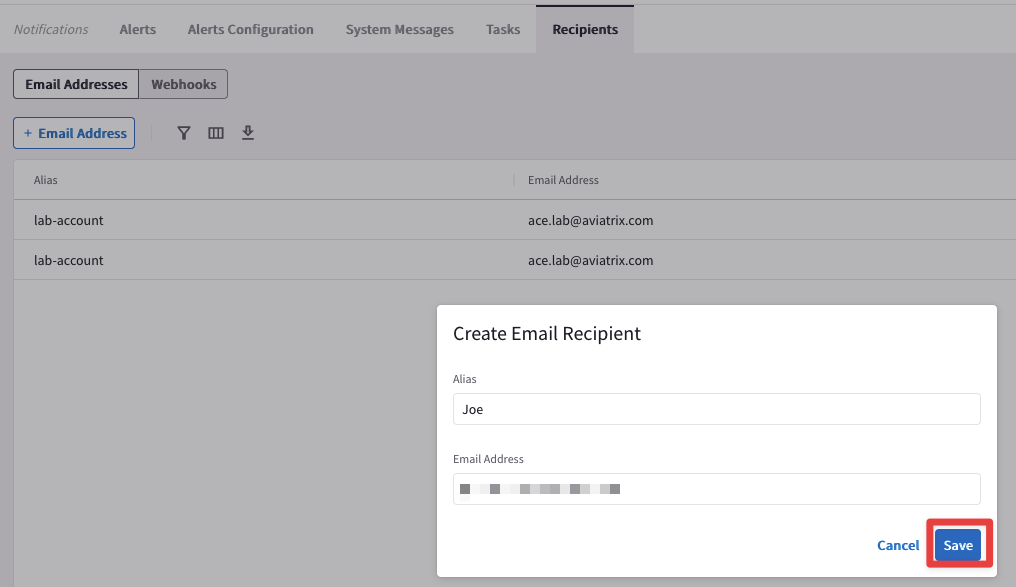
Click on the "+ Email Address" to add a new recipient
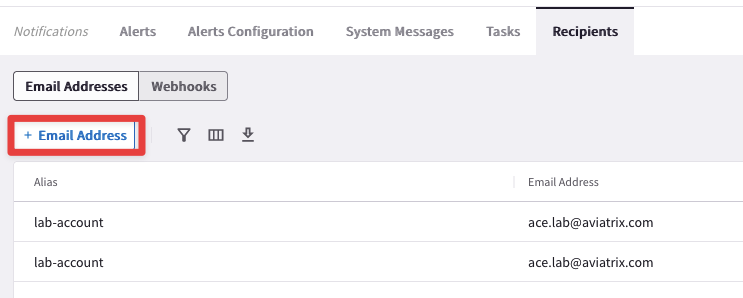
Choose an alias, insert your personal email and then click on Save:
Navigate back to CoPilot > Security > ThreatIQ > Configuration
Click again on Send Alert:
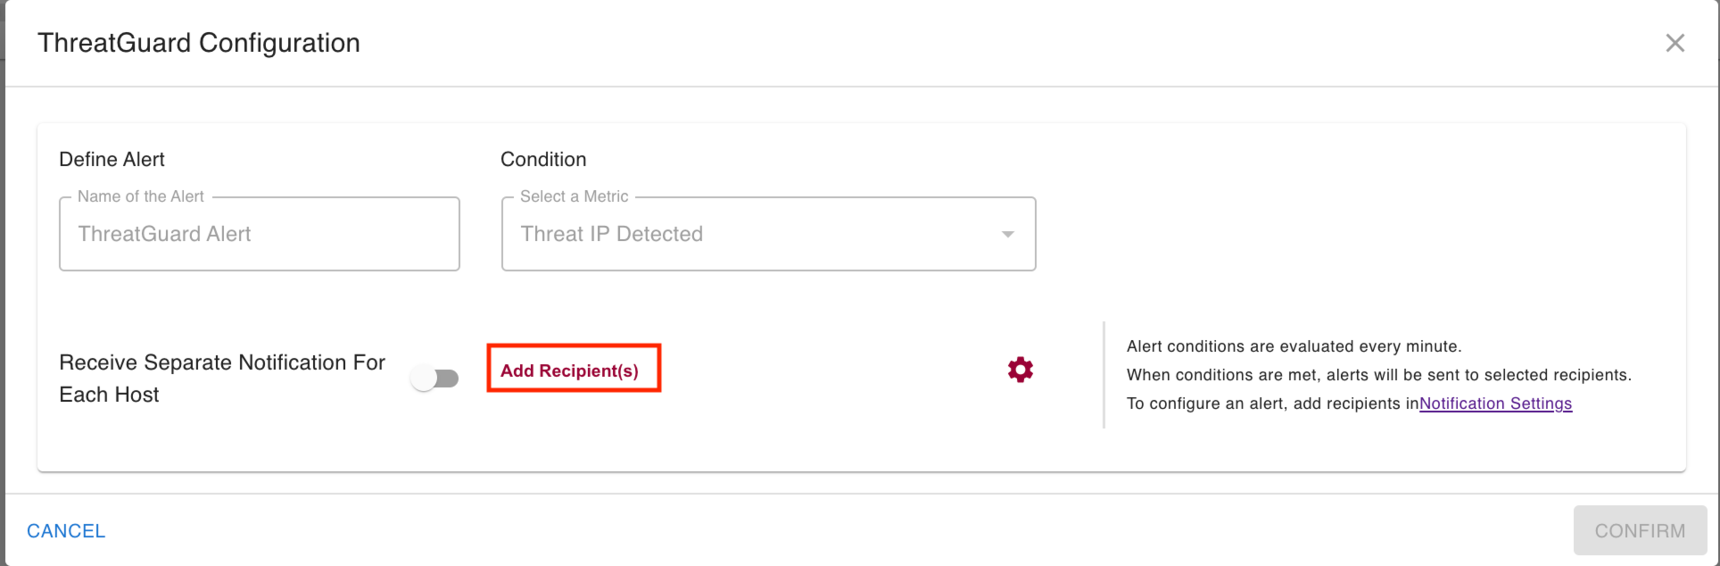
Click on Add Recipients.
Select your email address from the pulldown menu.
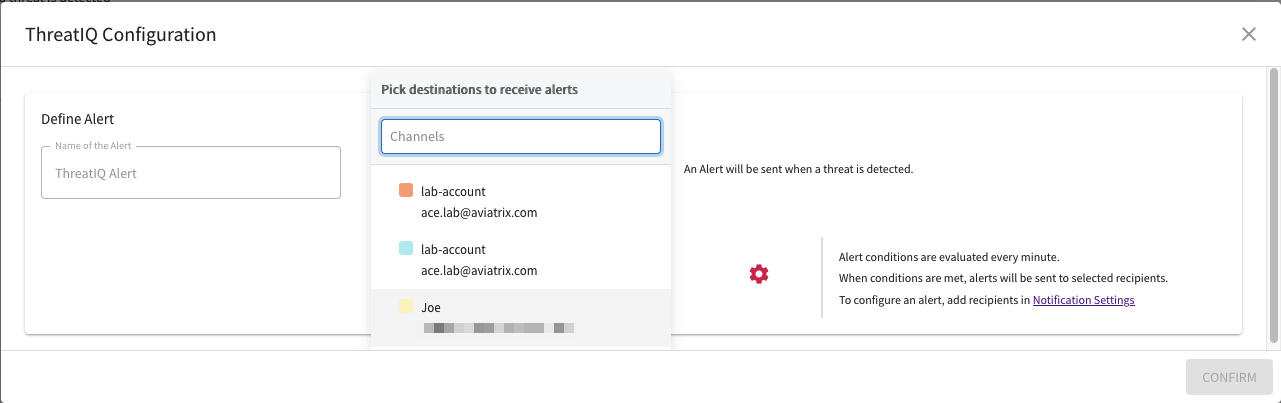
Then click CONFIRM.
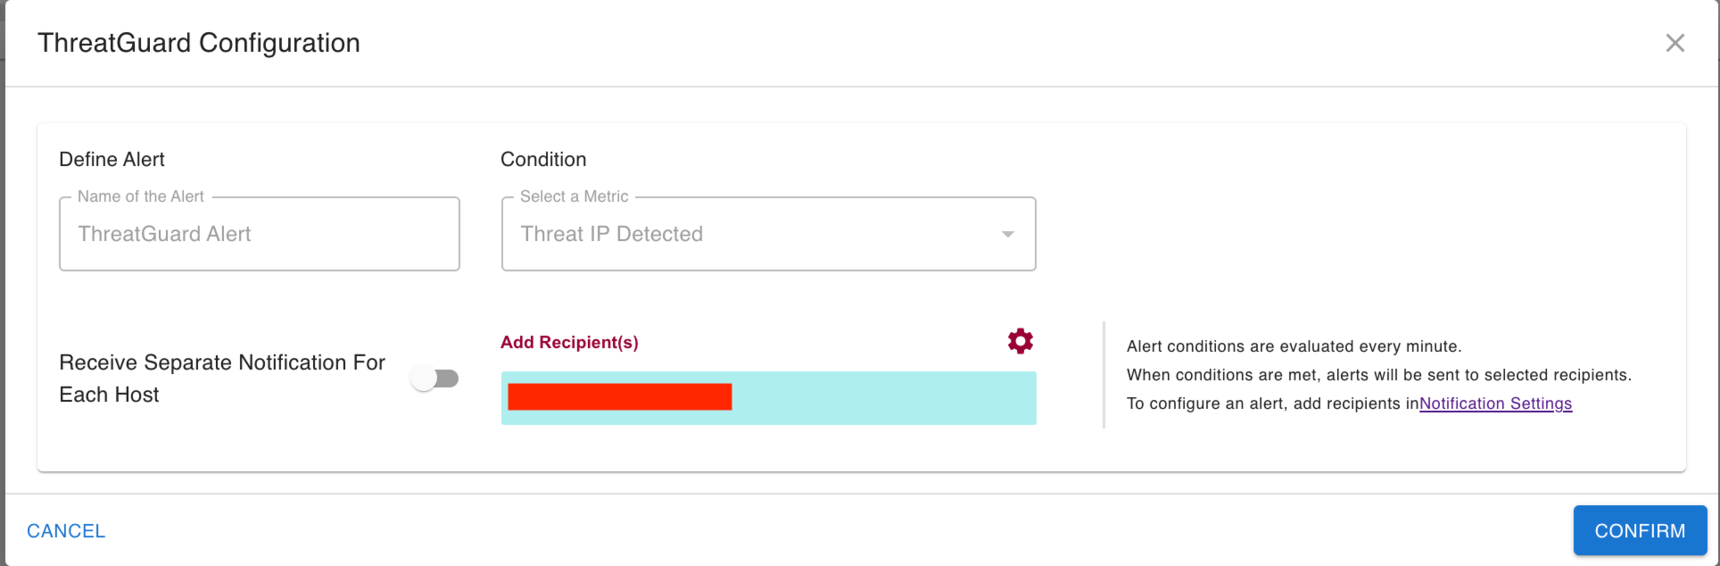
From this point onwards, if you enter a valid email address, you will receive email notifications about ThreatIQ alerts.
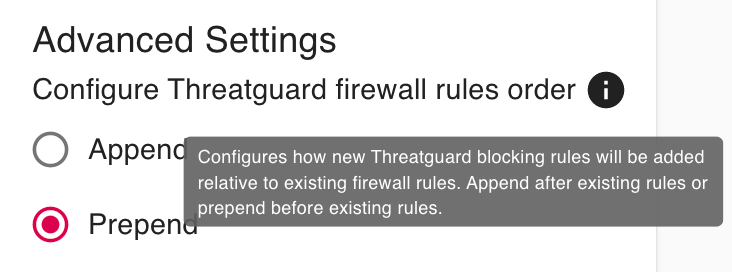
Before enabling the blocking, on the far right side, ensure that the ThreatGuard firewall rules order is set to Prepend.
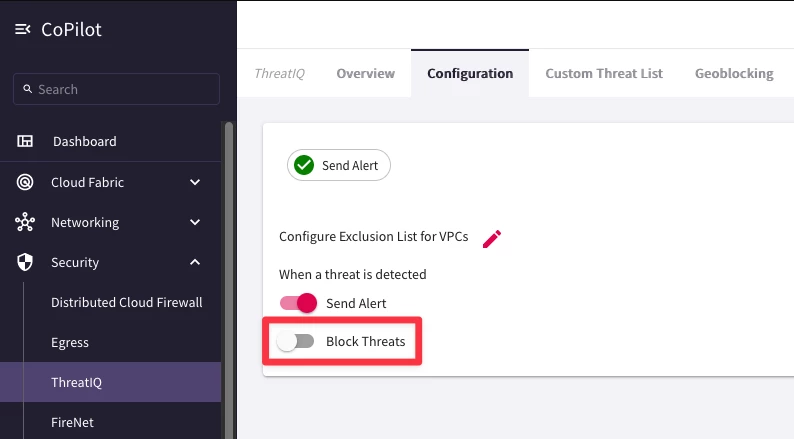
Enable Block Threats:
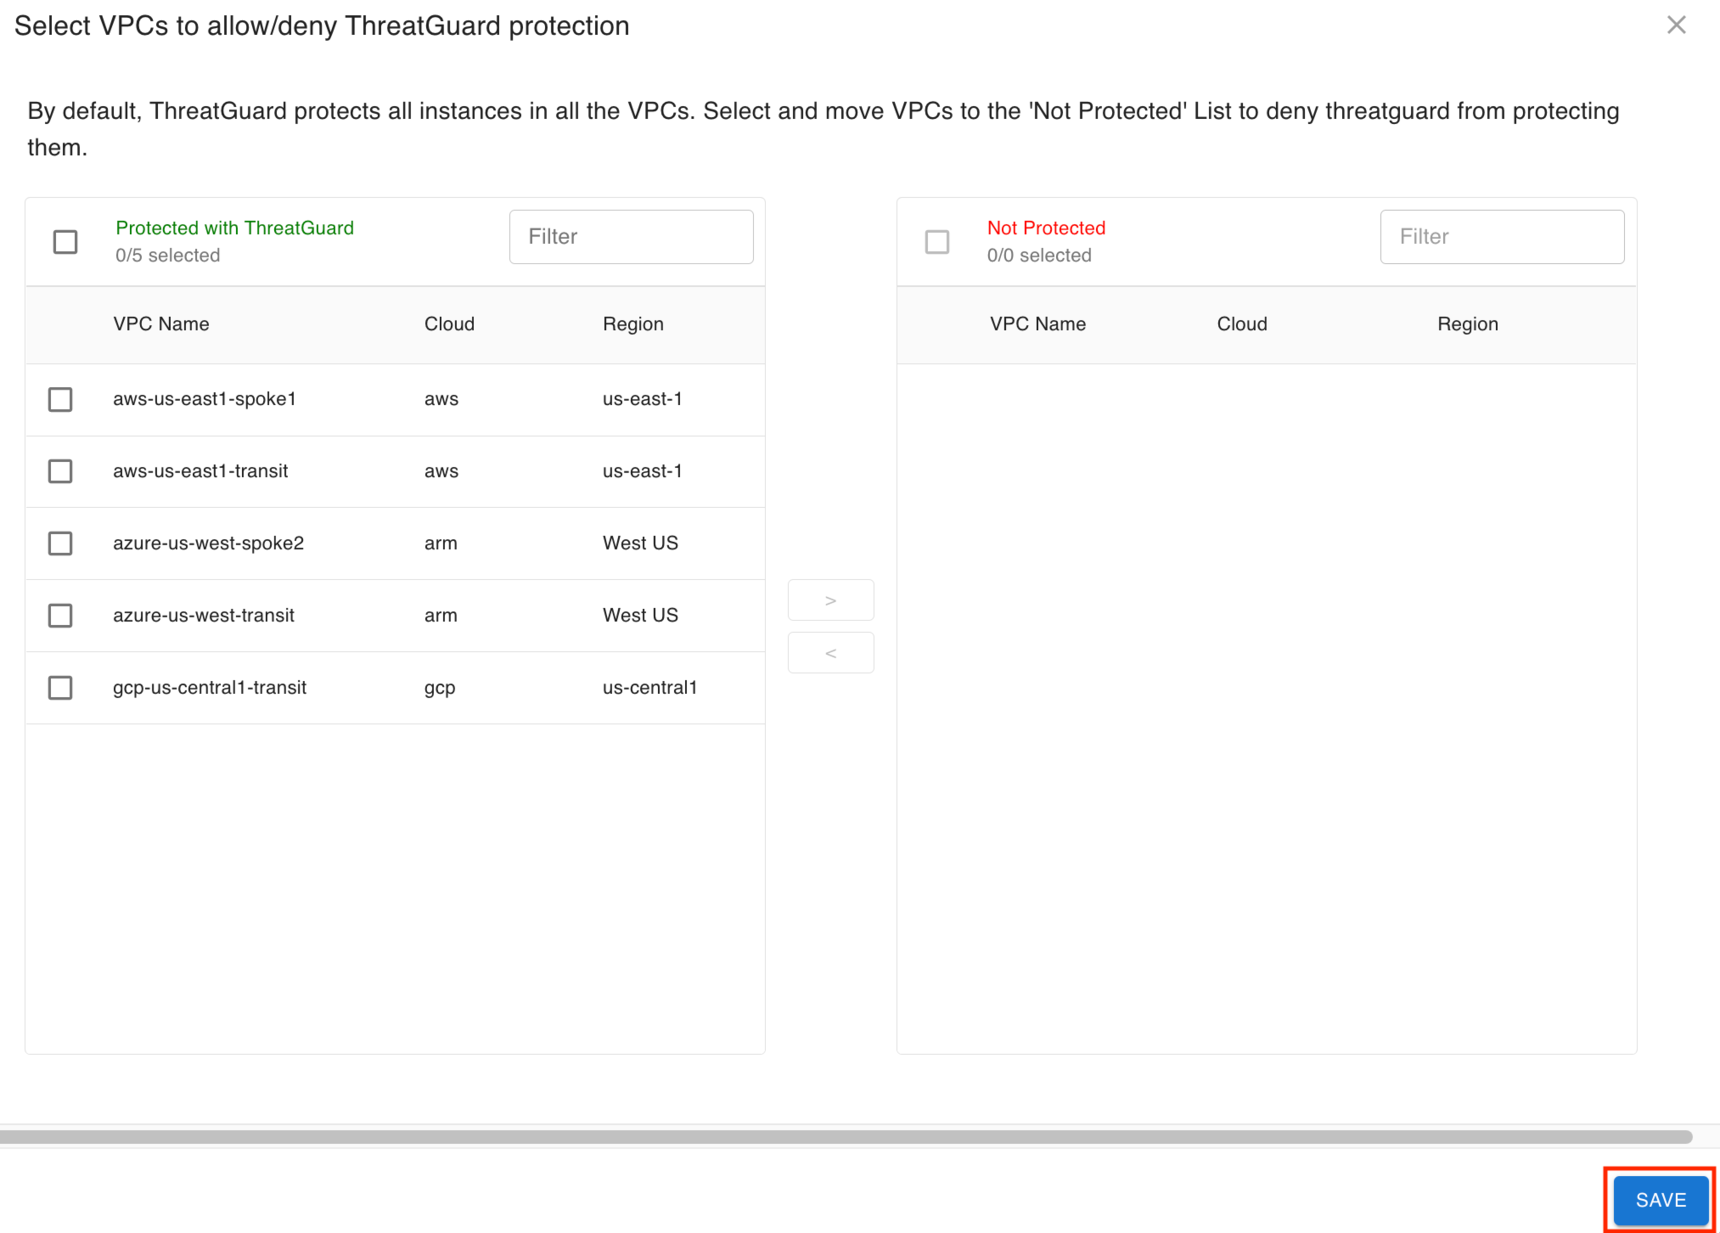
By default, all VPCs are enabled for ThreatGuard. Click Save to continue.
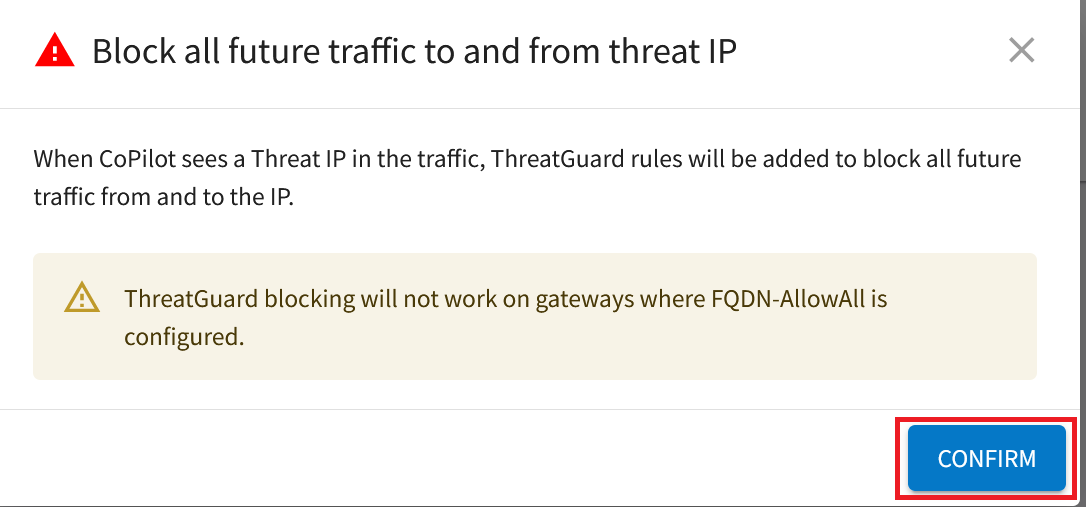
Then, click CONFIRM.
5. Verification
Wait for the instructor to provide a malicious IP. Let's call it <malicious-IP>.
Note down this IP address!
SSH back to the EC2 instance where you had previously performed some safe Egress actions, such as package updates and curl of google.com, aws-us-east2-spoke1-test1.
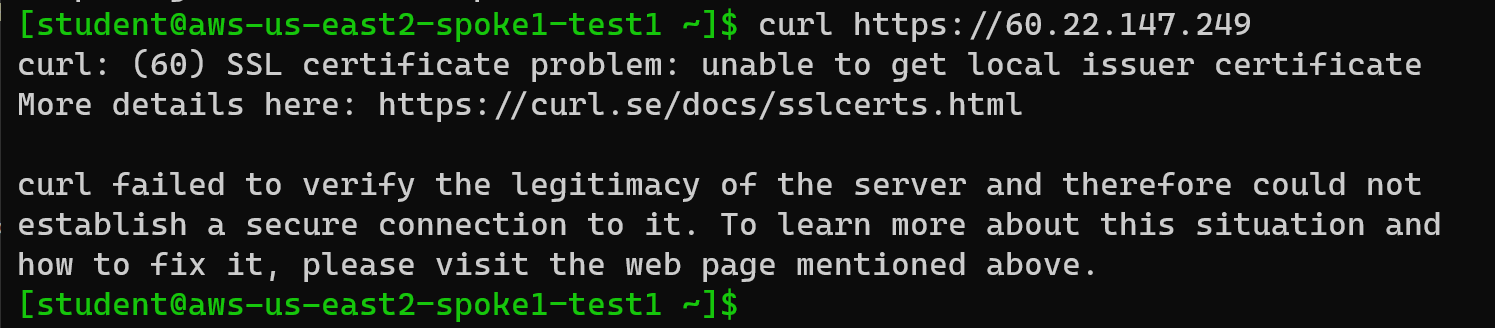
Now test ThreatGuard by first issuing this command (make sure to enter HTTPS):
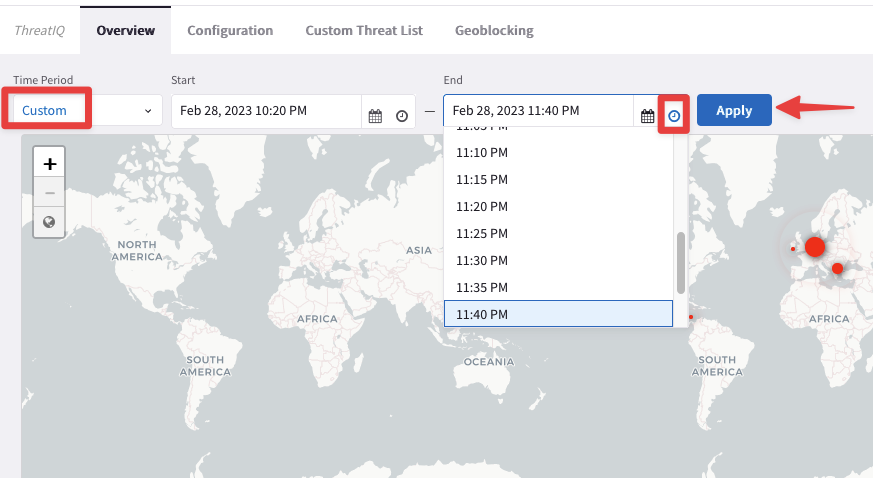
Navigate back to CoPilot > Security > ThreatIQ > Overview
Note: wait for some minutes, before proceeding with the next action. Furthermore, set the Time Period to "Custom" and then set the end time a bit farther than your current time:
You should see the IP in the table at the bottom. You can filter based on the destination IP address (insert the malicious IP address):
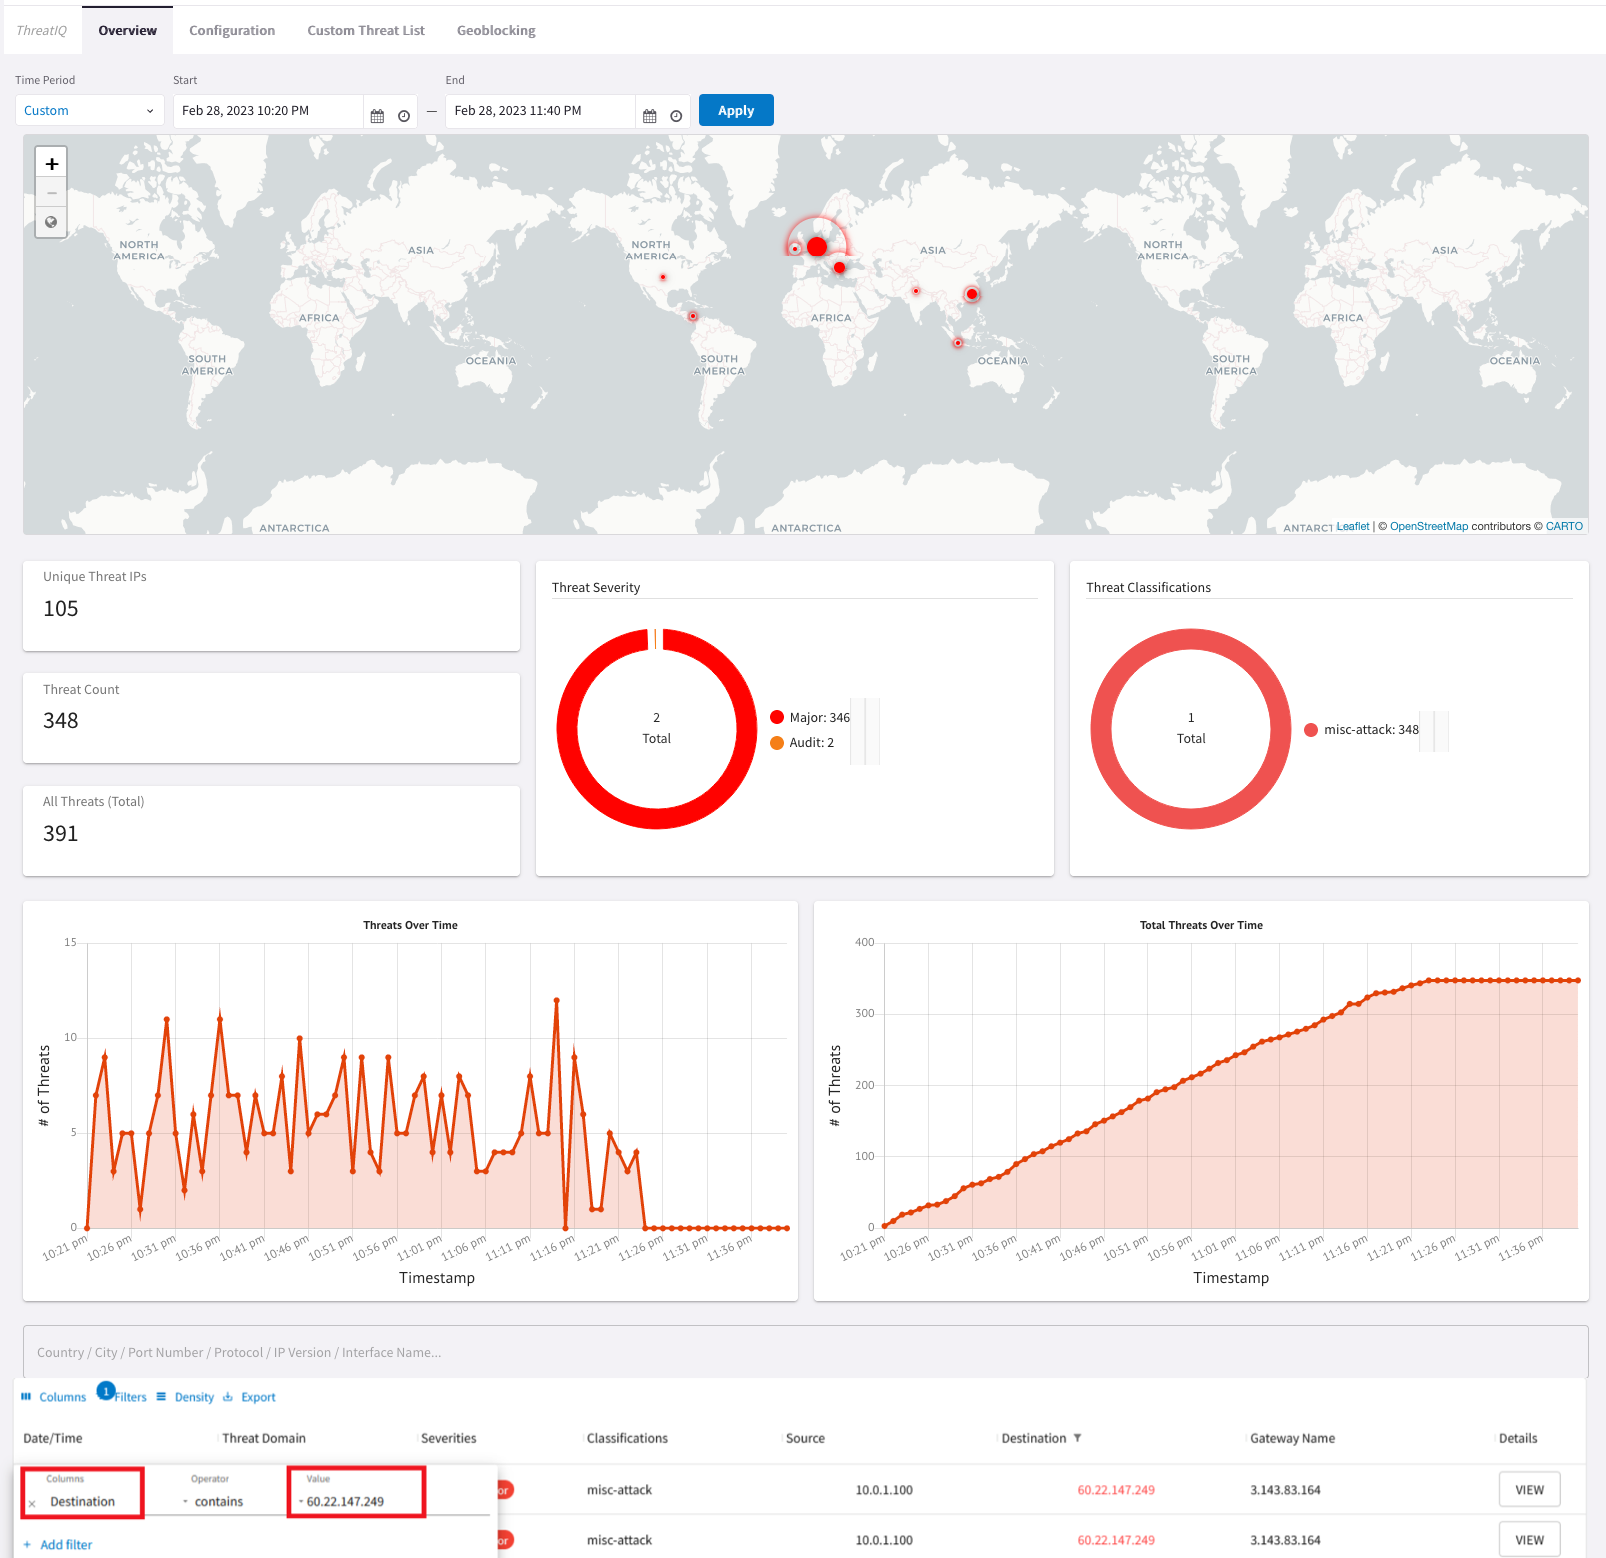
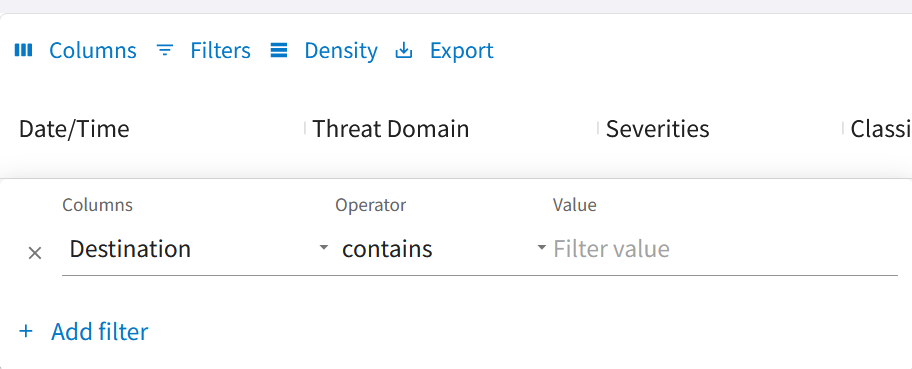
Afterwards, click on VIEW under the column Details.
Note: the IP we selected might not be deemed a threat when you read this.

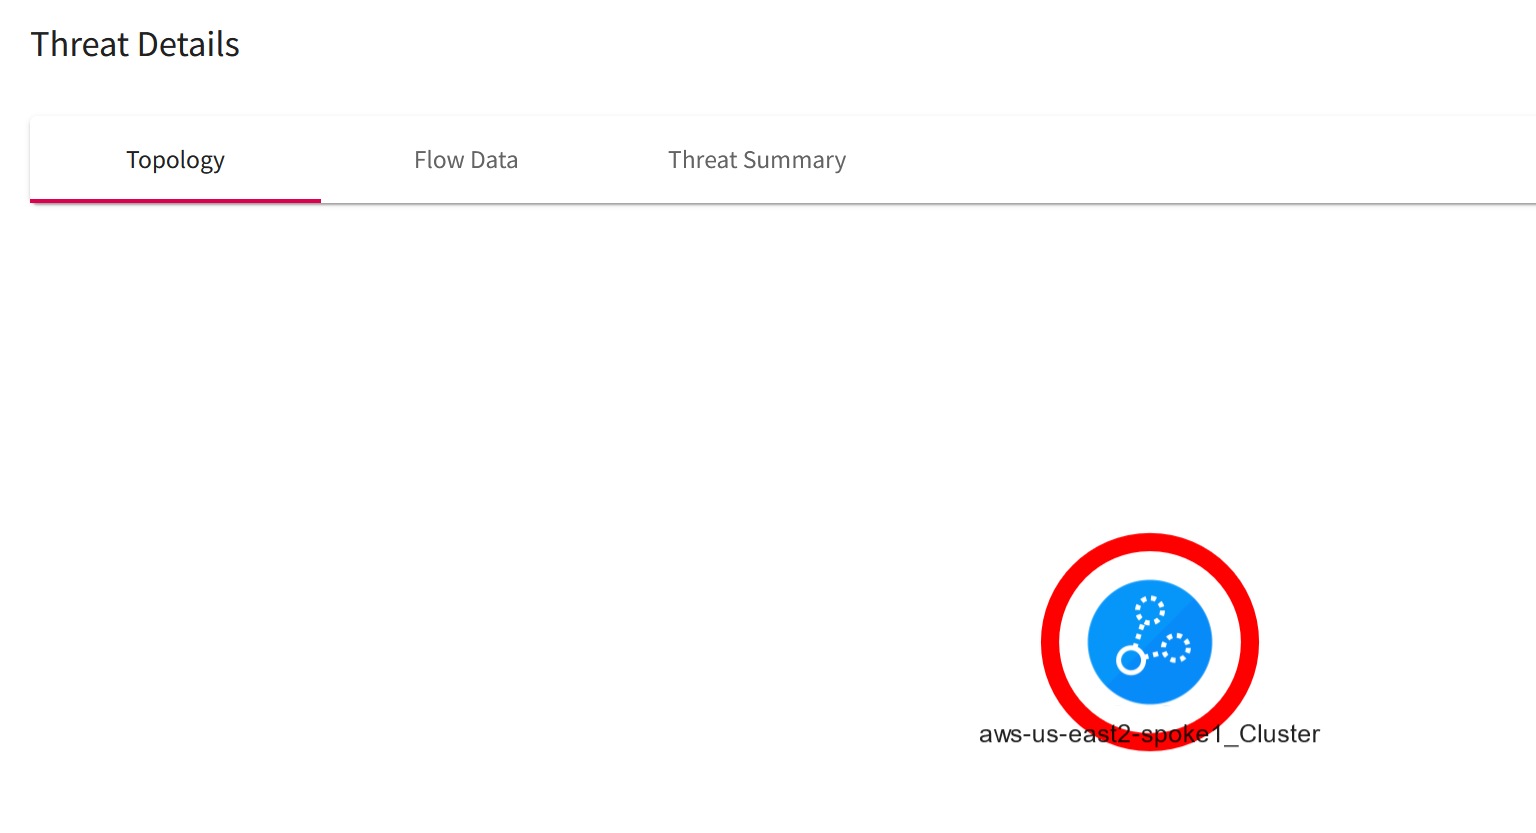
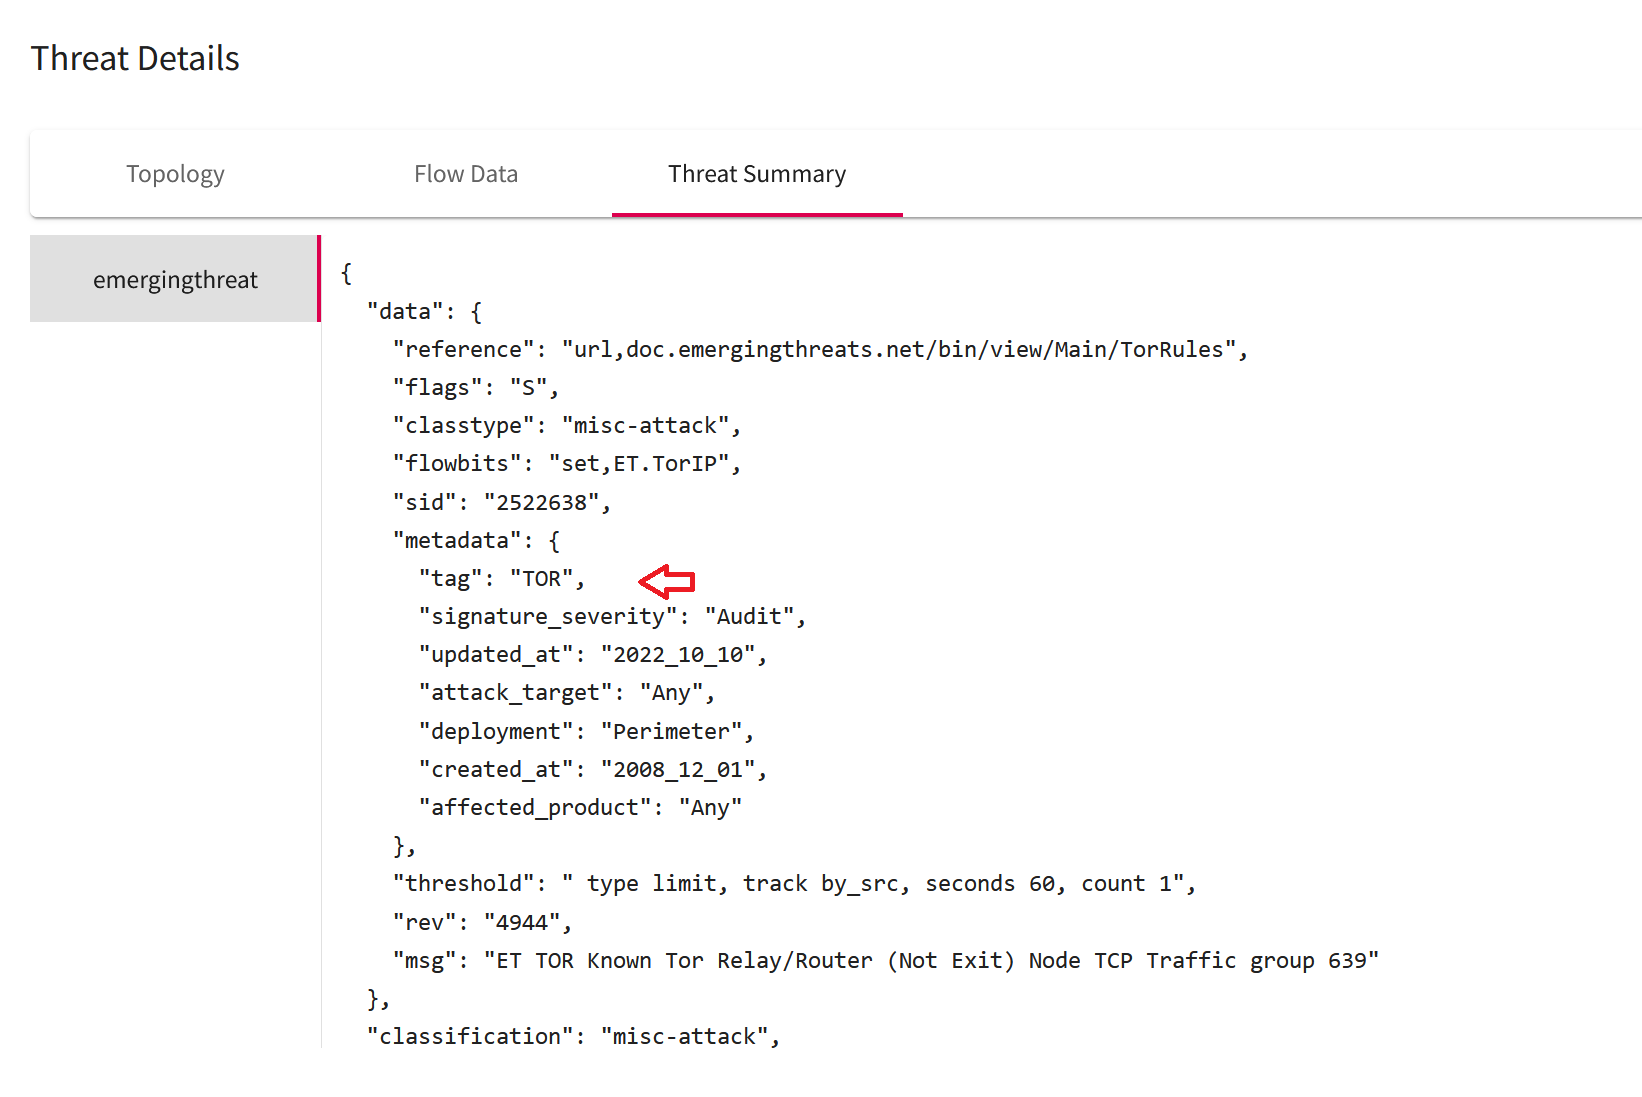
Then select Threat Summary and pinpoint the metadata "tag" to determine how ThreatIQ has classified this IP.
5.1. Example of ThreatGuard in action
Navigate to CoPilot > Security > ThreatIQ > Configuration
Note: the CoPilot UI frequently changes, and what you see below may differ from your experience.
Note: the IP we selected might not be deemed a threat when you read this.
Click on VIEW under the column View Rules:
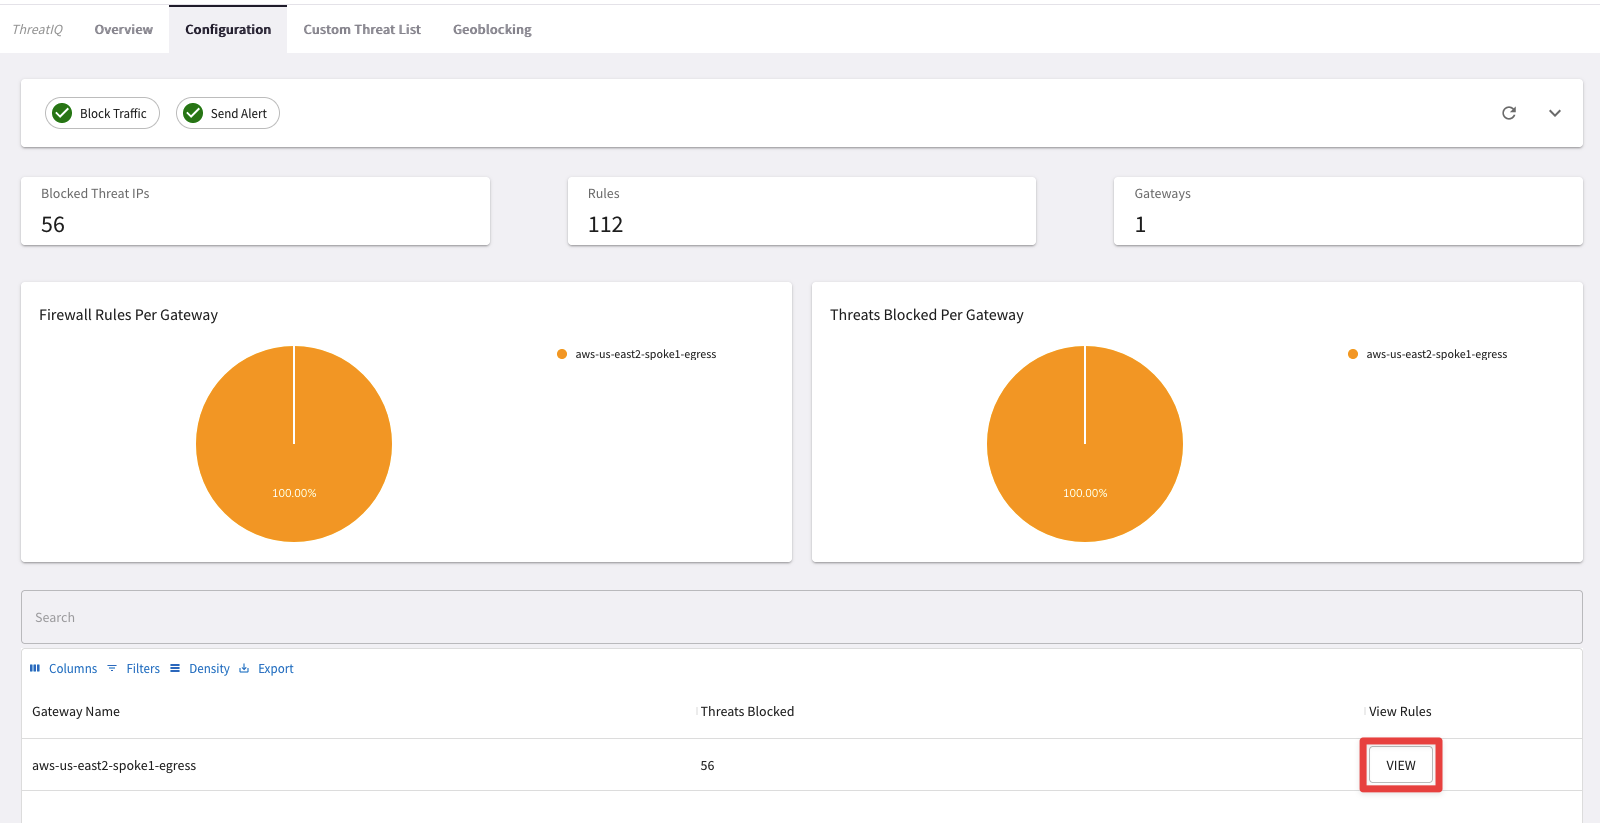
Filter based on the malicious IP (both on source address and destination address): you will find out that ThreatGuard applied the enforcement "force-drop" in both directions.


Now try issuing the same curl command once again.

ThreatGuard has successfully blocked the malicious IP!
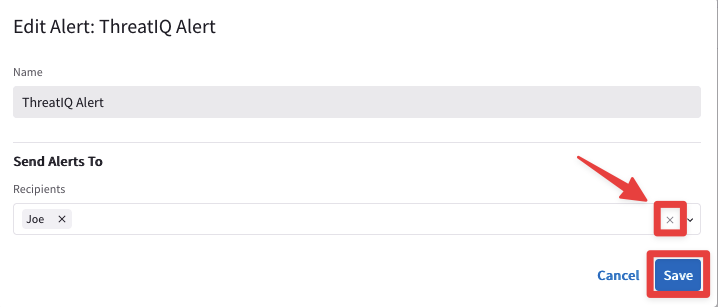
Note: Before ending this lab, remove your email from the notification list!
Navigate to CoPilot > Monitor > Notifications > Alerts Configuration
Click on the pencil icon for editing the configured alert named "ThreatIQ Alert":
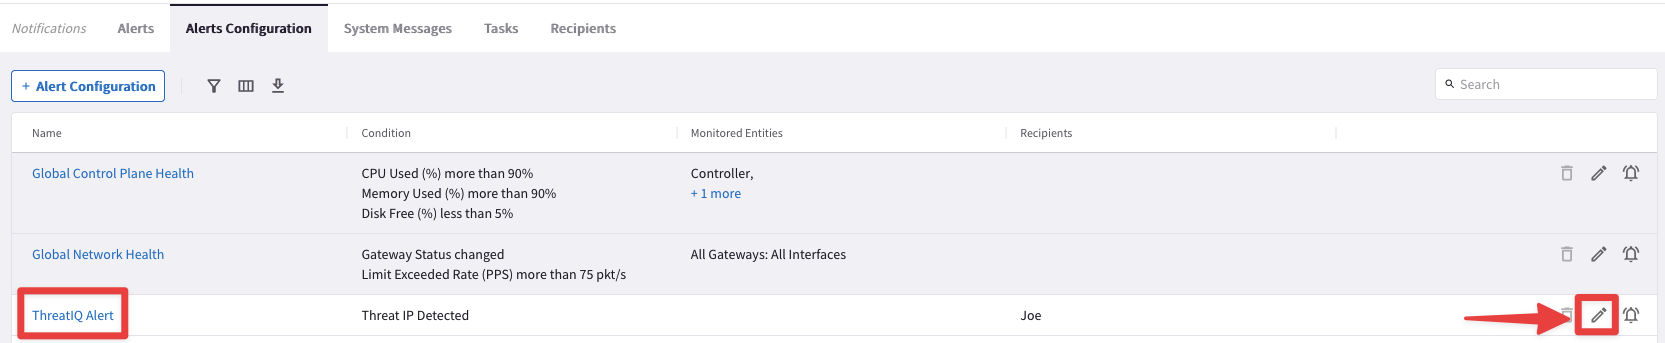
Remove the recipient that is identified based on the alias that you chose before, then click on Save.
ThreatIQ will immediately stop sending the alerts to your personal email: