

1. SSLT: Introduction
The Aviatrix Self Service Launch Tool (SSLT) is the new community-supported tool that orchestrates the deployment of a multicloud infrastructure securing the cloud networking with the Aviatrix platform. The tool provides several interesting use cases that reflect world case scenarios.
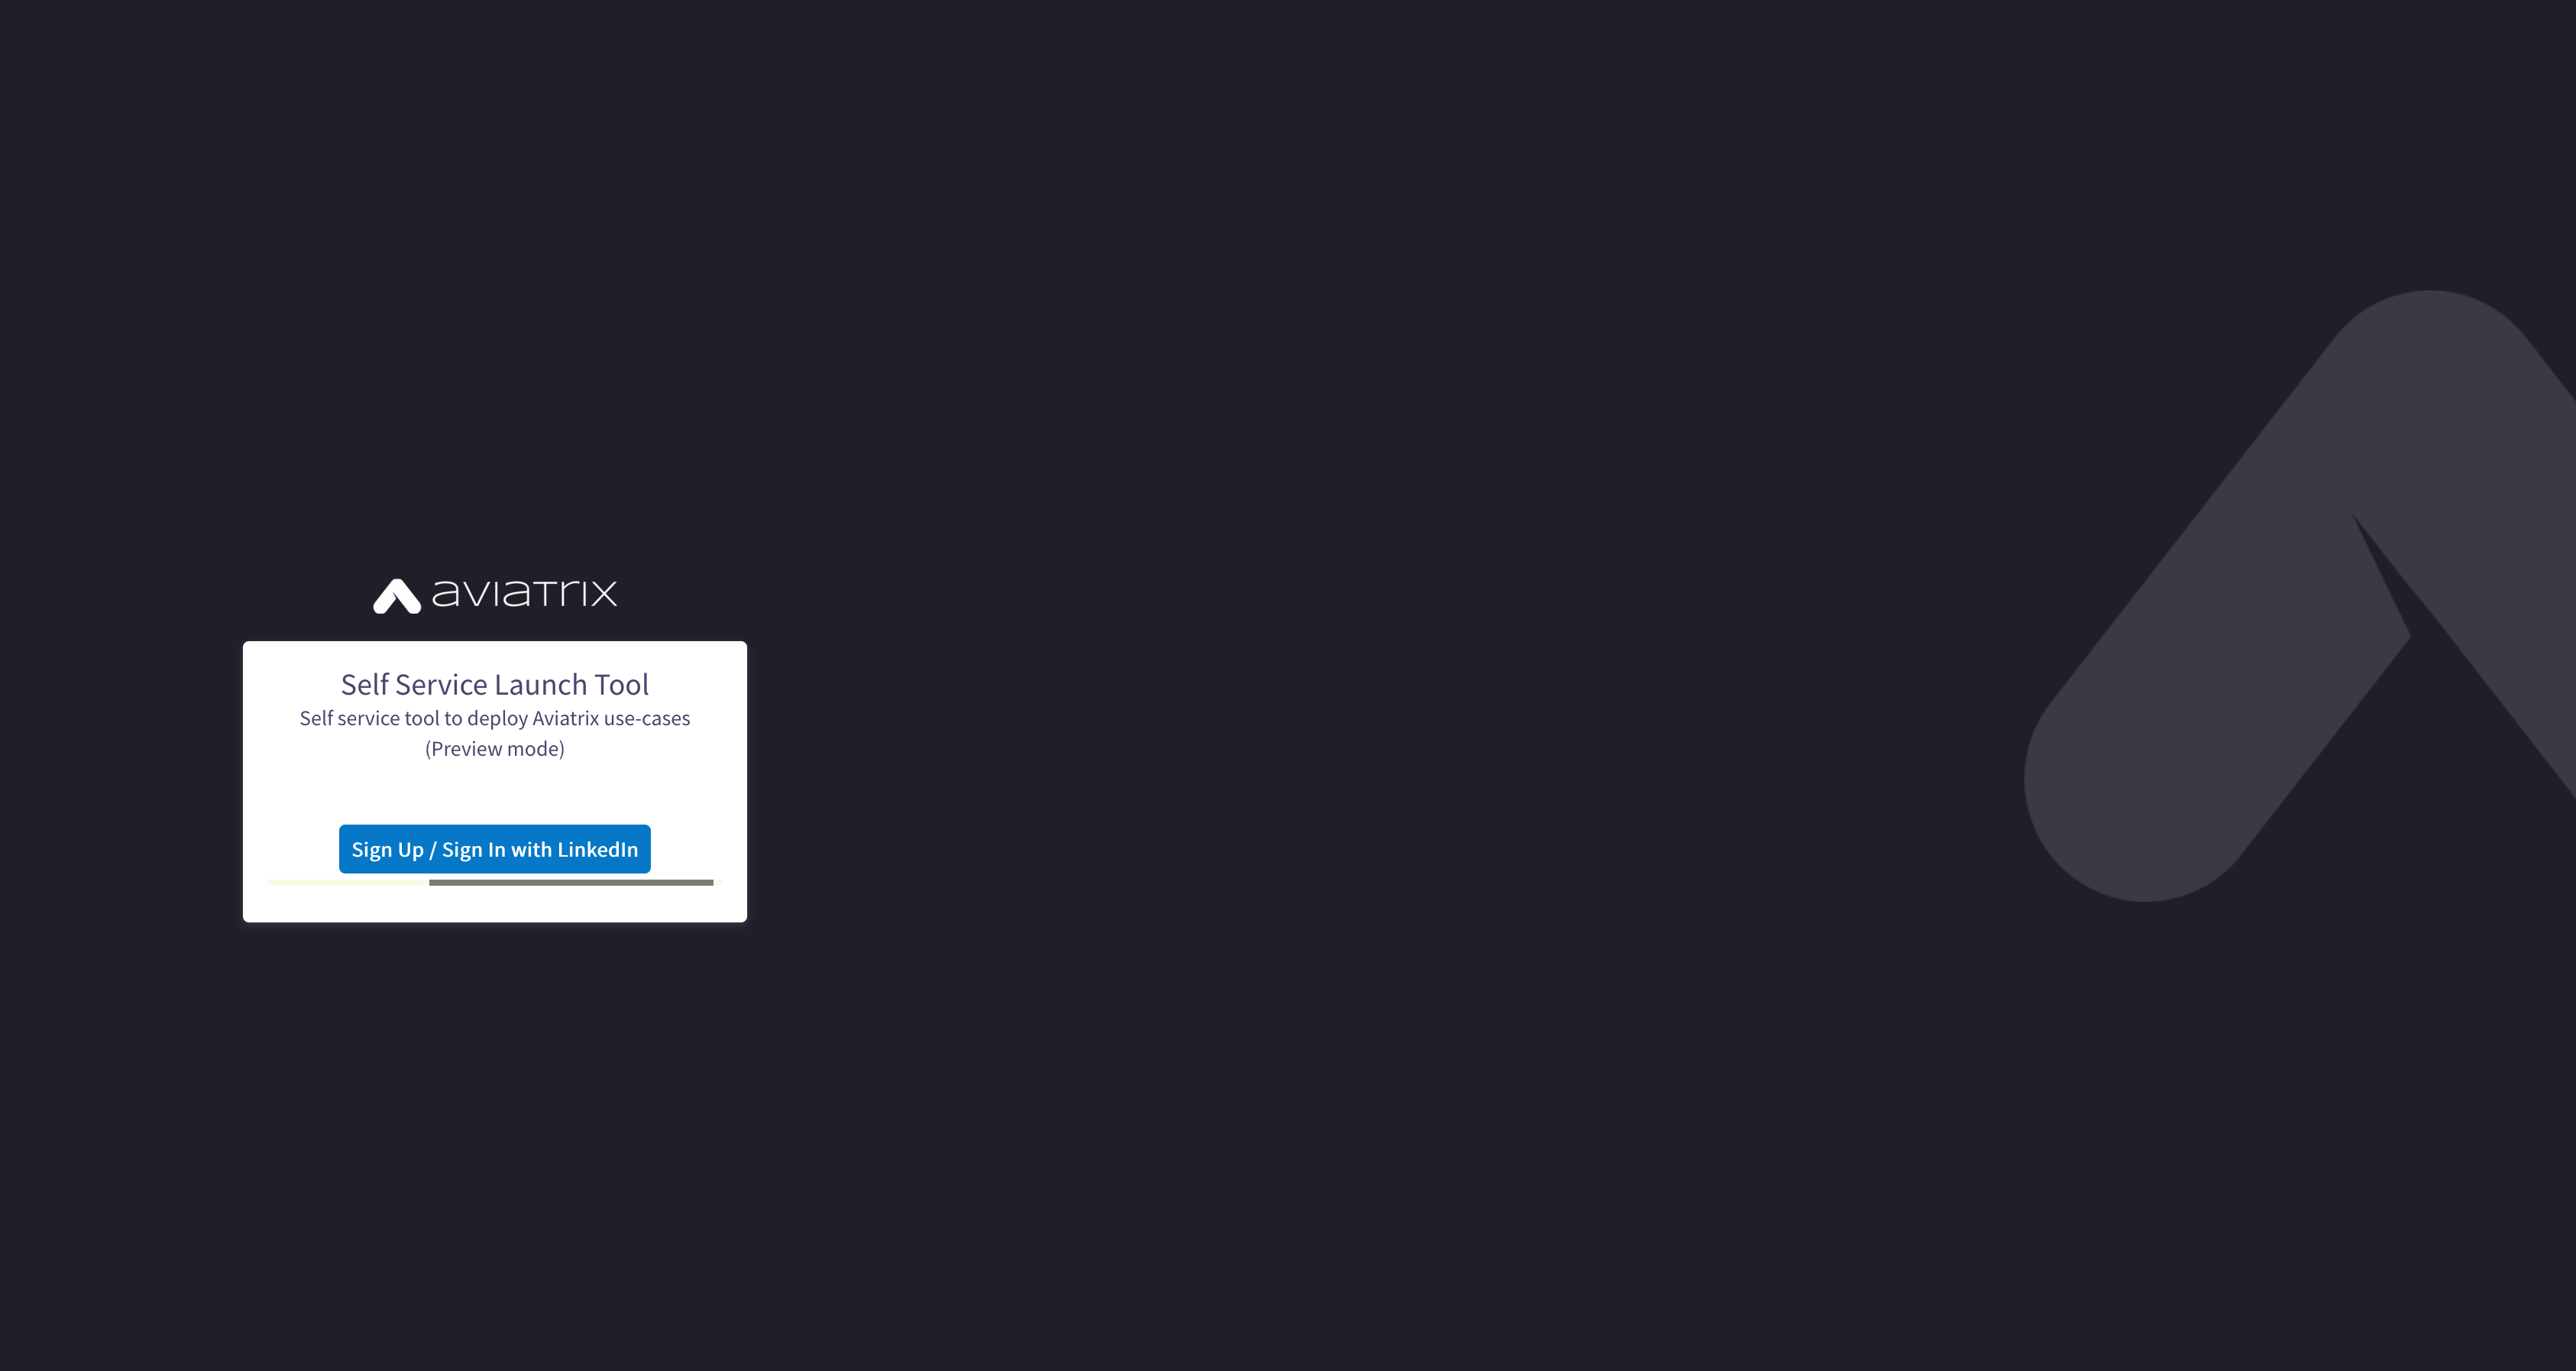
2. Accessing SSLT
Launch the Aviatrix Self Service Launch Tool and click on the “Sign Up / Sign In with LinkedIn” button.
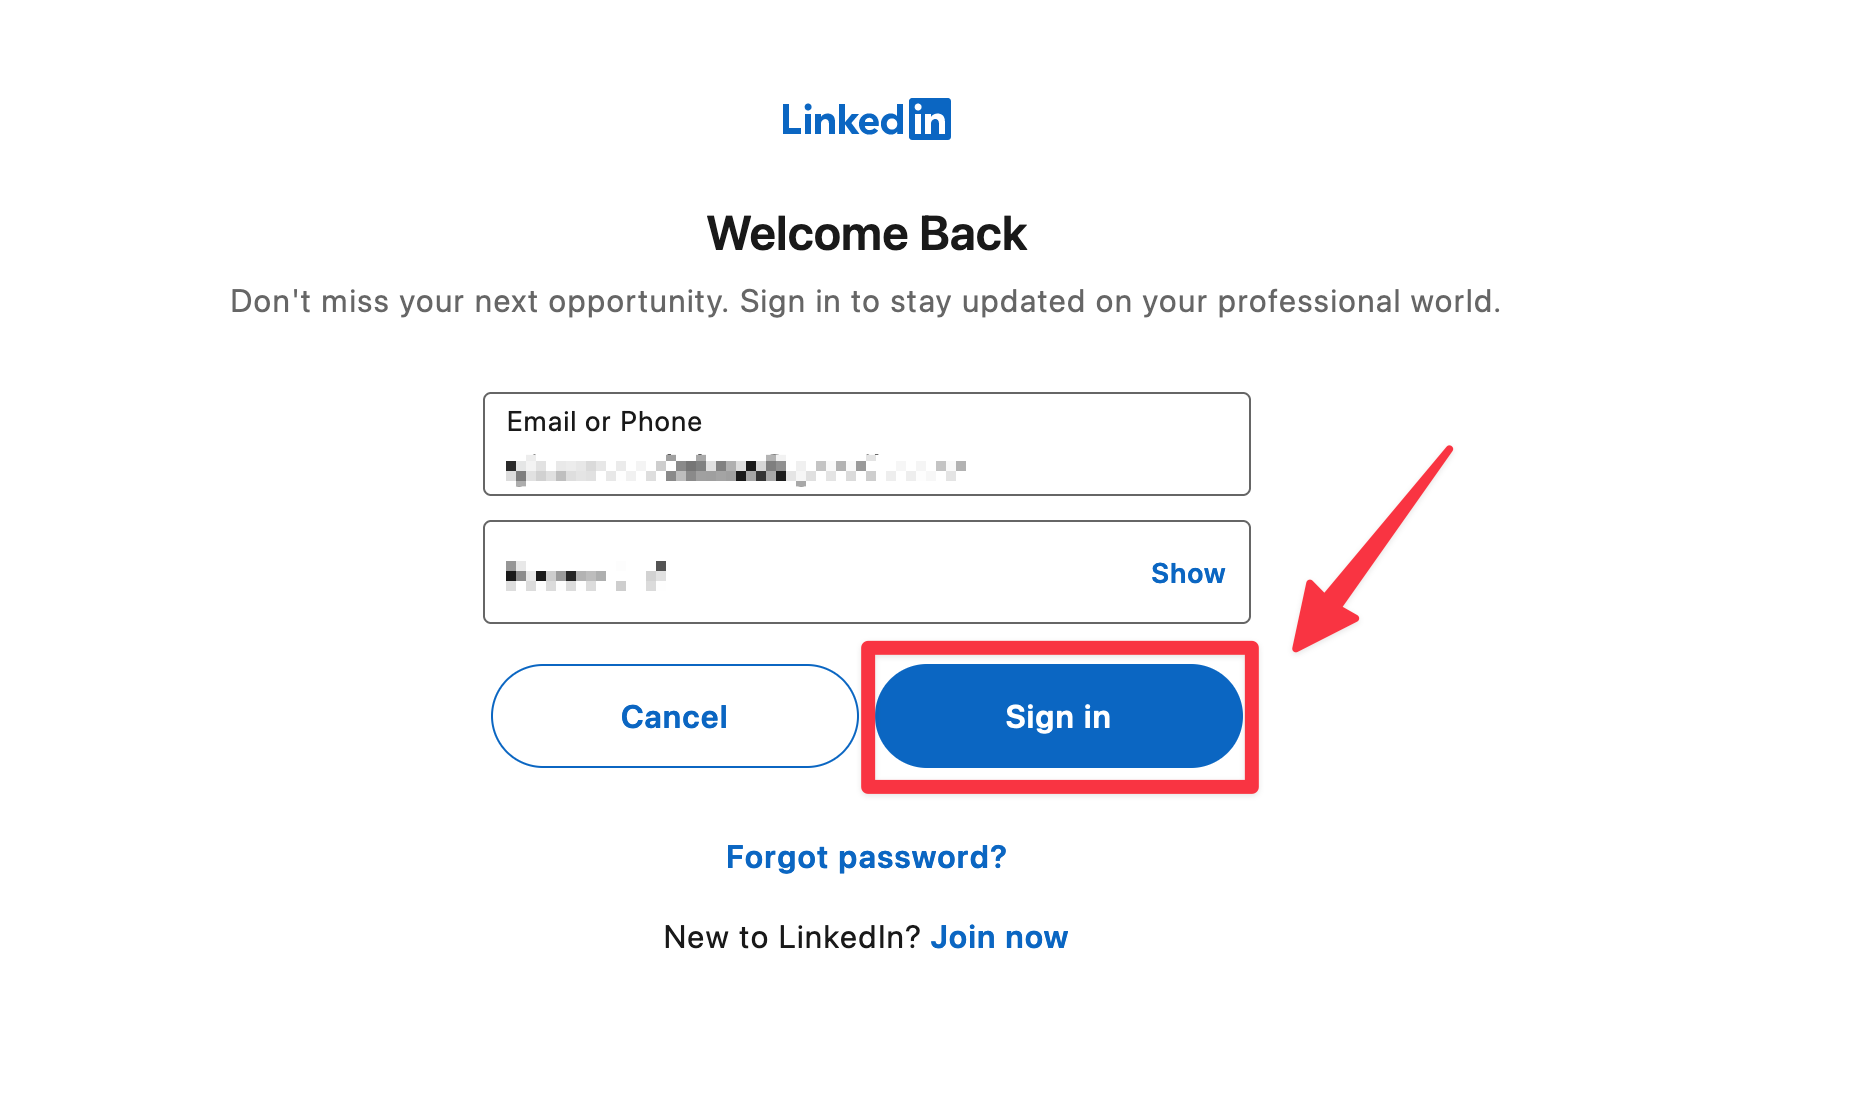
Insert your LinkedIn credentials and then click on the “Sign in” button.
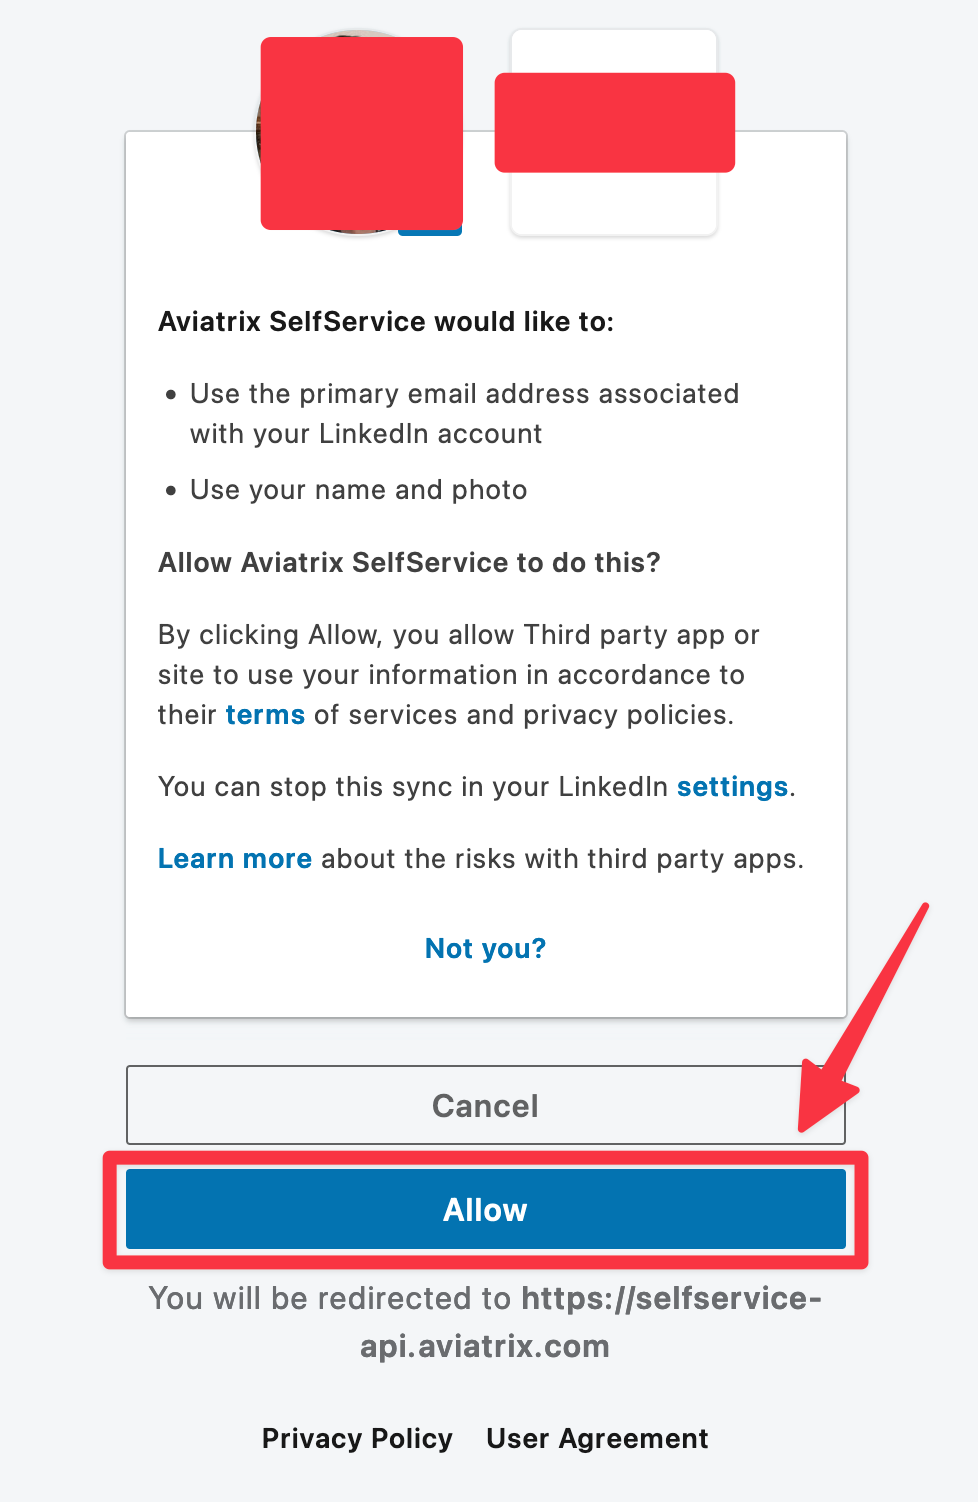
Then you need to click on “Allow”.
3. SSLT Portal
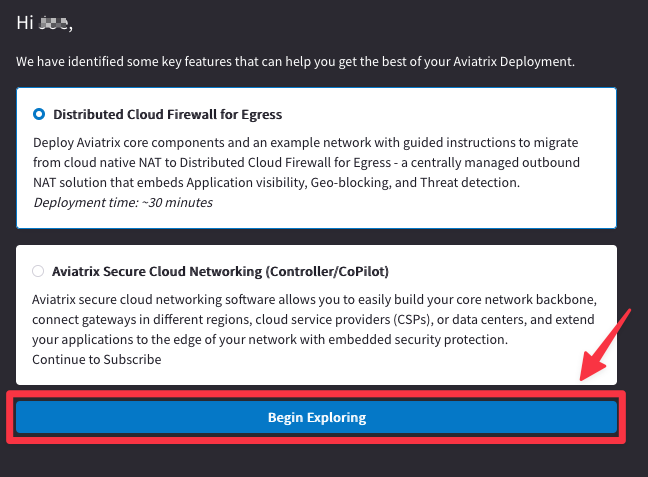
The SSLT Portal provides two types of automated deployments:
- Distributed Cloud Firewall for Egress
- Aviatrix Secure Cloud Networking (Controller/CoPilot)
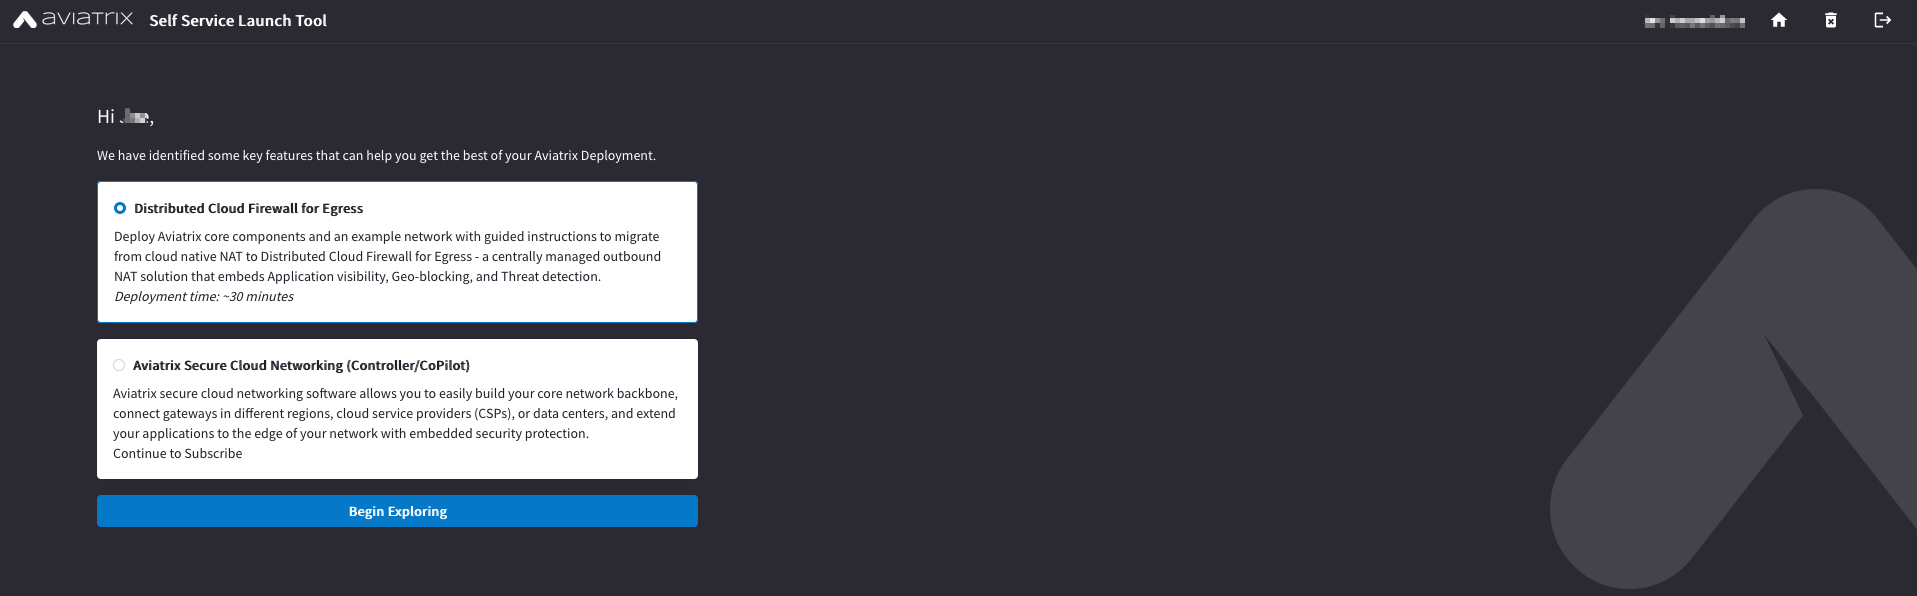
3.1. Distributed Cloud Firewall for Egress
Let’s start exploring the first option (i.e. Distributed Cloud Firewall for Egress).
Click on the “Begin Exploring” button.
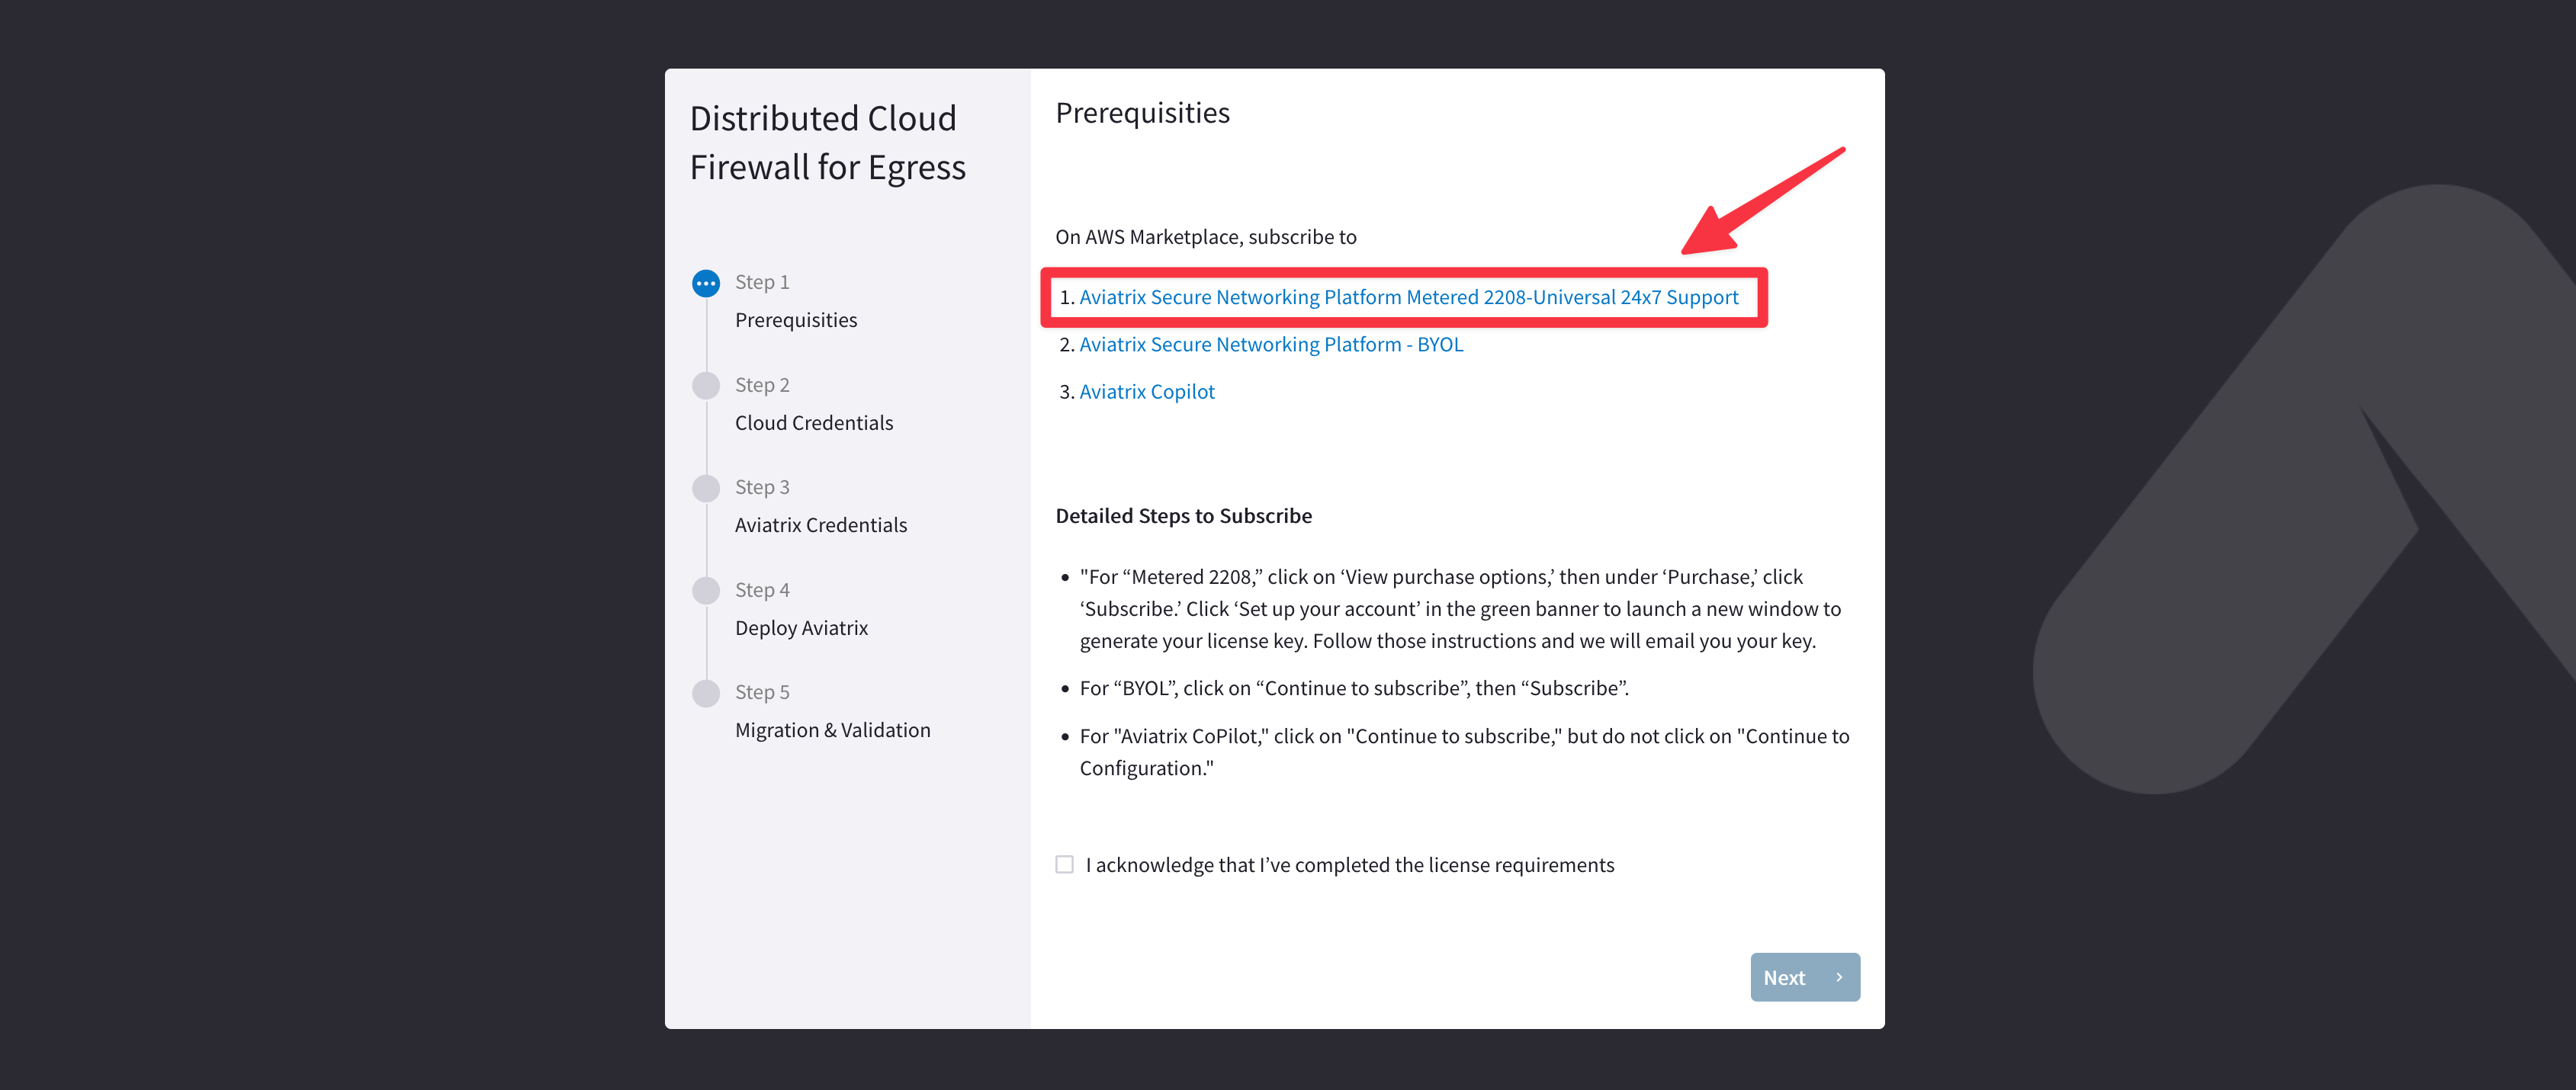
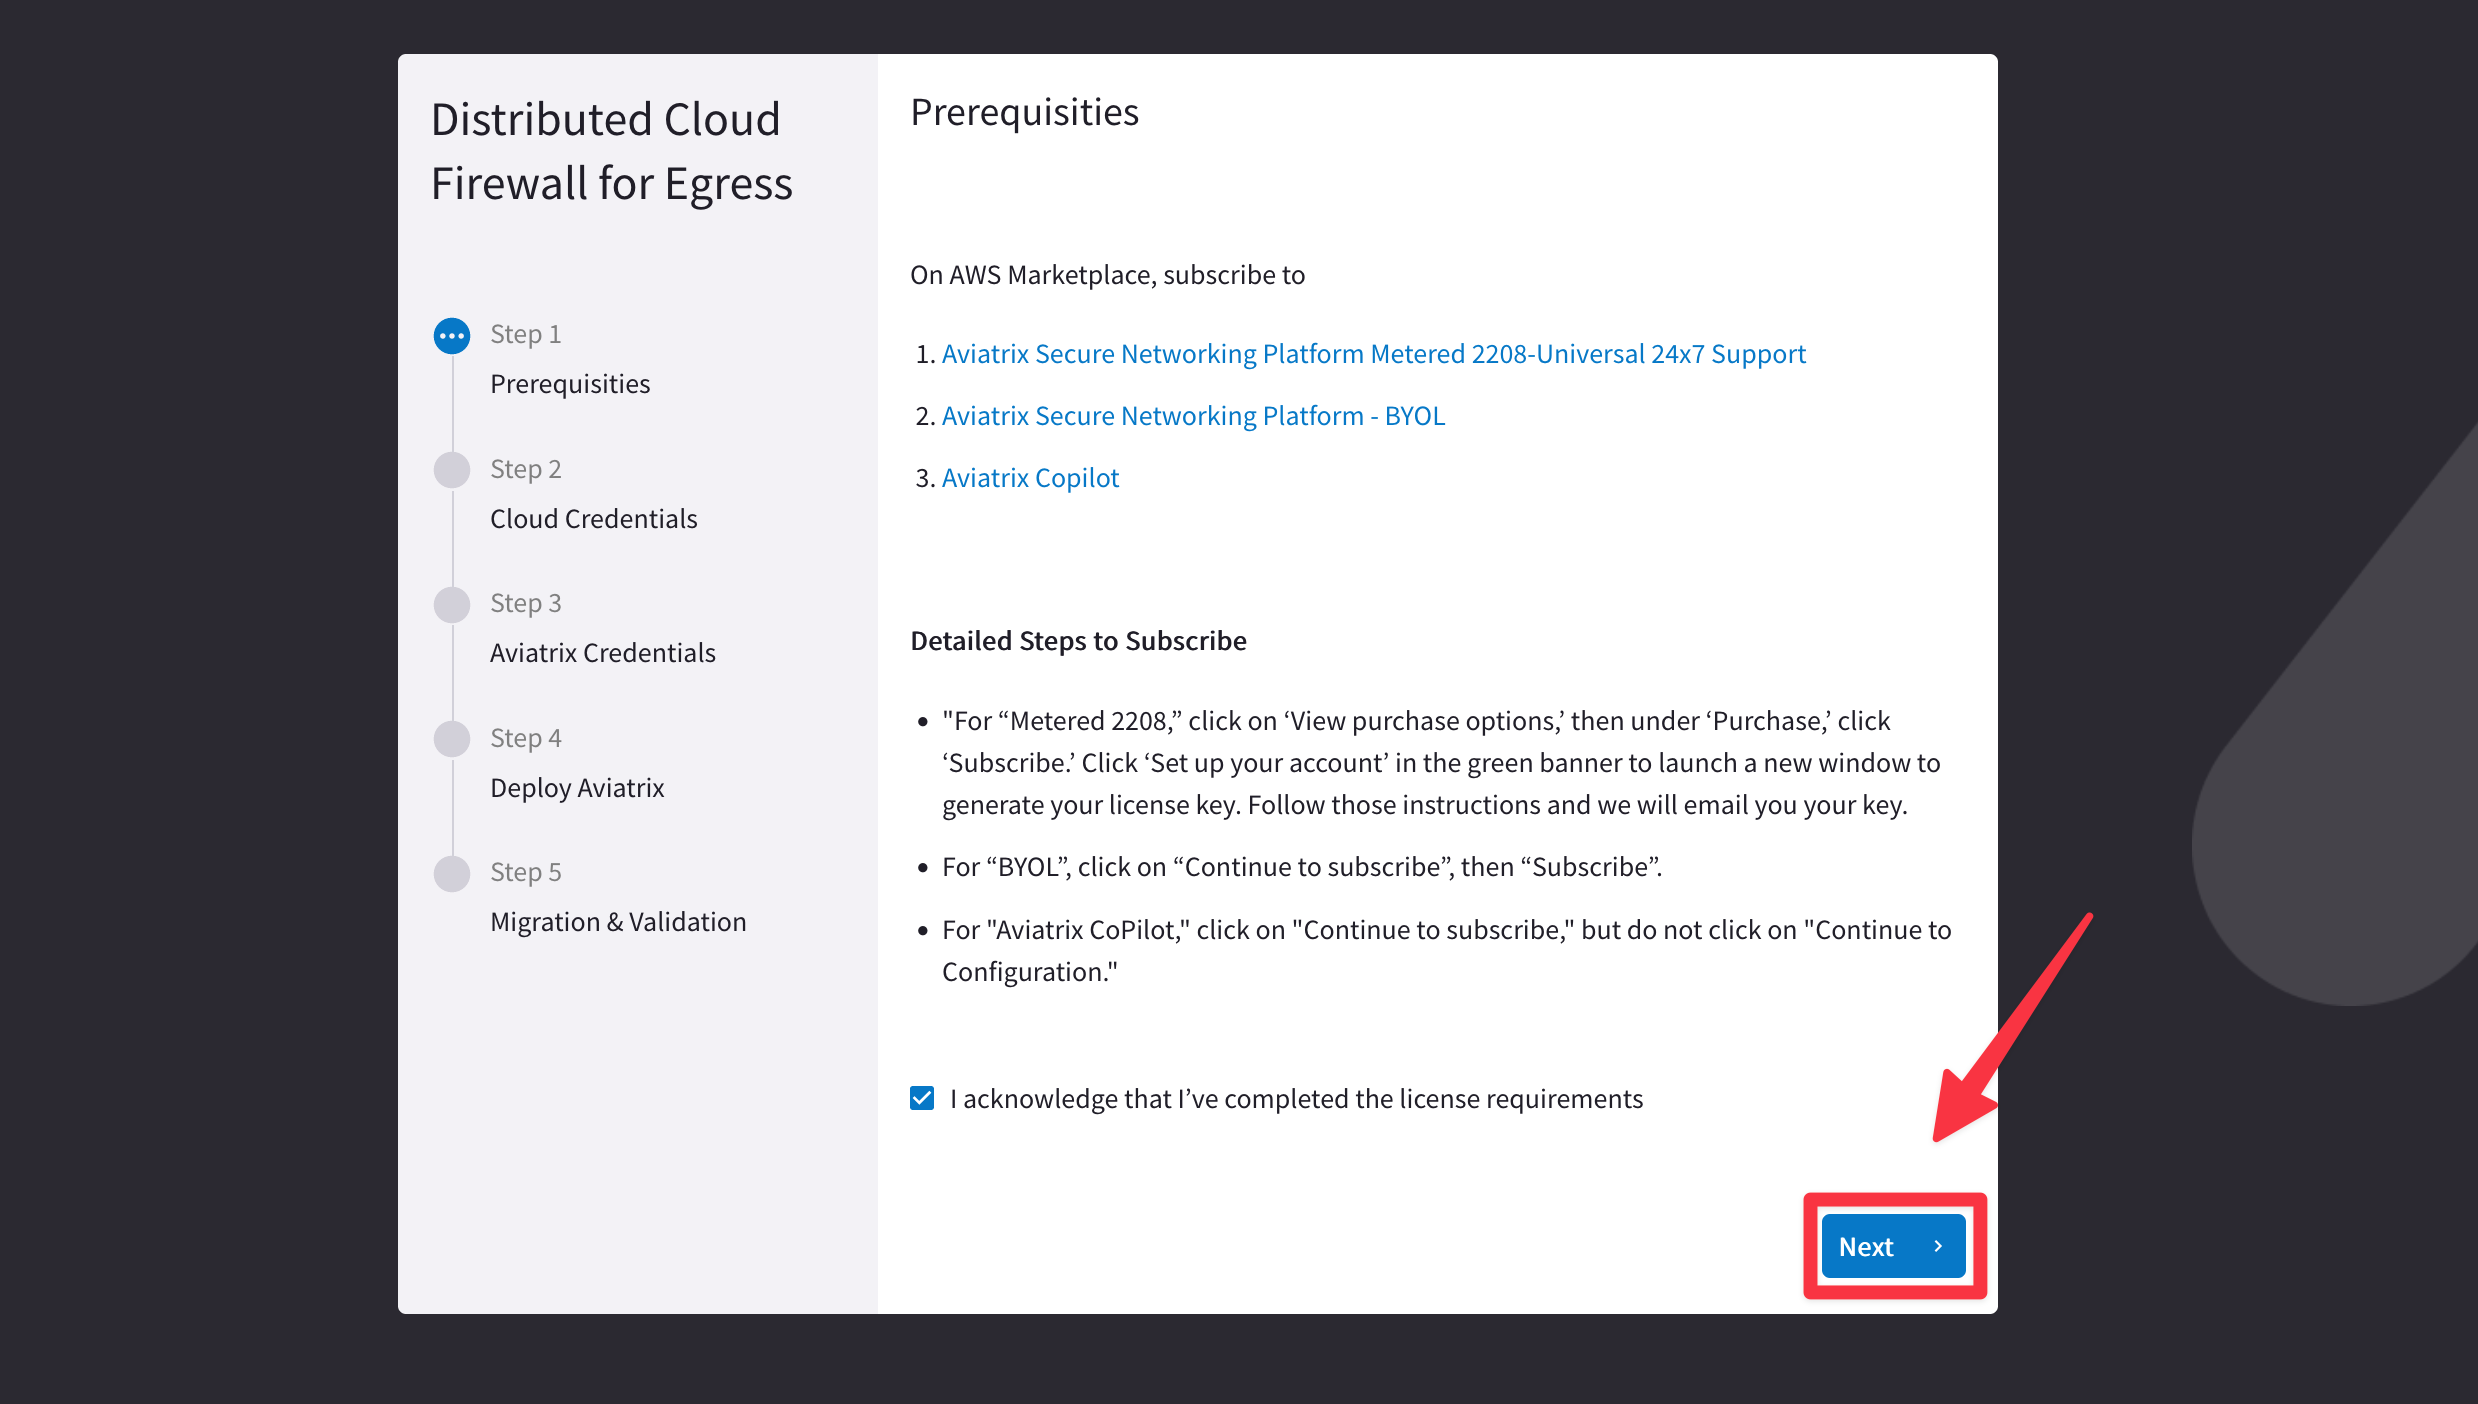
3.1.1. Step 1 - Prerequisities: How to generate the License Key
First and foremost, click on the link “Aviatrix Secure Networking Platform Metered 2208-Universal 24x7 Support”.
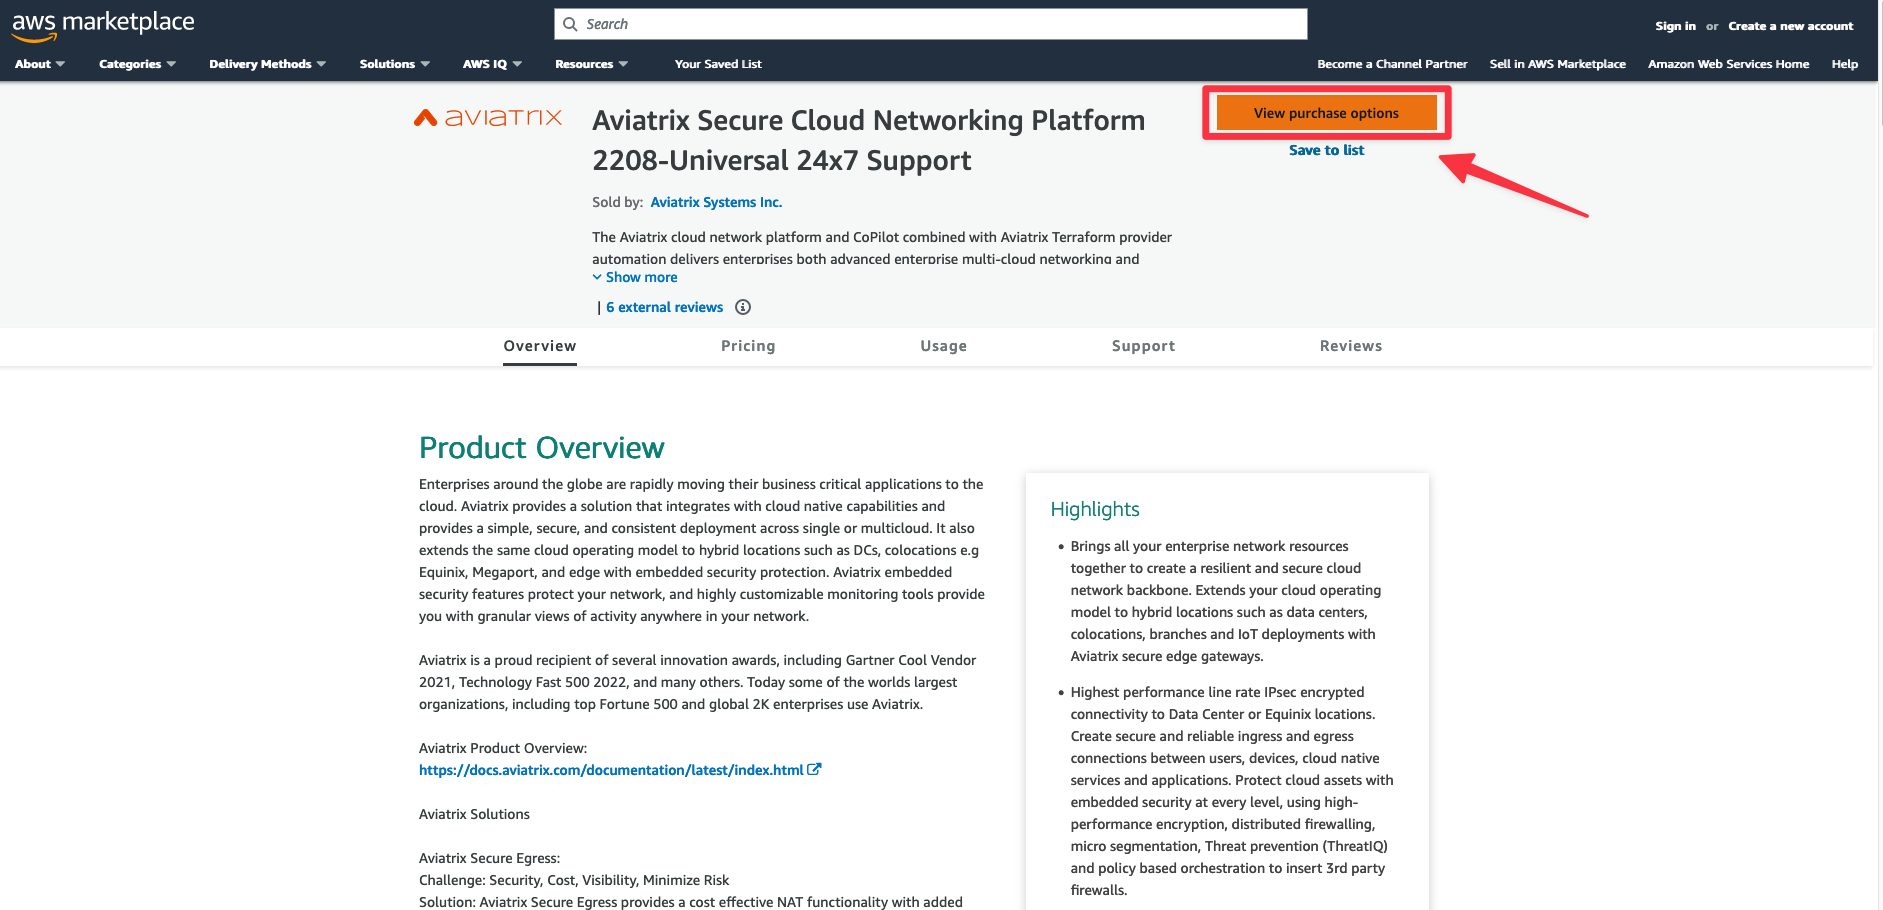
Click on “View purchase options”.
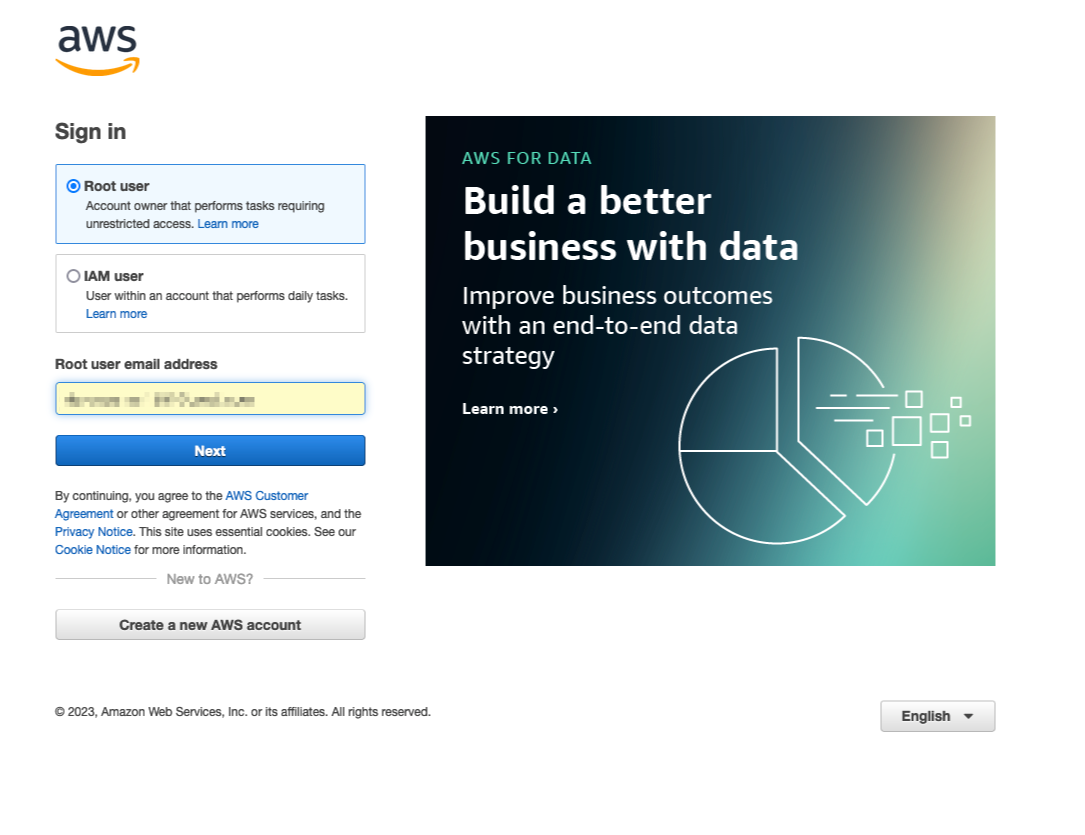
Sign in to your personal AWS account.
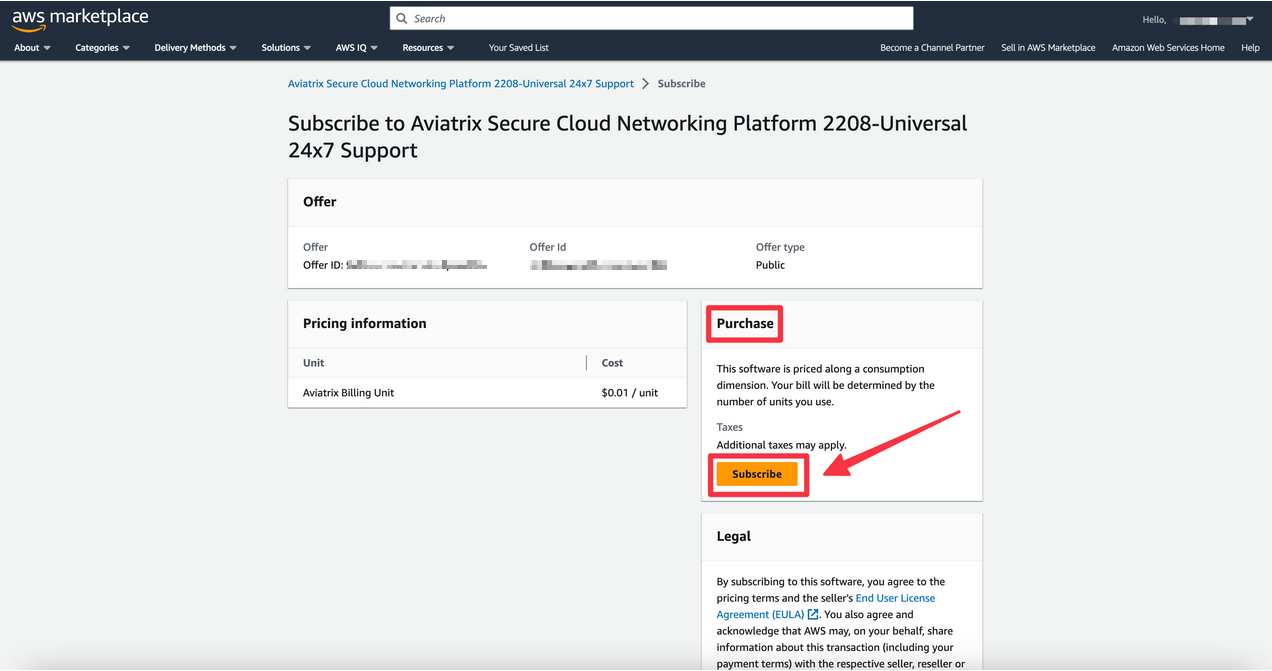
Click on the “Subscribe” button within the Purchase section, as depicted below.
Click on “Set up your account” at the top-right corner.

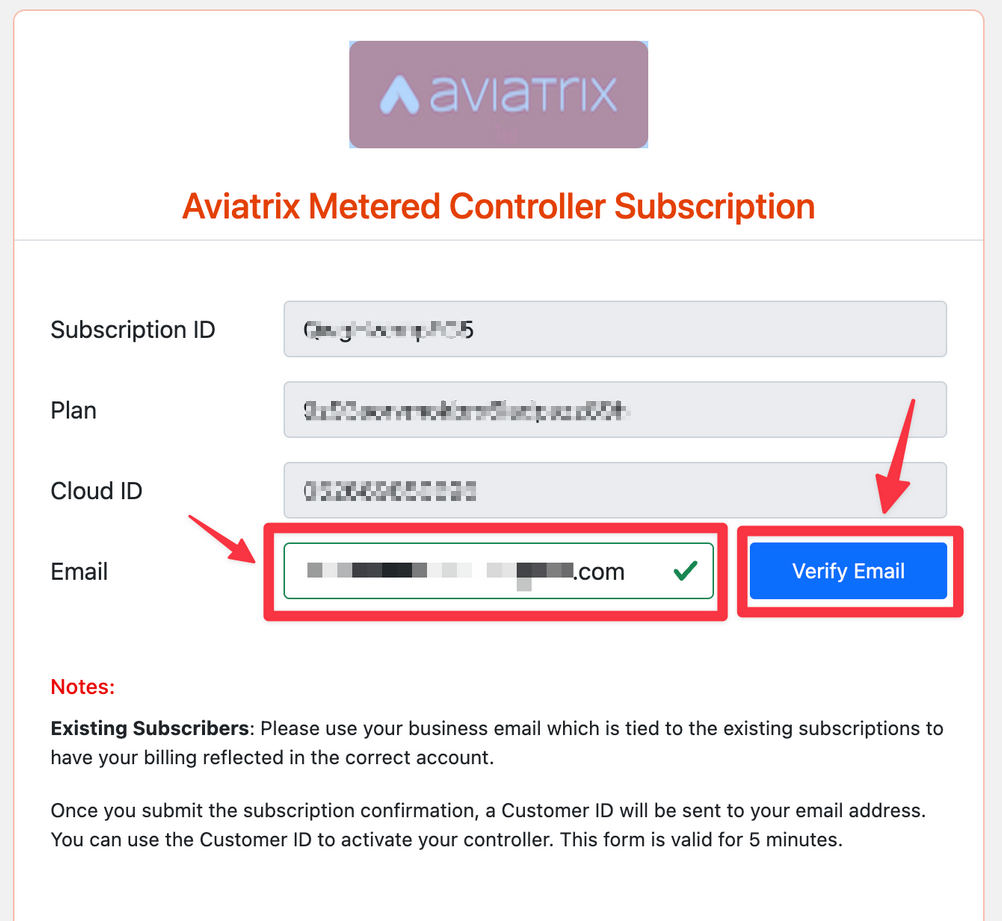
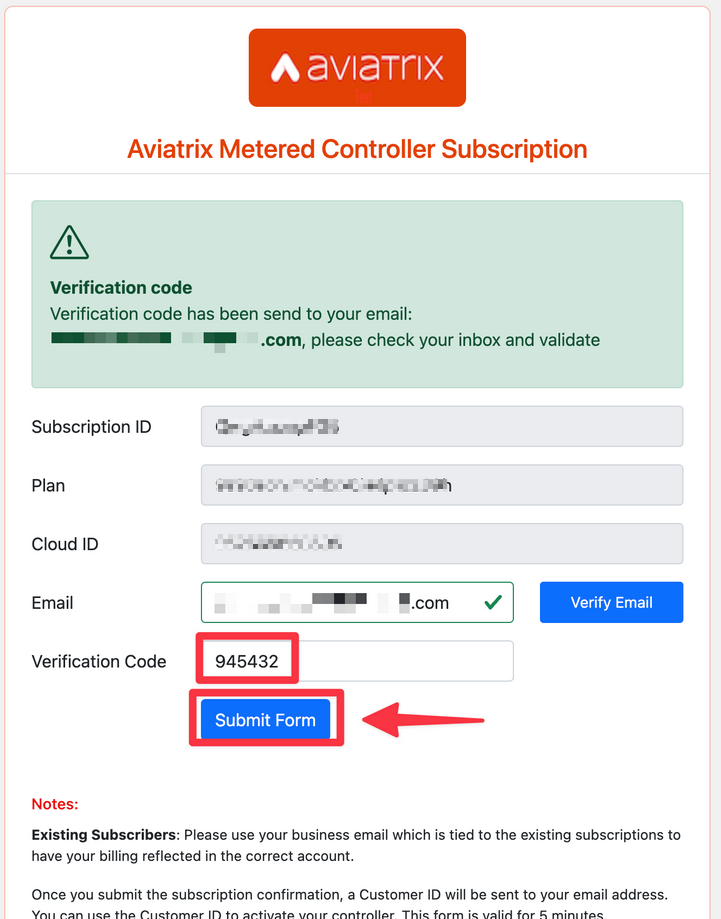
Insert your Email and then click on “Verify Email” button.
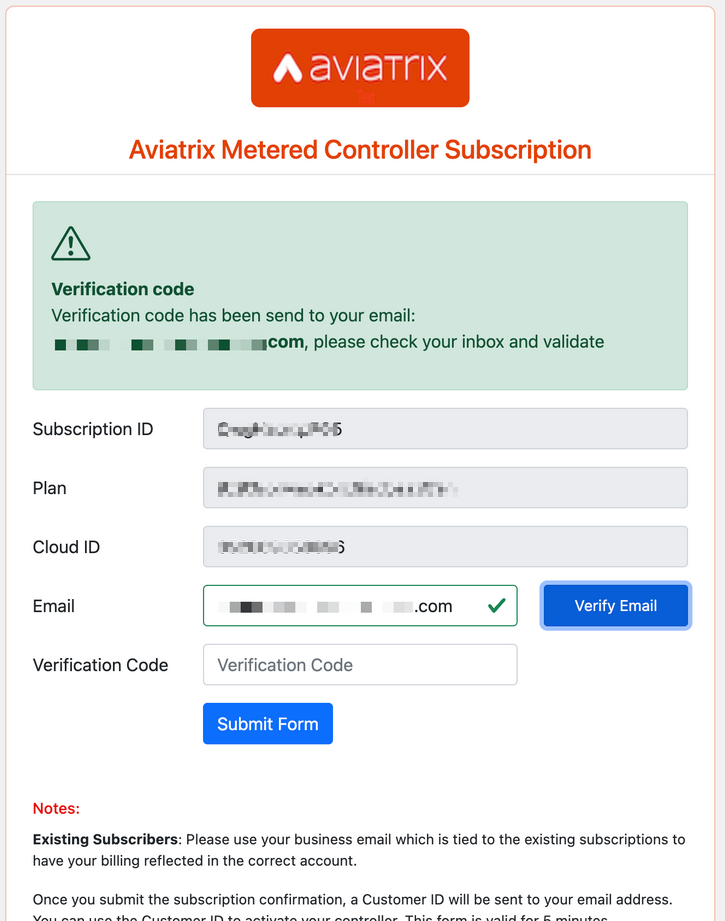
After a few seconds you will get a notification message on a green banner, confirming that a Verification Code has been sent to the email that you inserted previously.
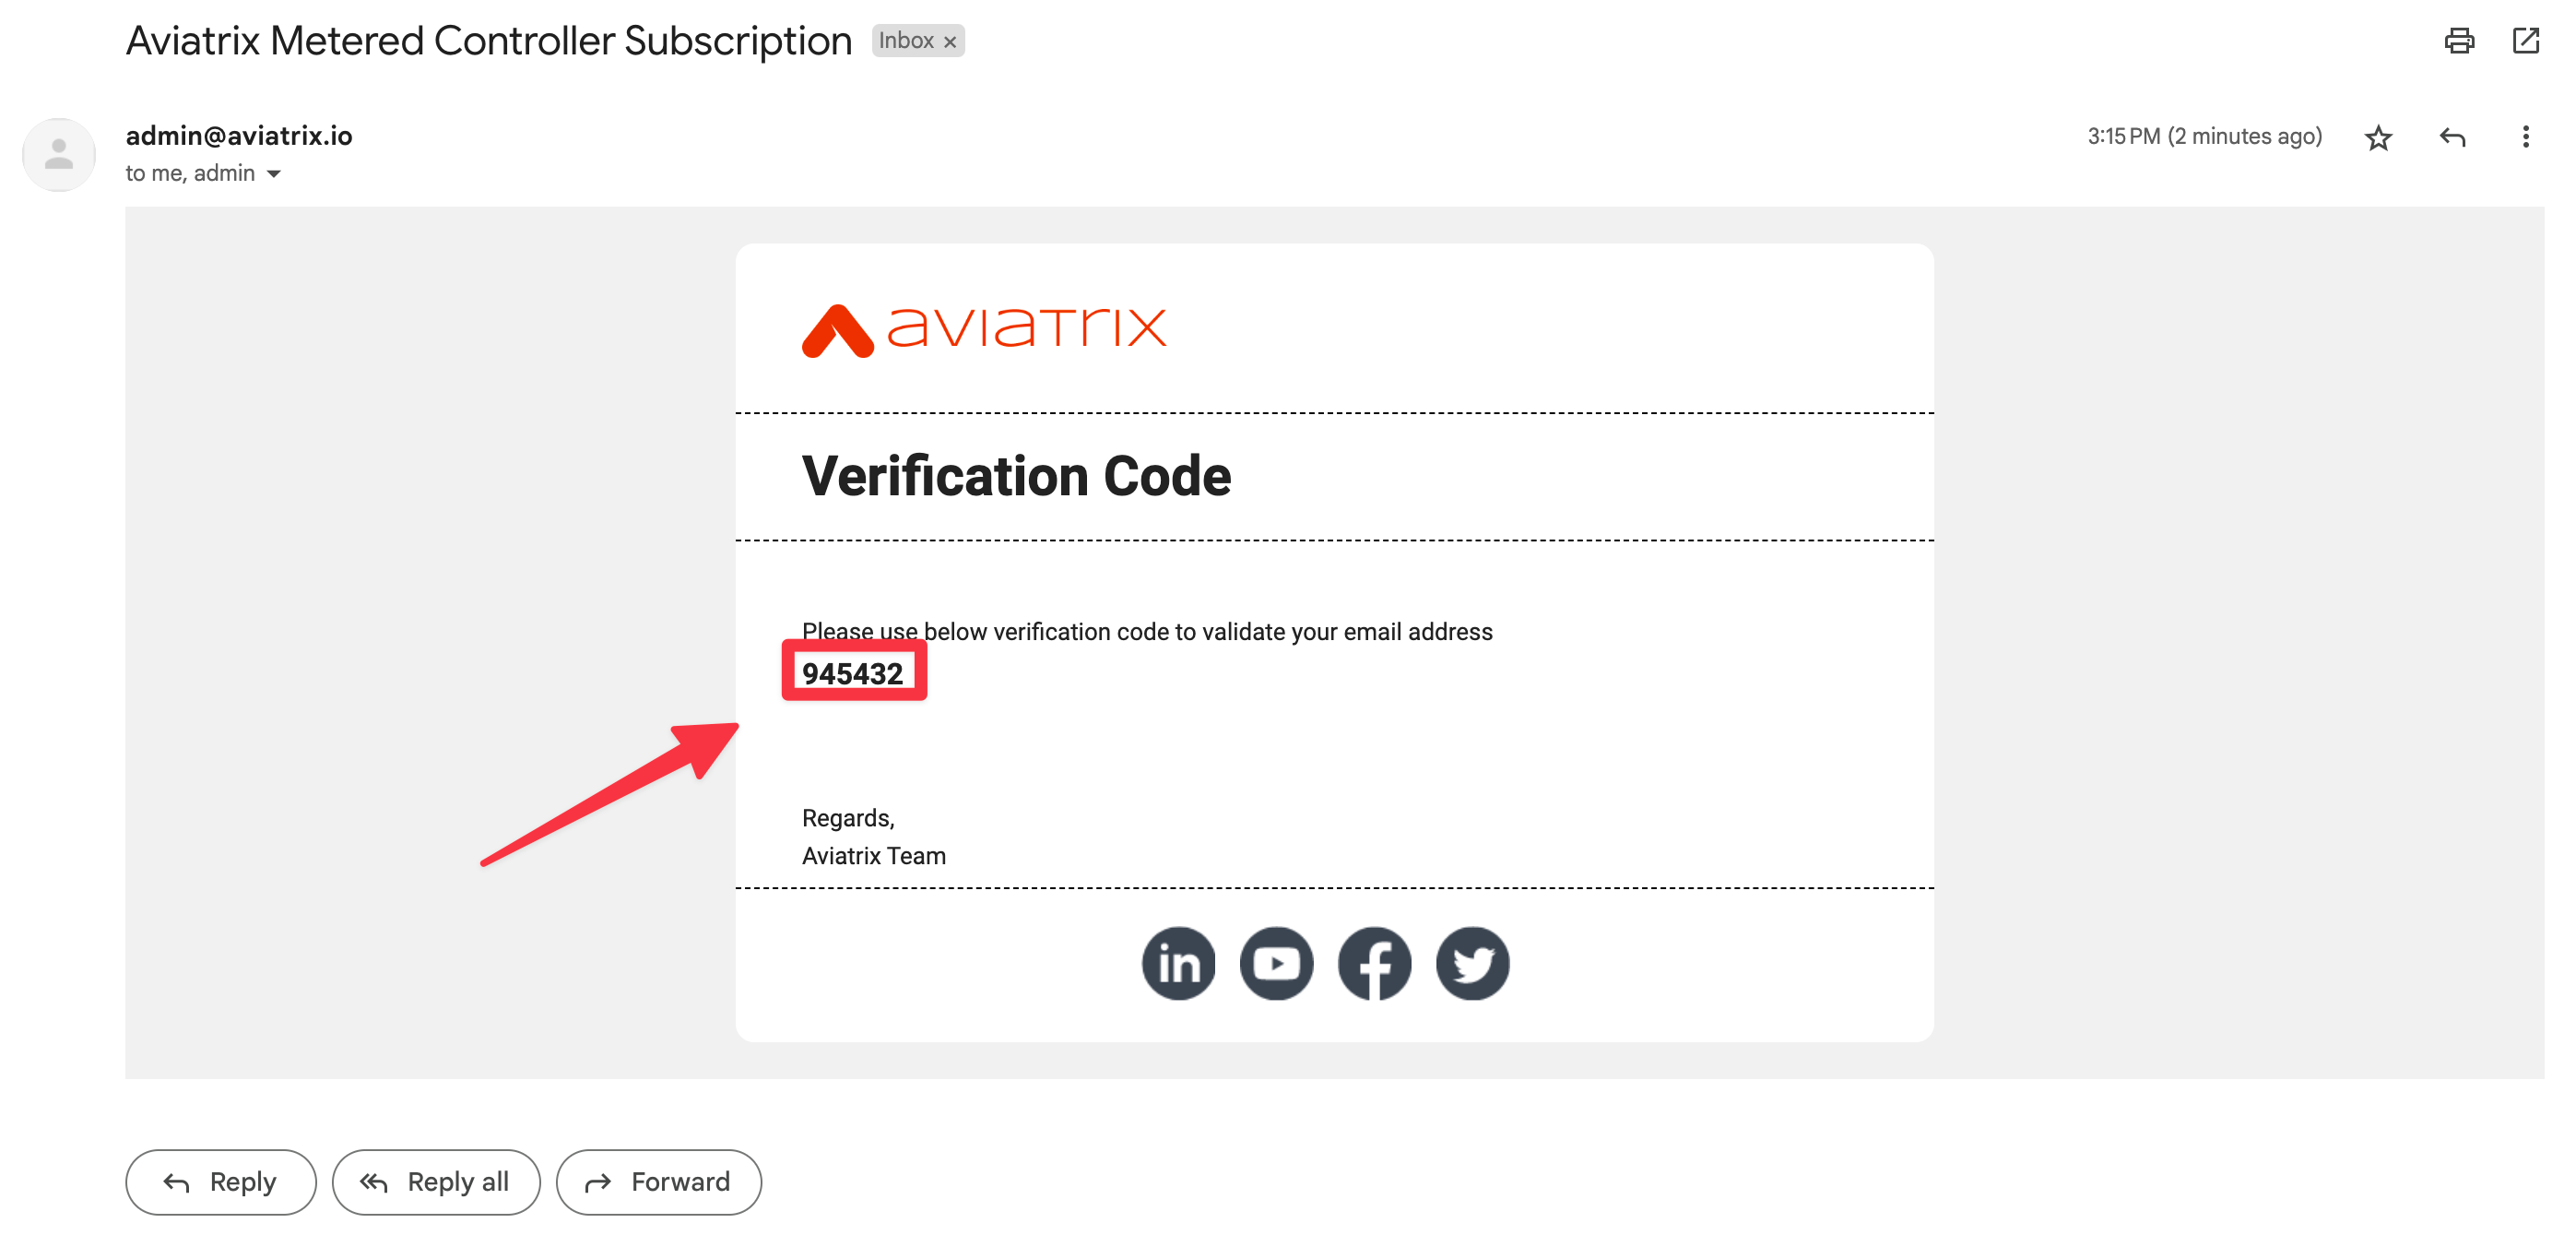
Retrieve the Verification Code from the Email account that you used before.
Now copy and paste the code in the Verification Code field and then click on the “Submit Form” button.
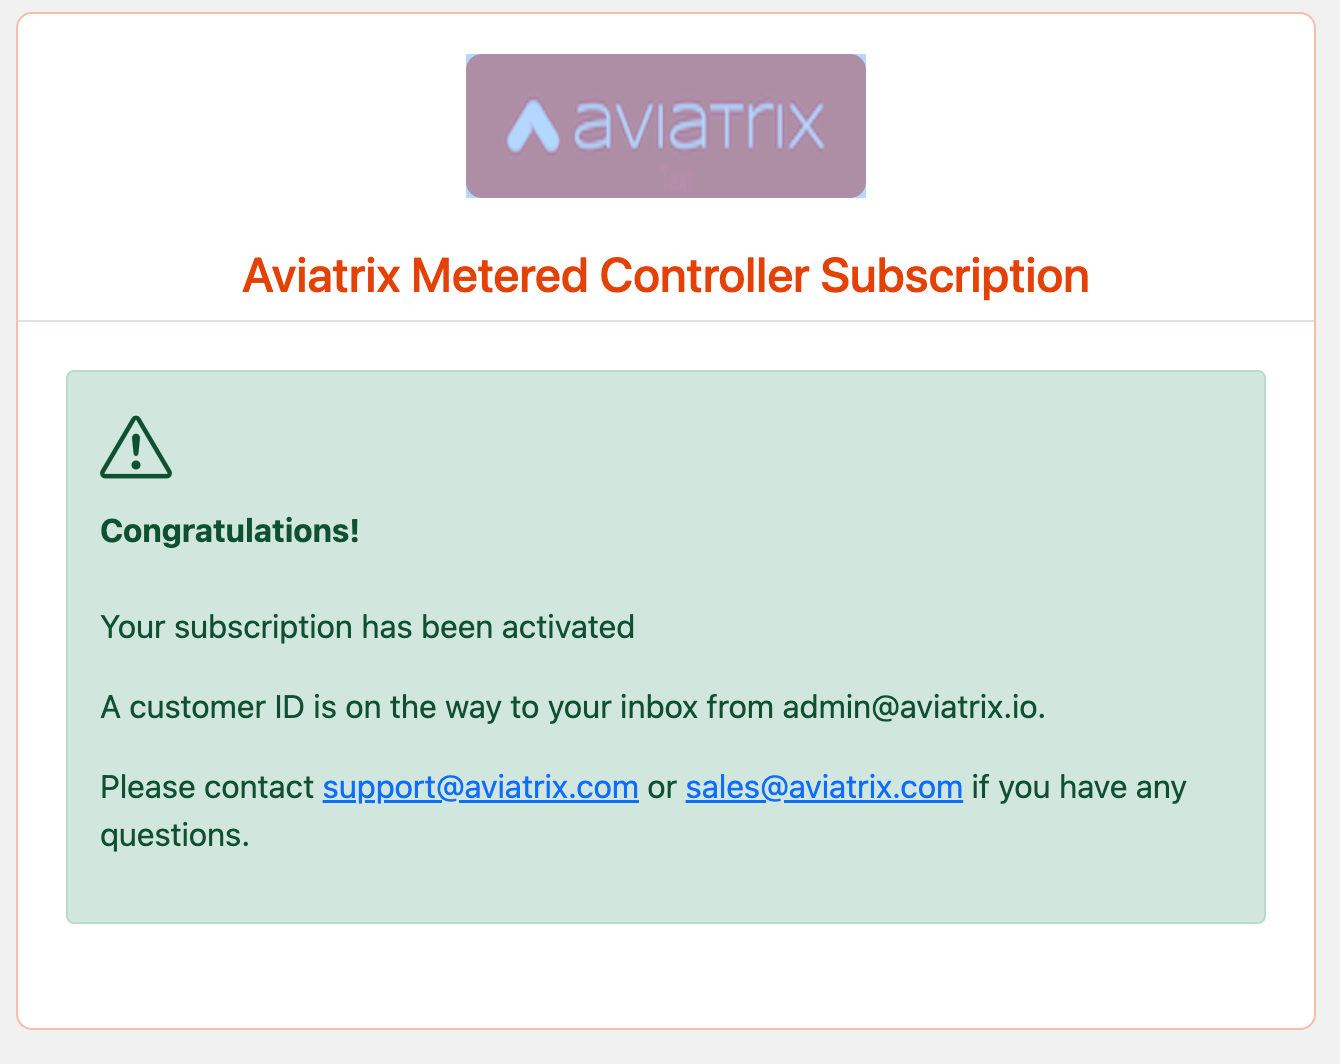
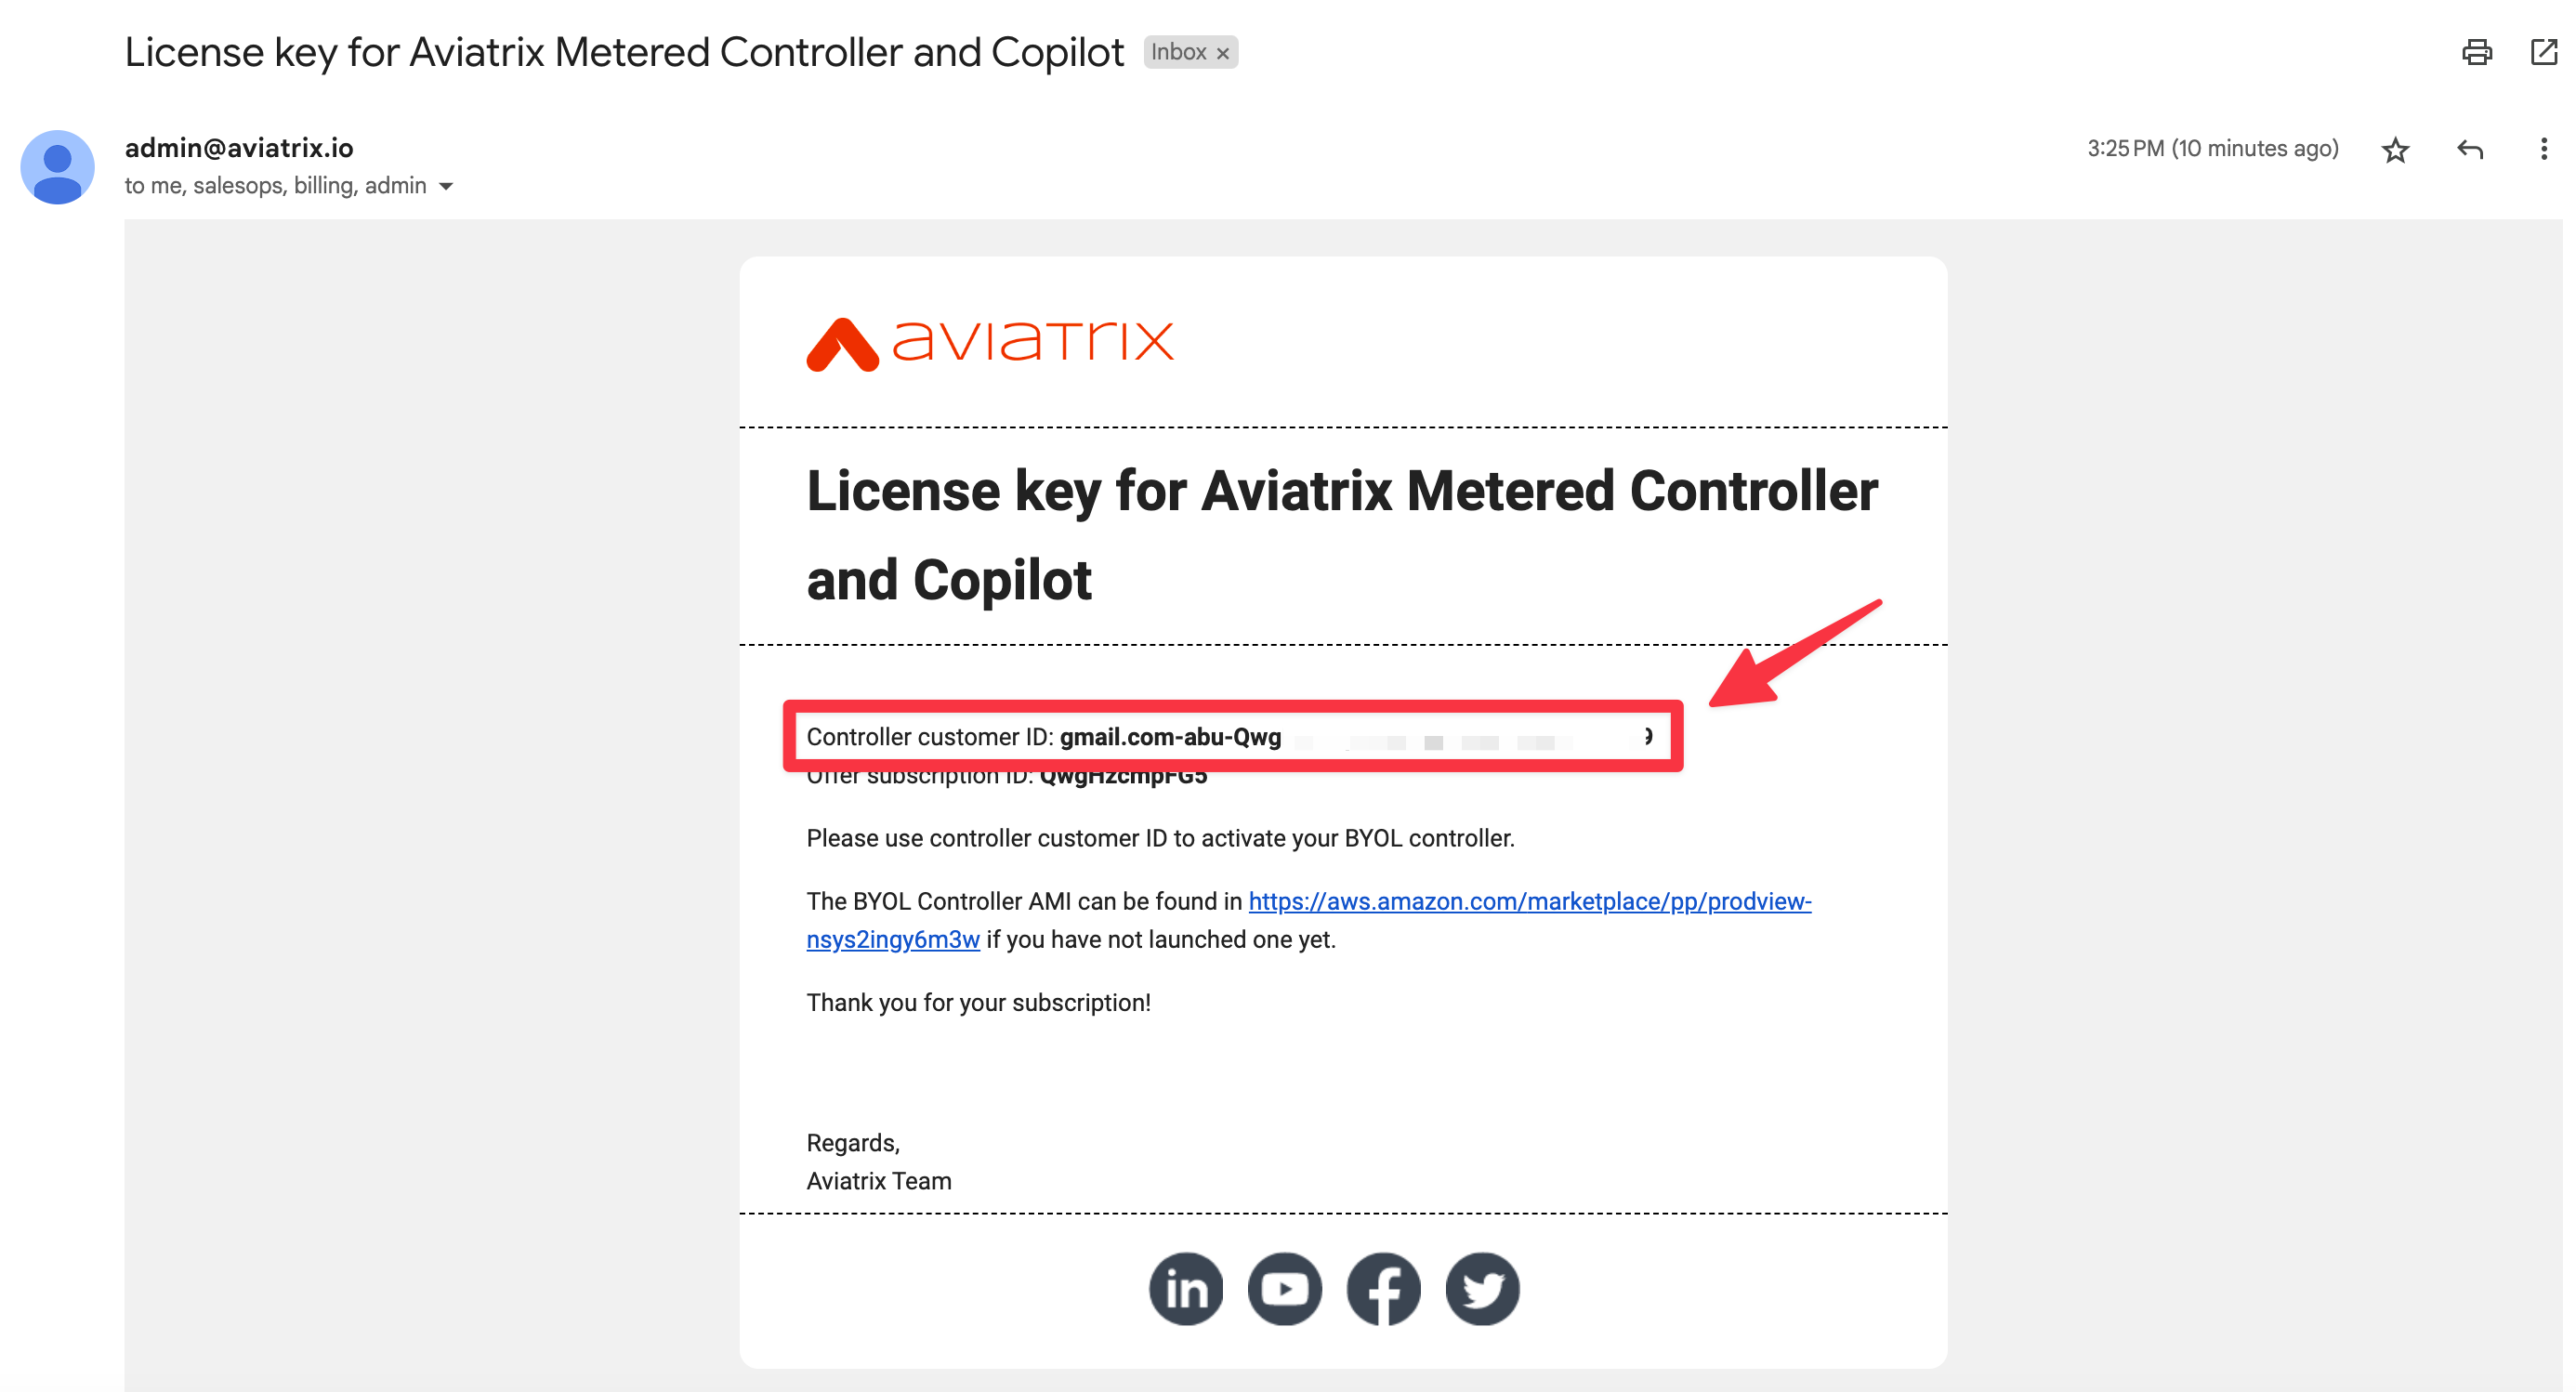
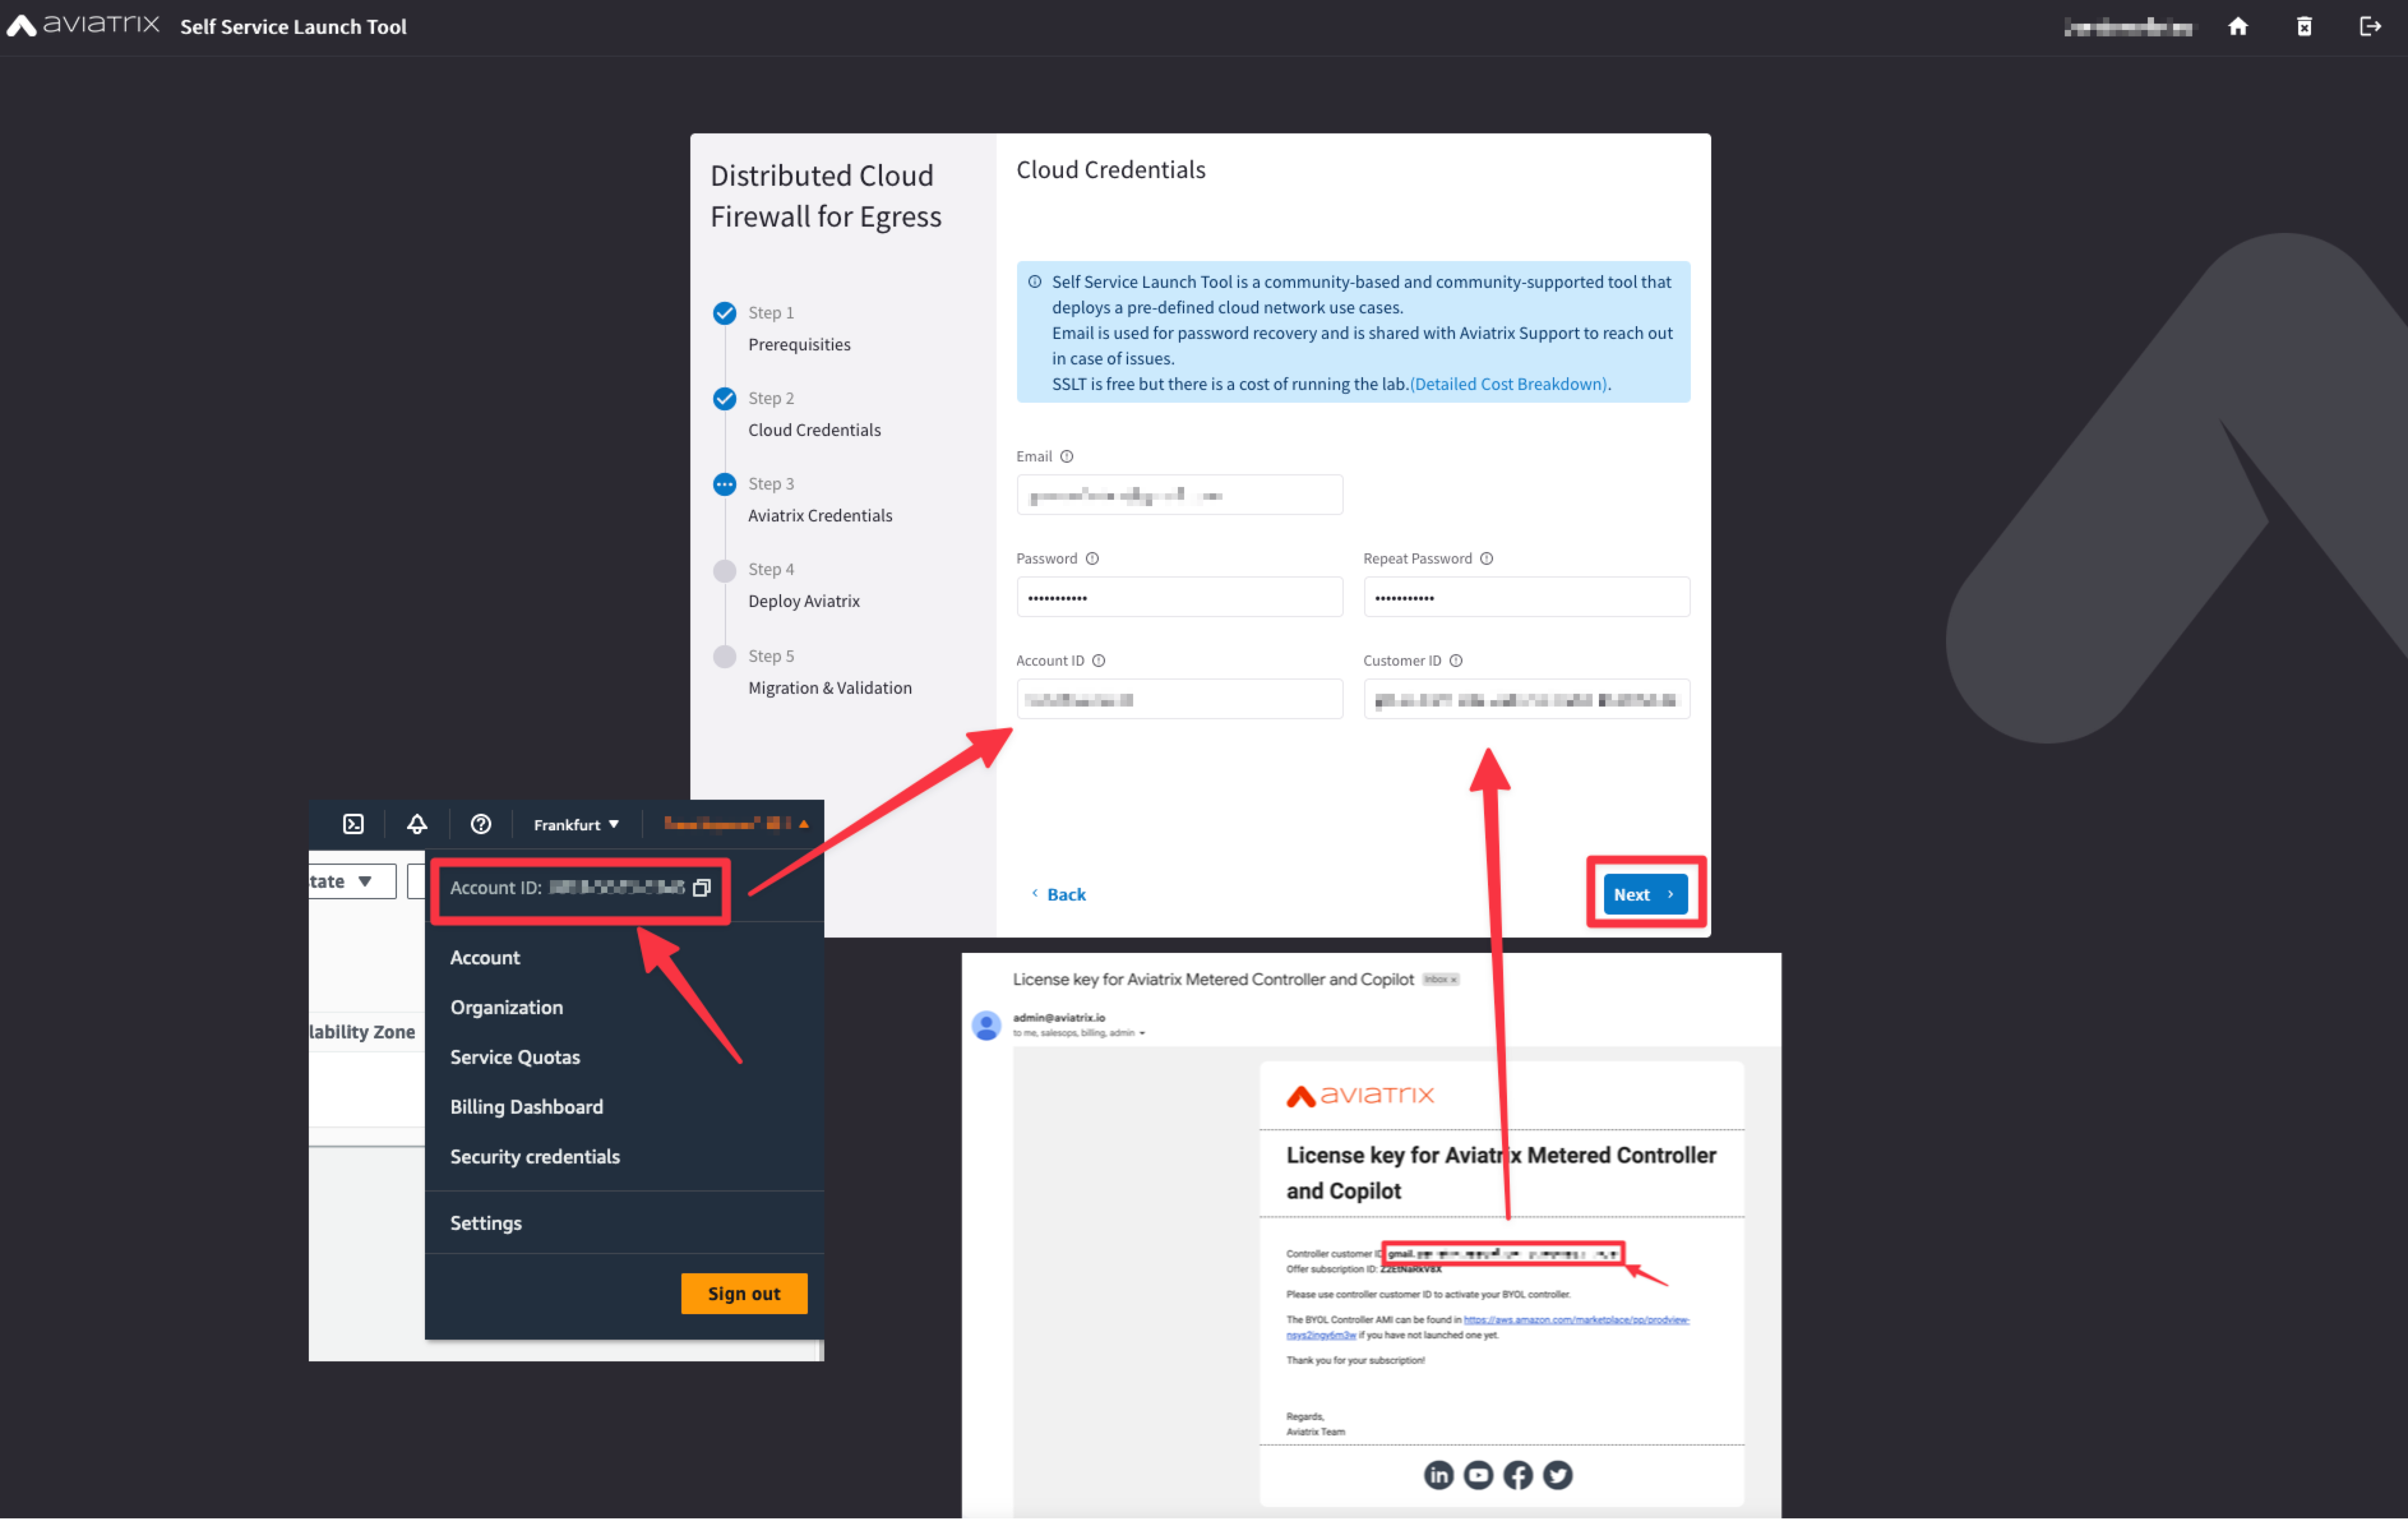
Afterwards, you will get a notification message confirming that your subscription has been activated. In addition to this, a Customer ID (aka License) should have also arrived to your email
The Controller customer ID is your personal controller license (do not share it with anybody) and you can retrieve it from the first field in the confirmation subscrition email, as depicted below.
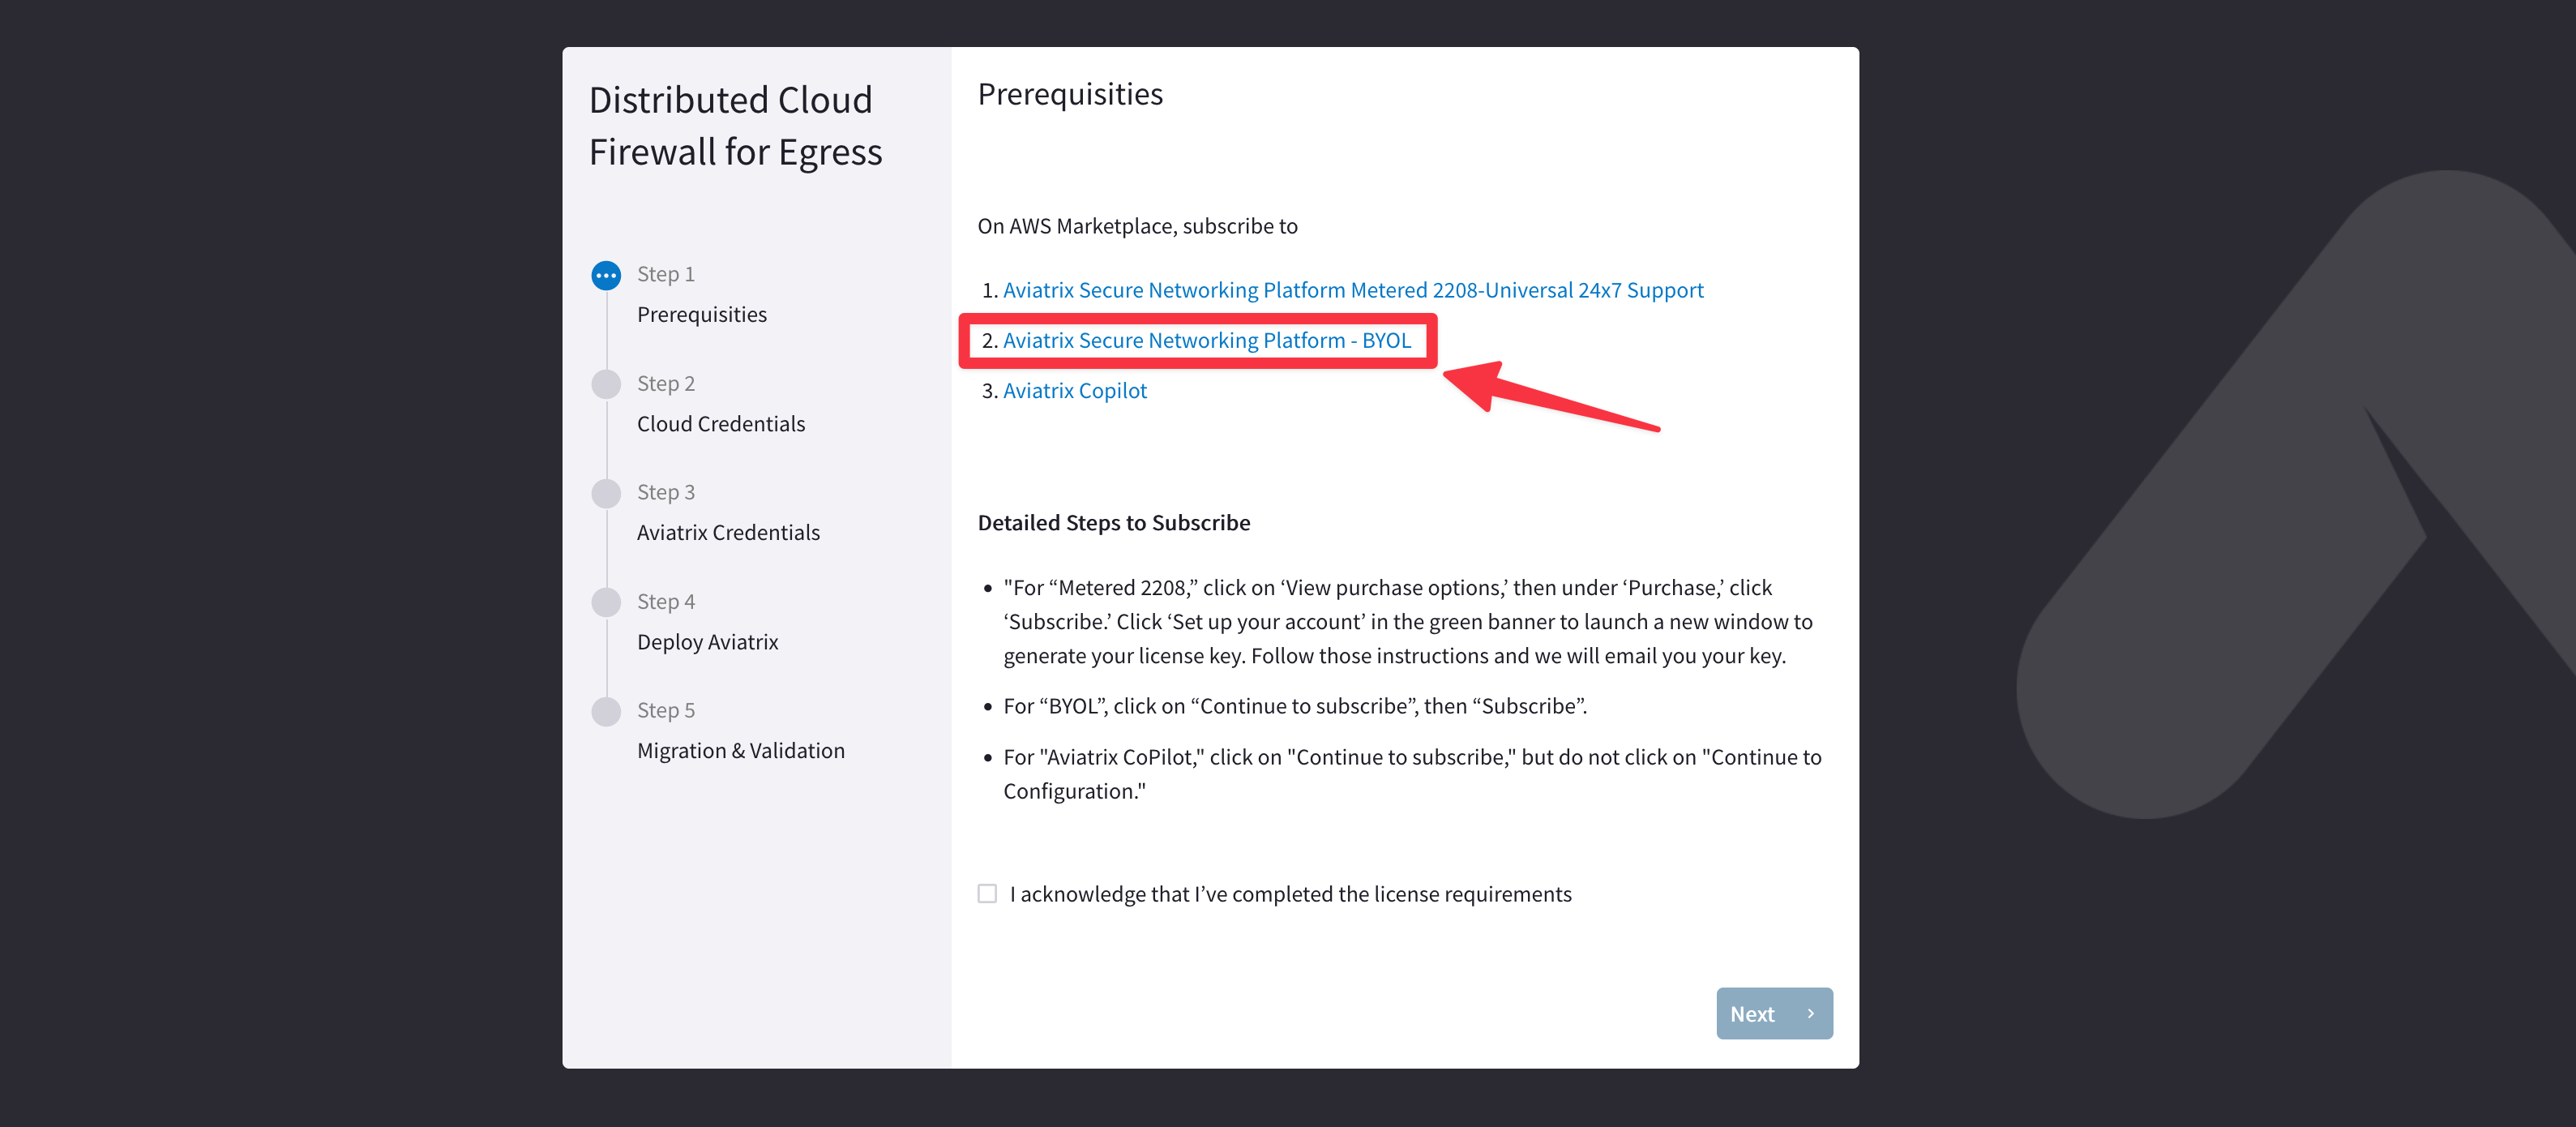
3.1.2. Step 2 - Prerequisities: Aviatrix Secure Networking Platform - BYOL
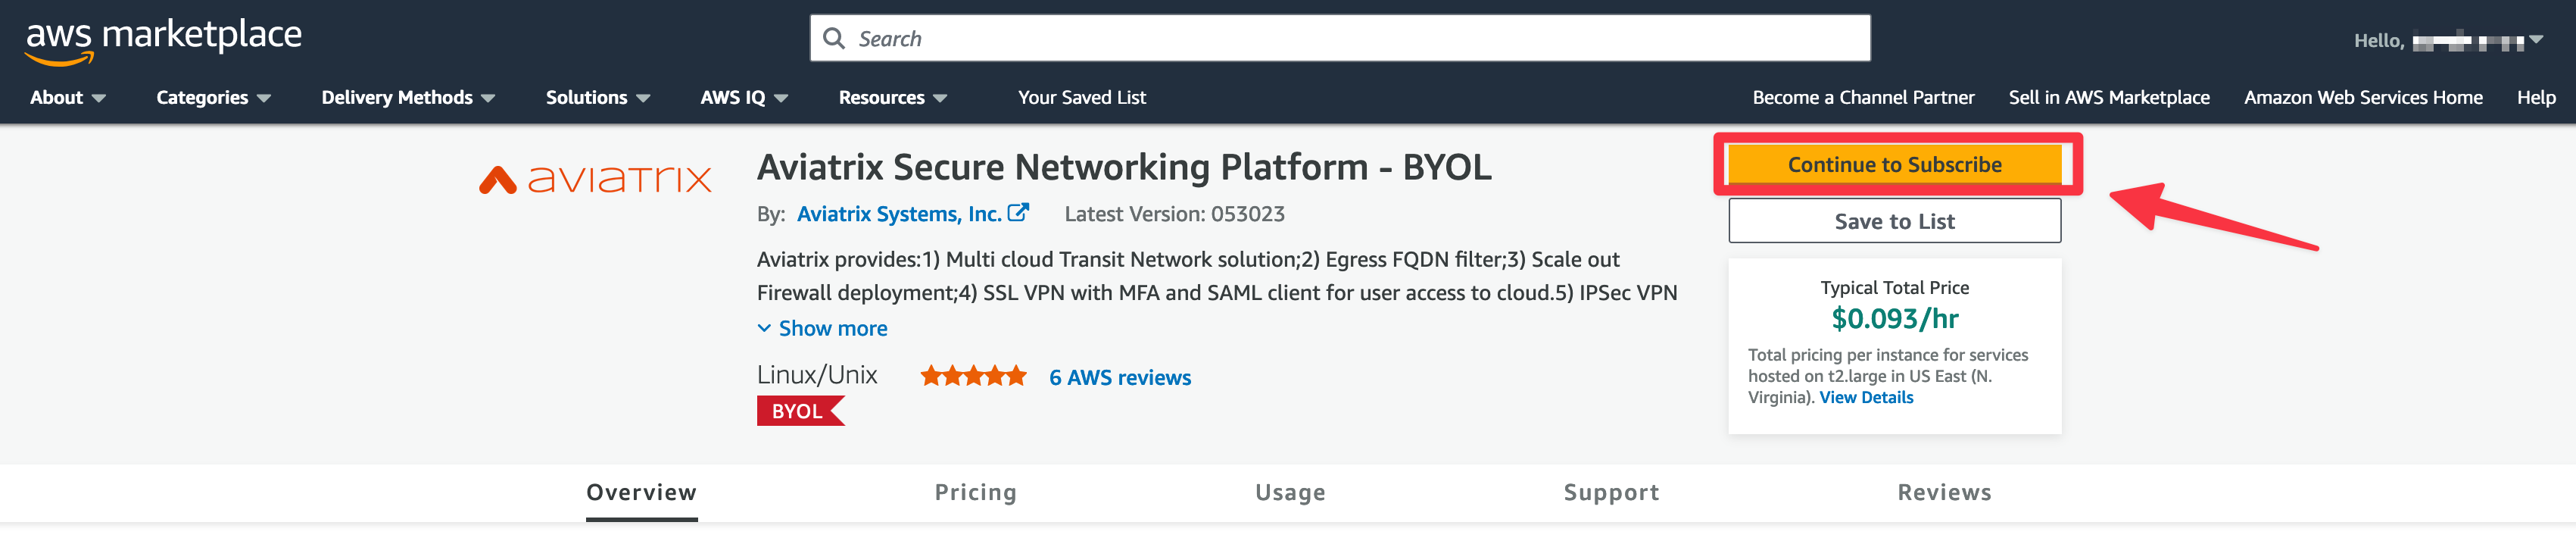
Go back to the SSLT Portal and click on the link “Aviatrix Secure Networking Platform - BYOL”.
Click on the “Continue to Subscribe” button.
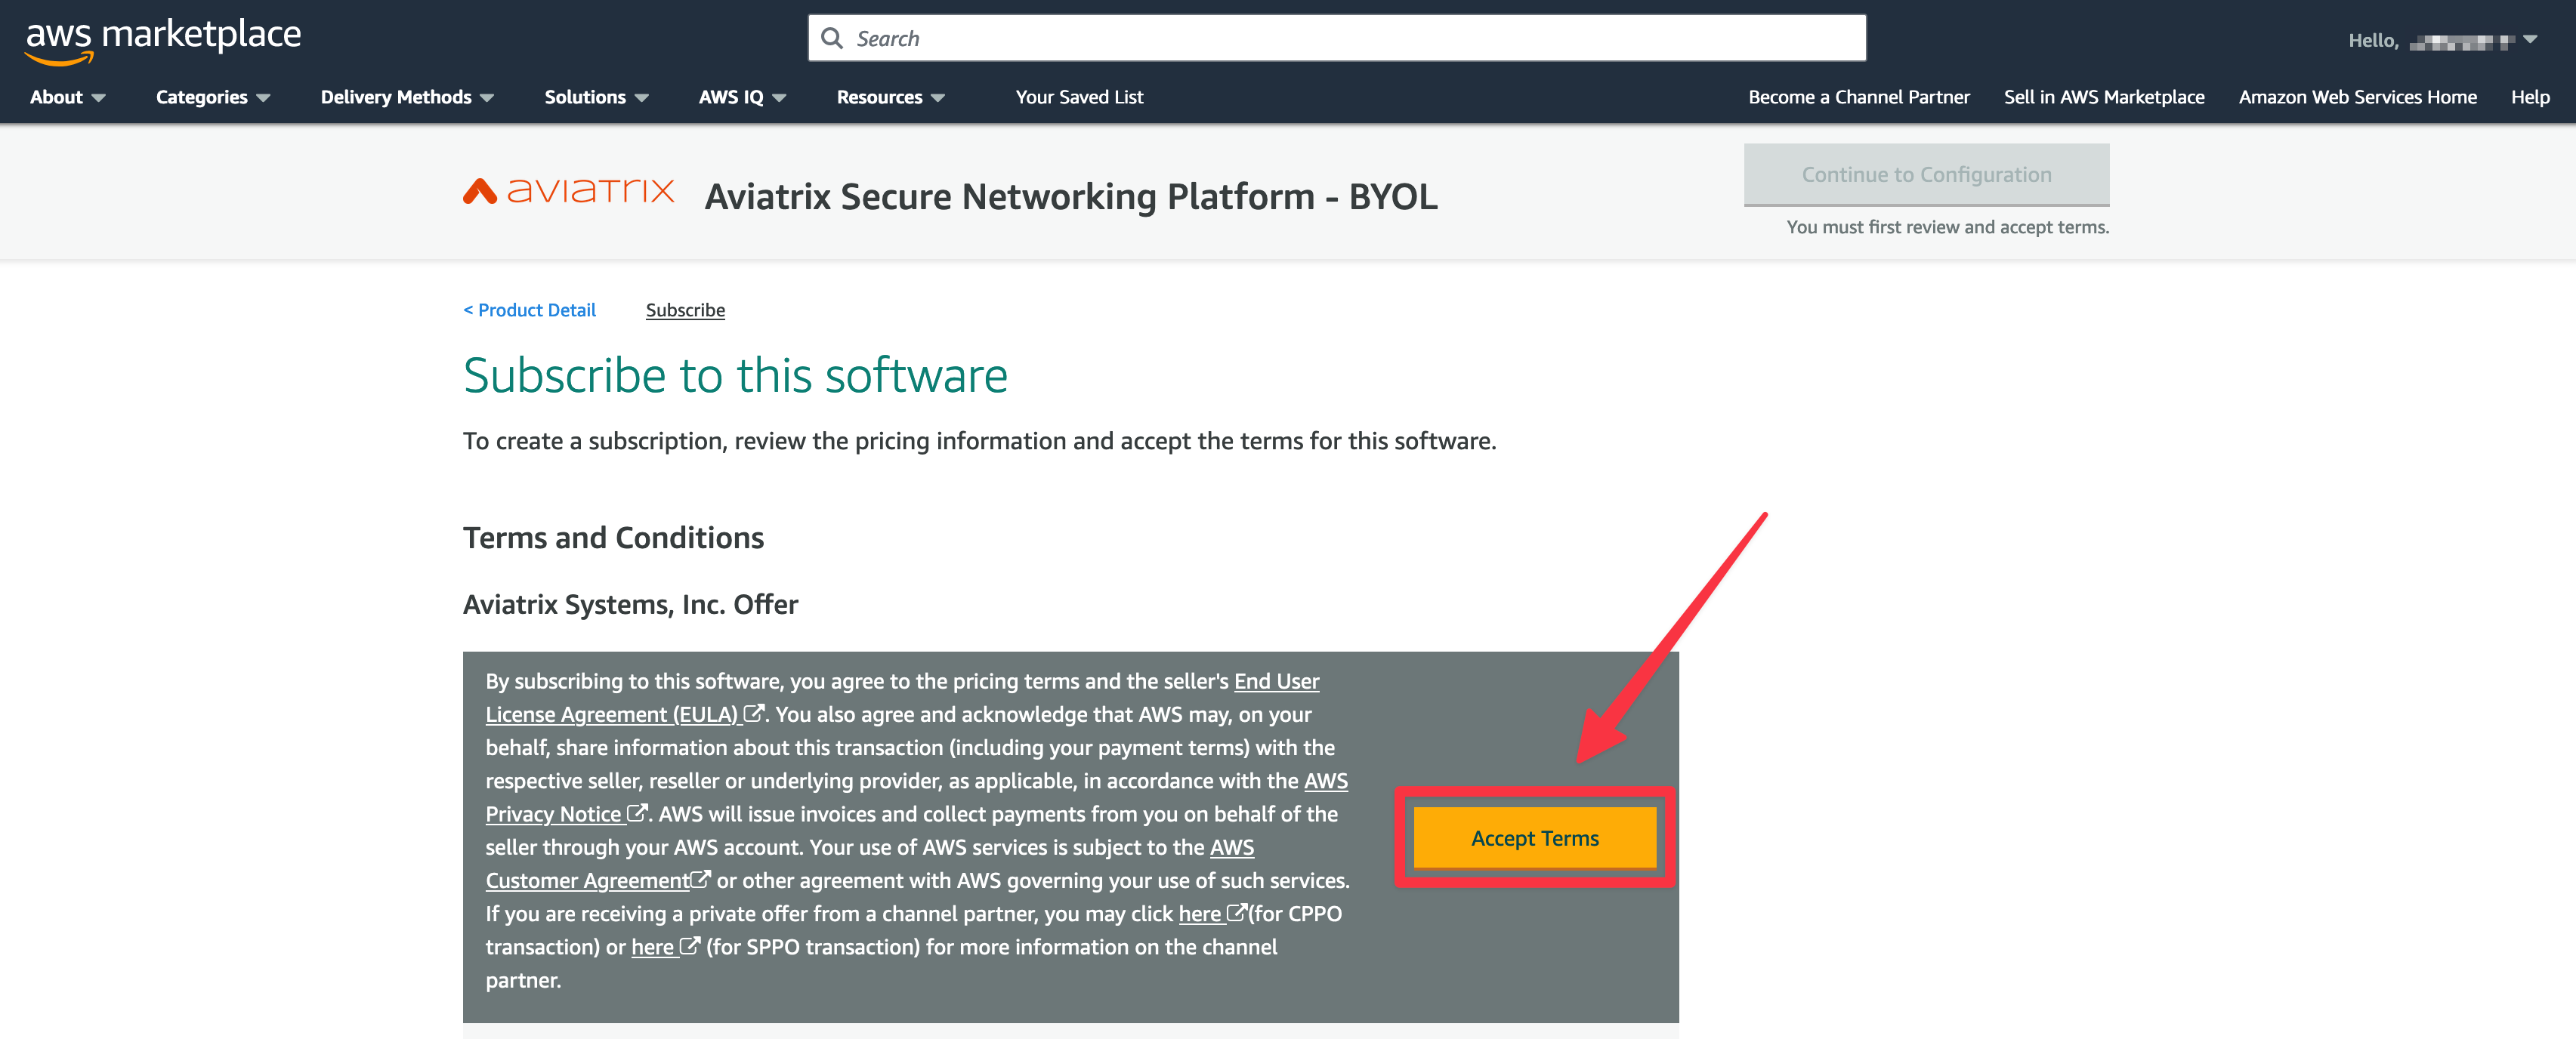
Then click on the “Accept Terms” button.
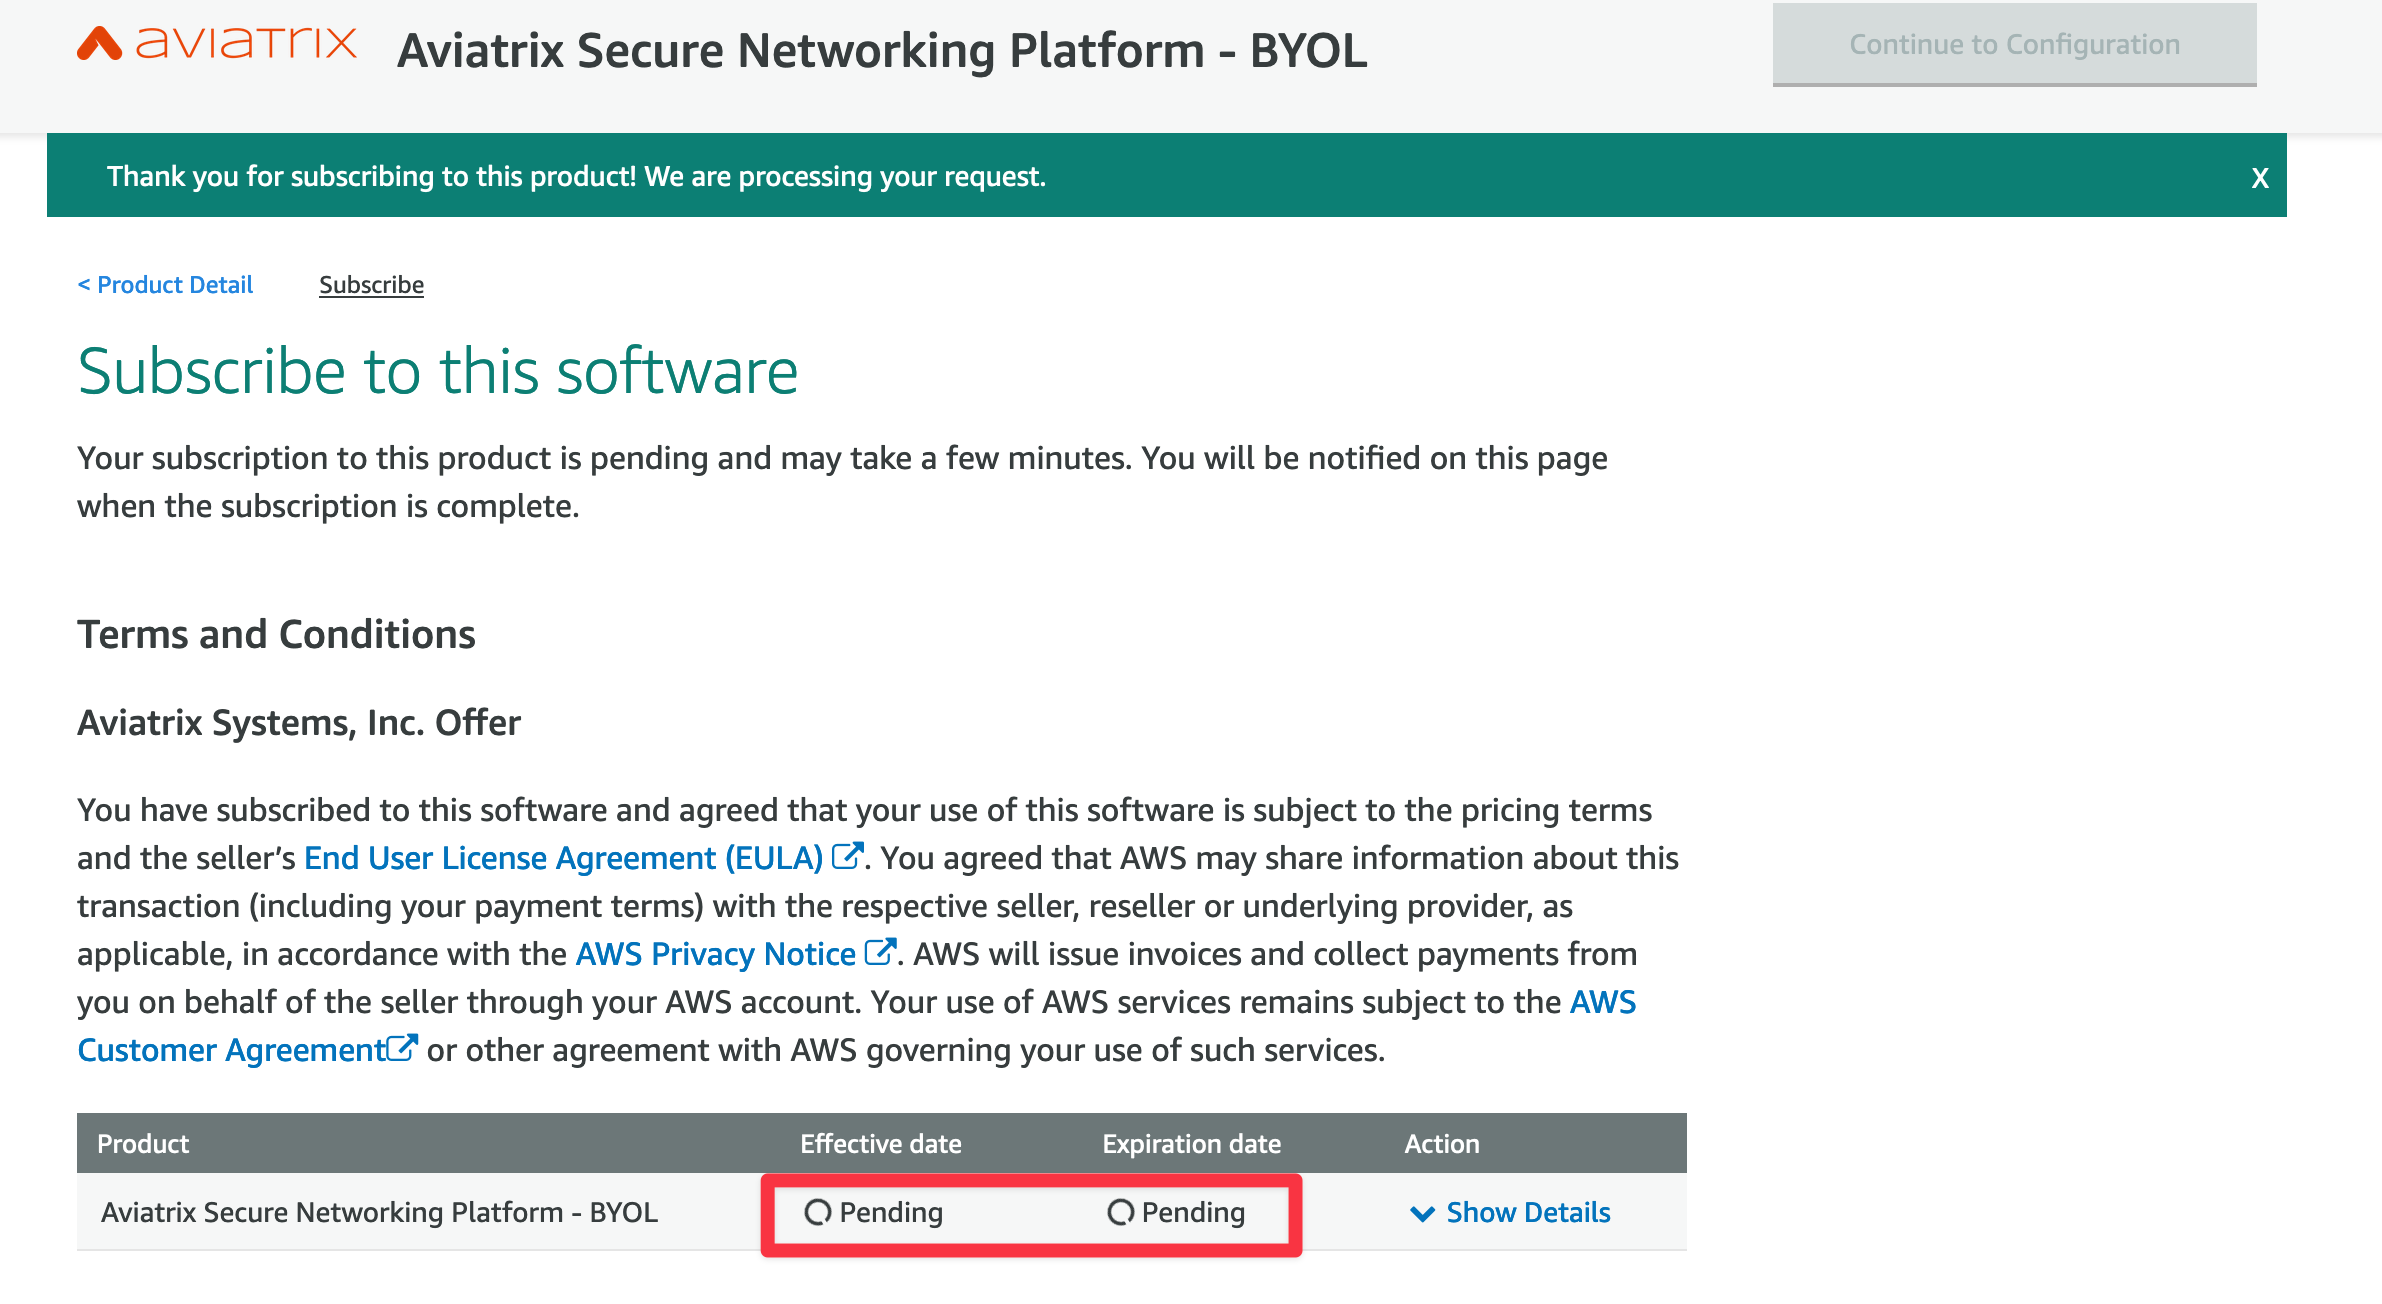
Wait some seconds until the Subscription get activated!

3.1.3. Step 3 - Prerequisities: Aviatrix Copilot
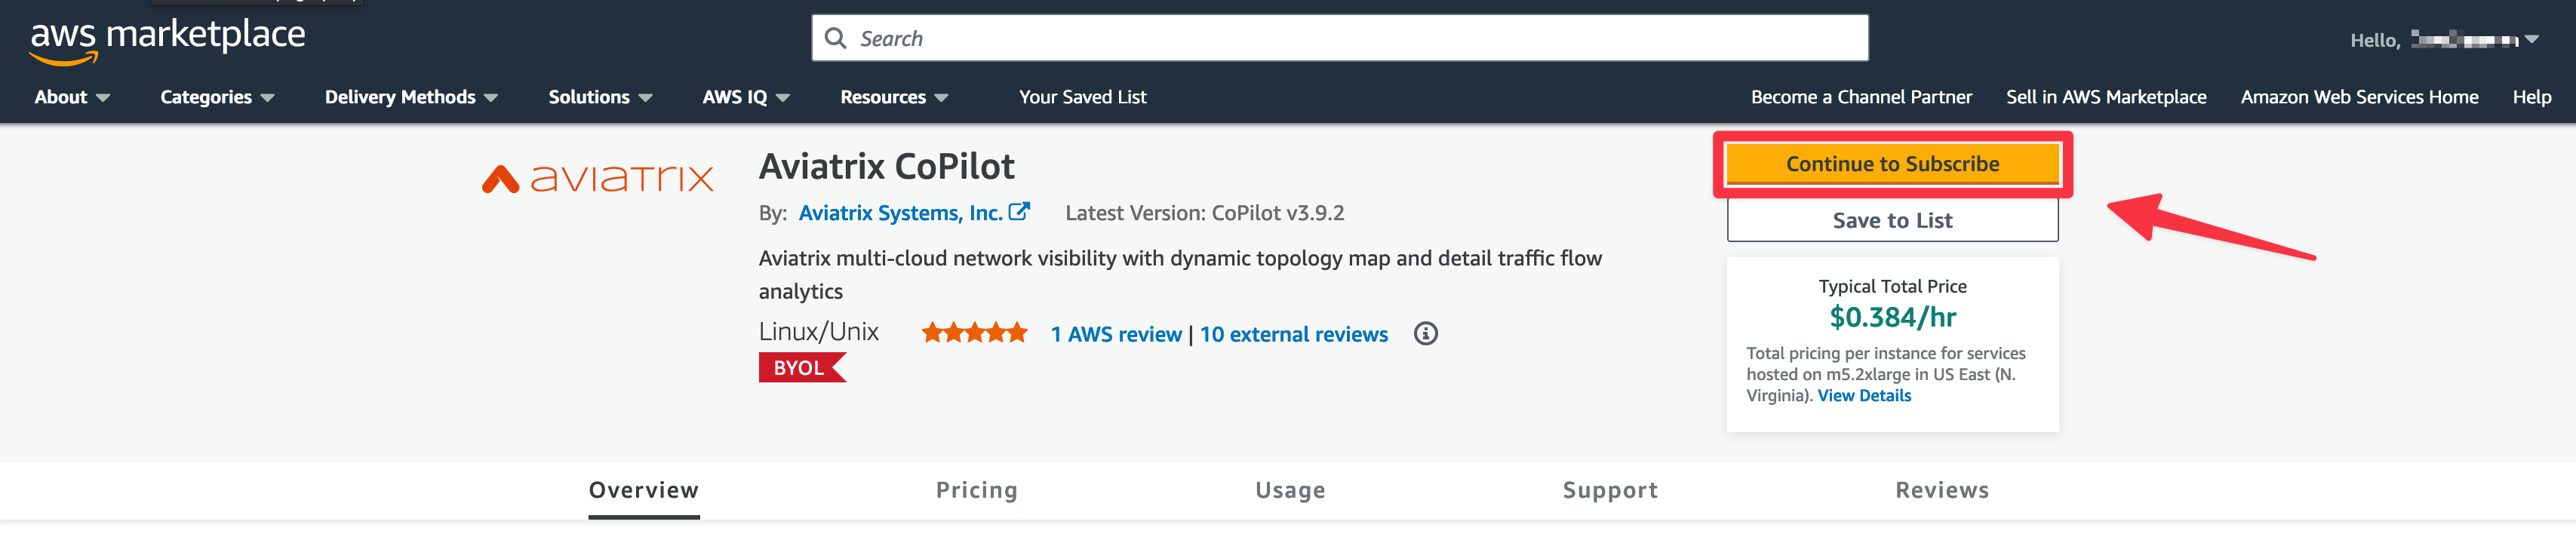
Go back to the SSLT Portal and this time click on the link “Aviatrix Copilot”.
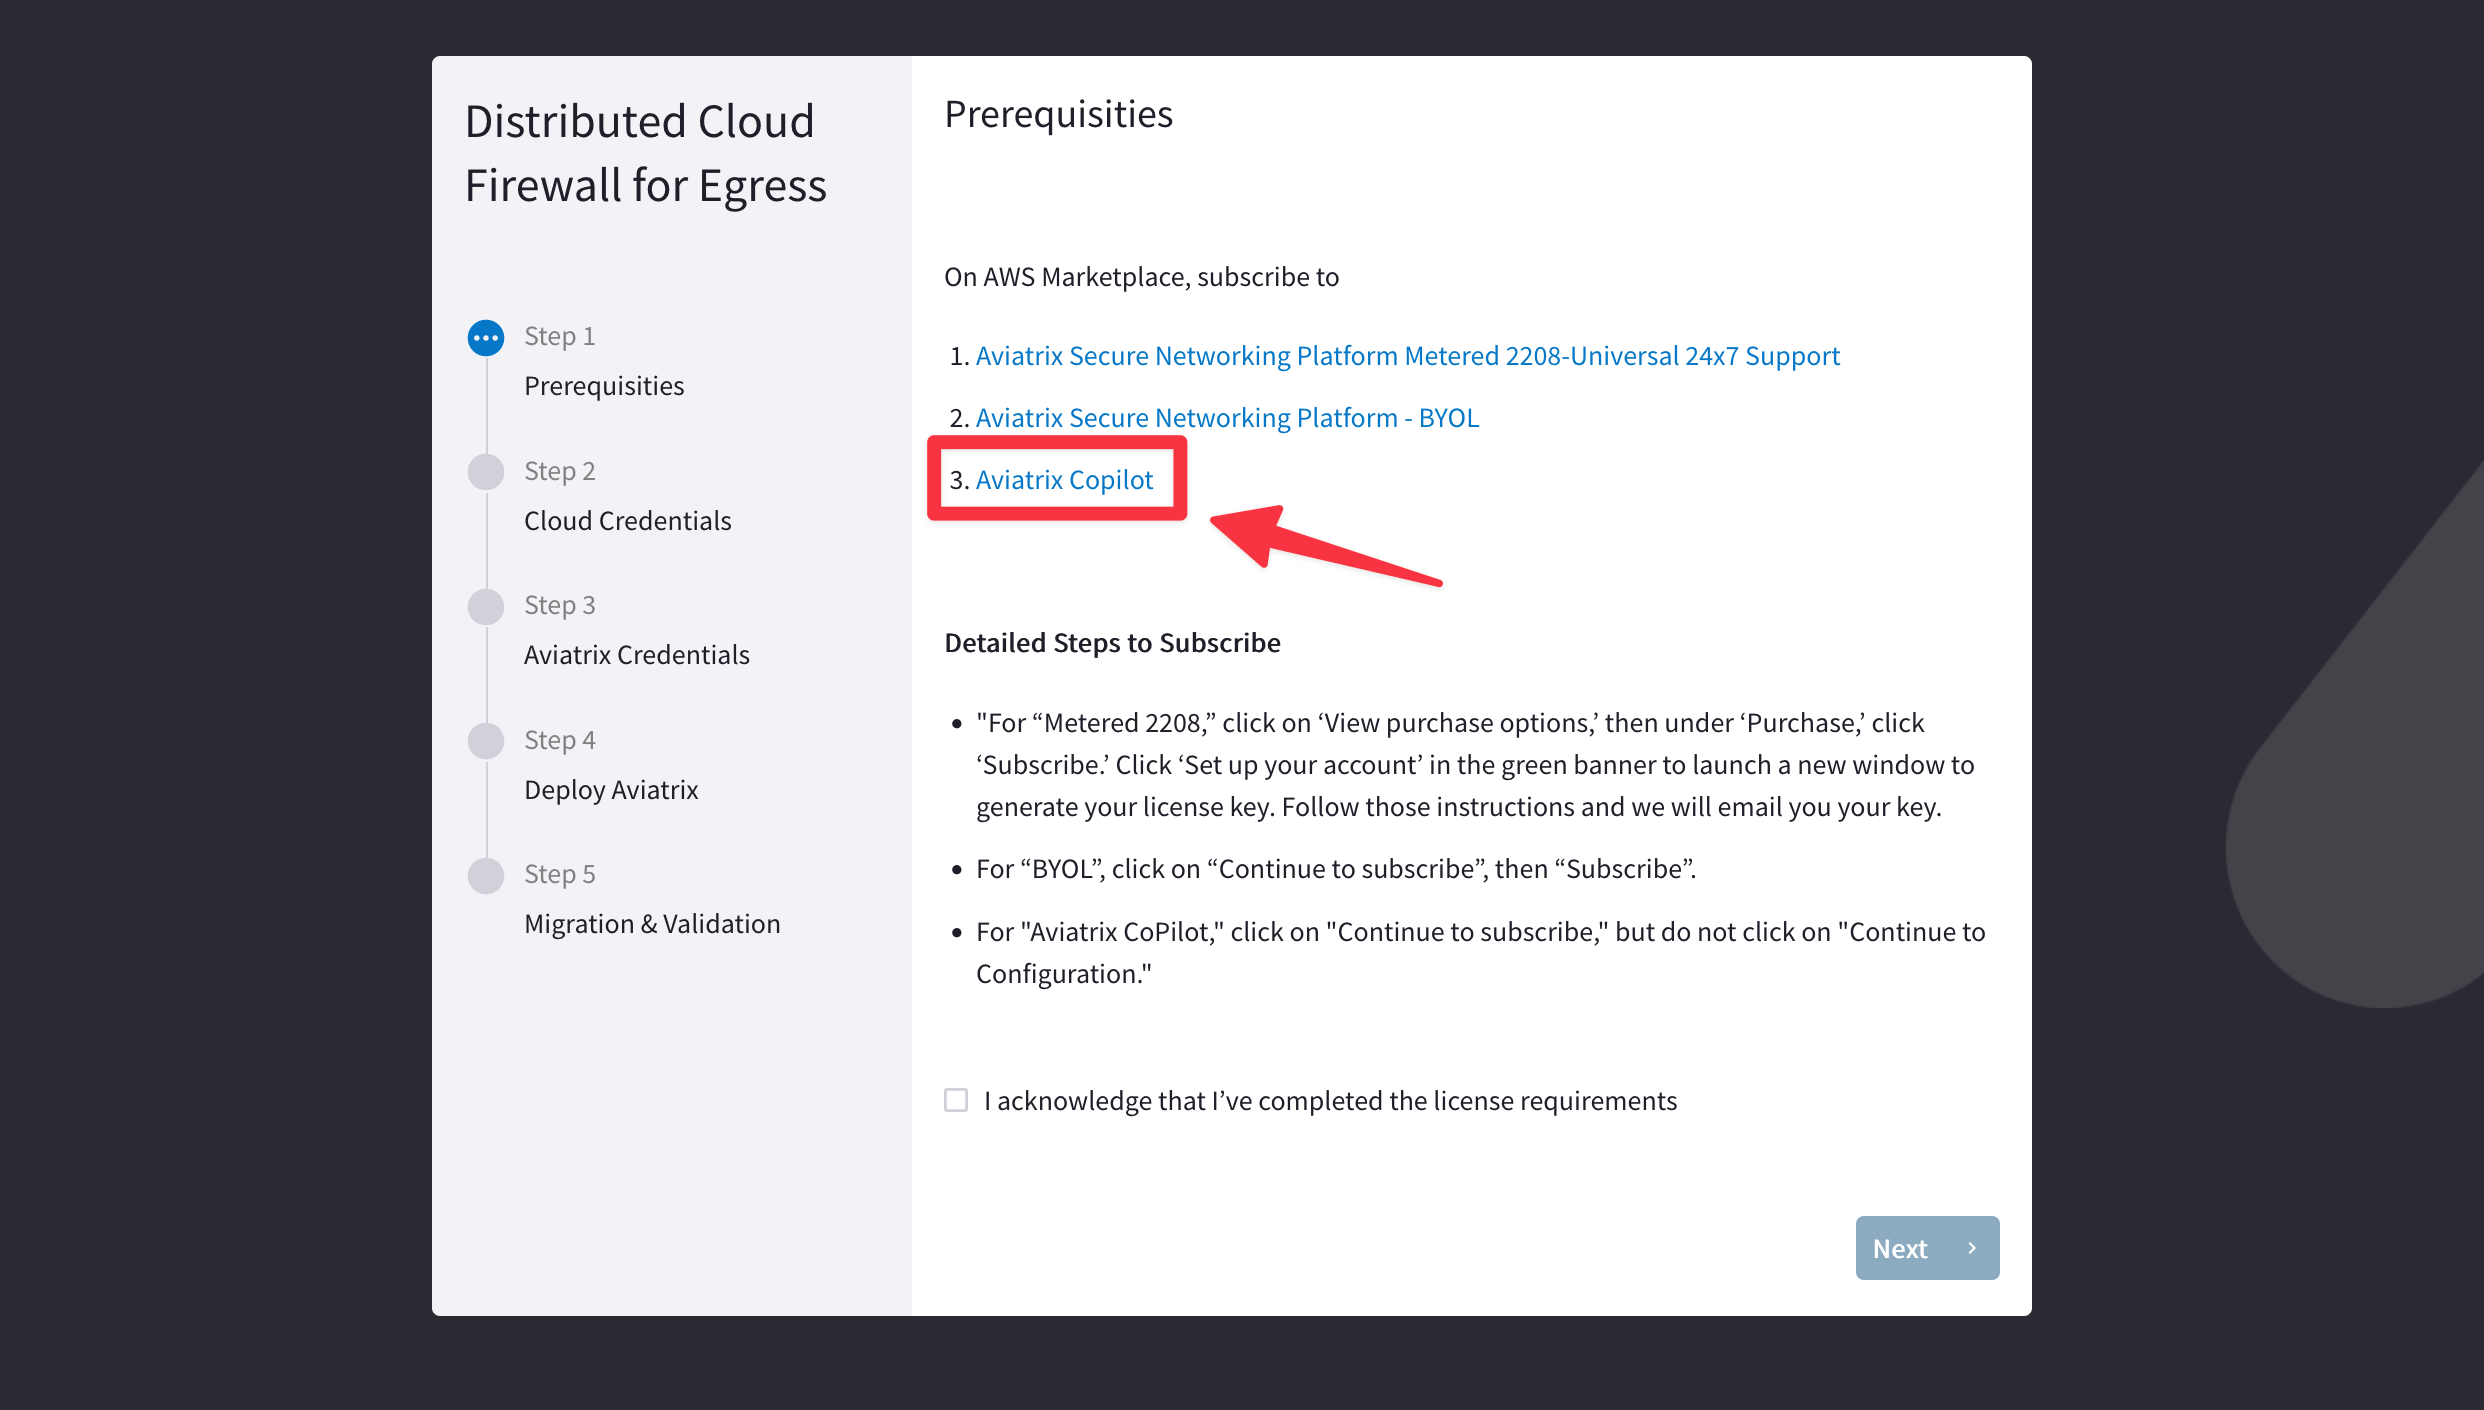
Click on the “Continue to Subscribe” button.
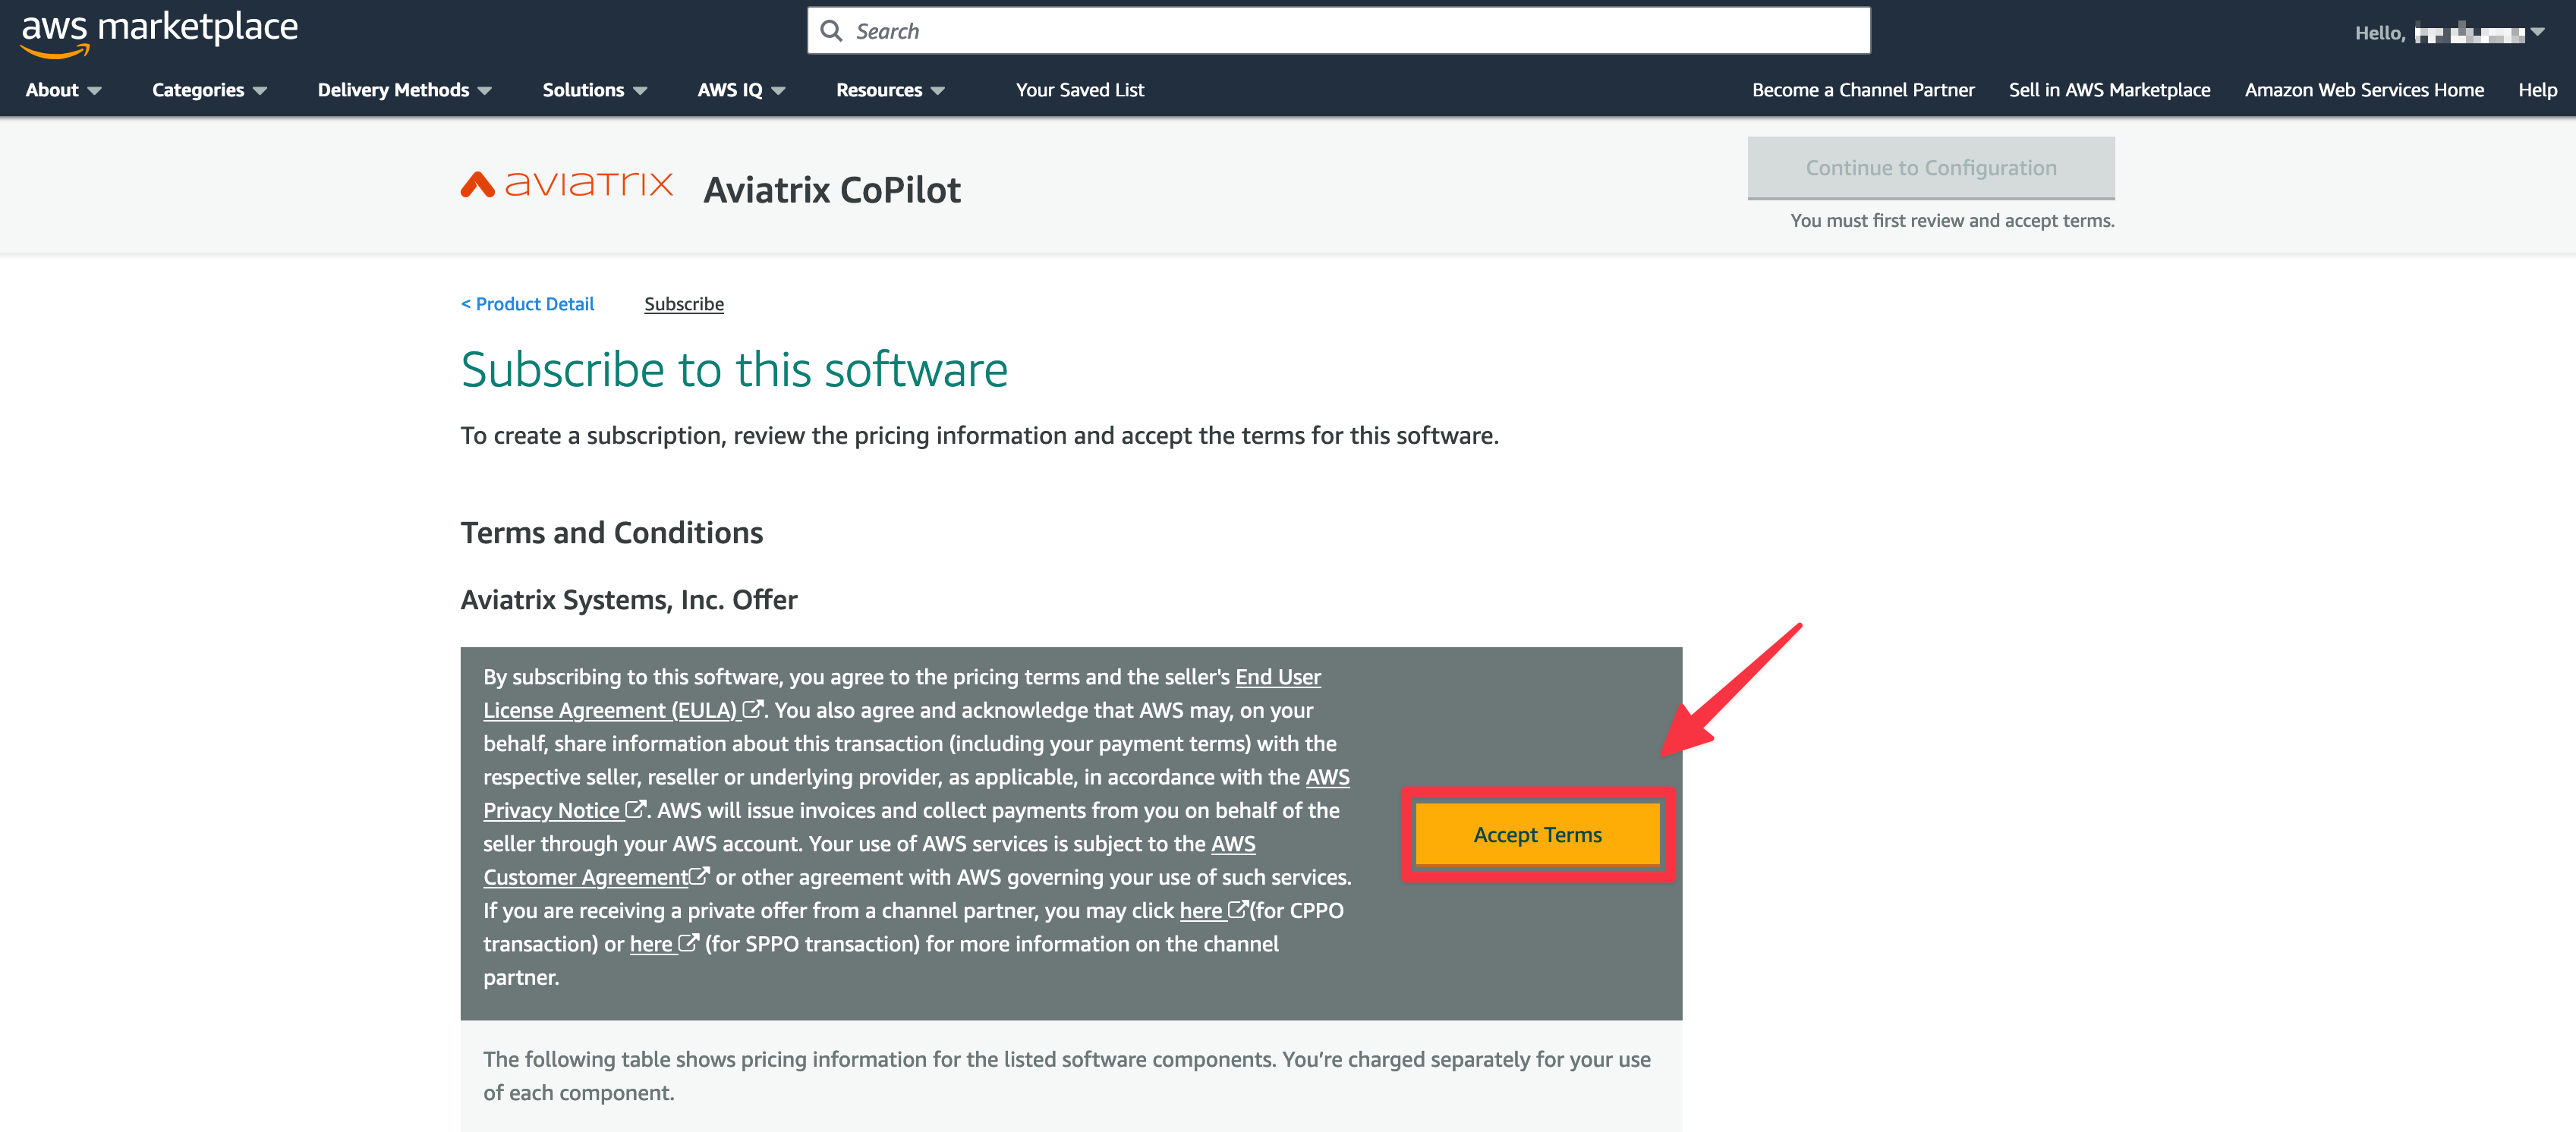
Click on the “Accept Terms” button.
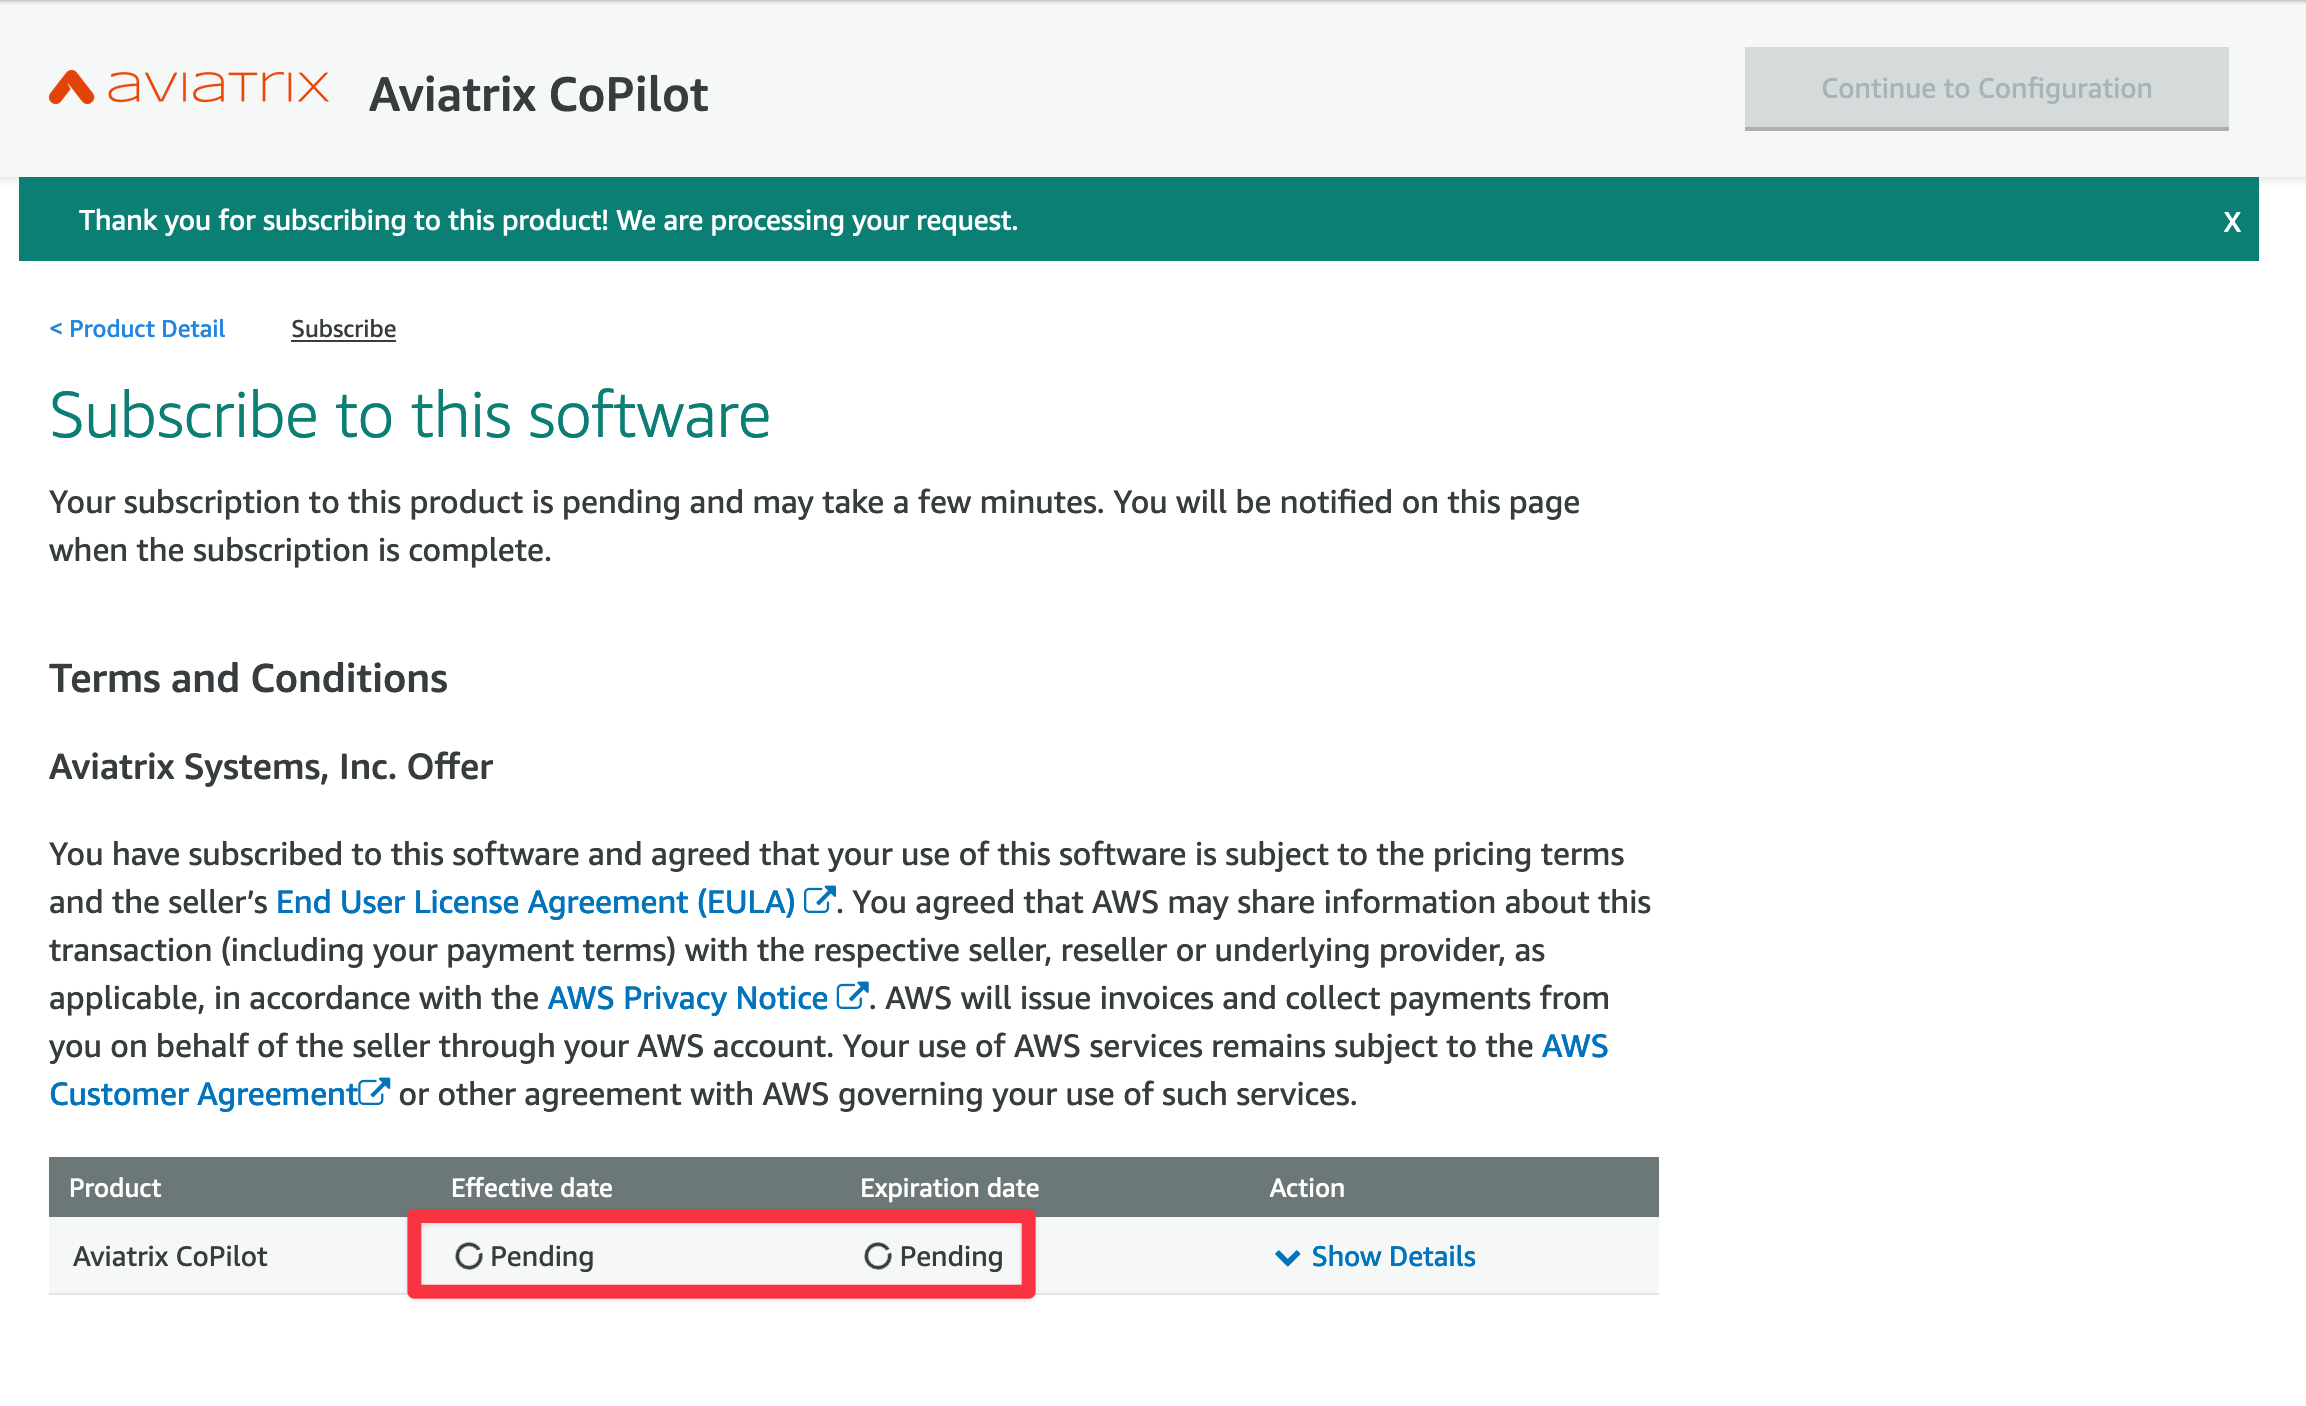
It will take few seconds before the Subscription will move from “pending” state to active state. Be patient here.

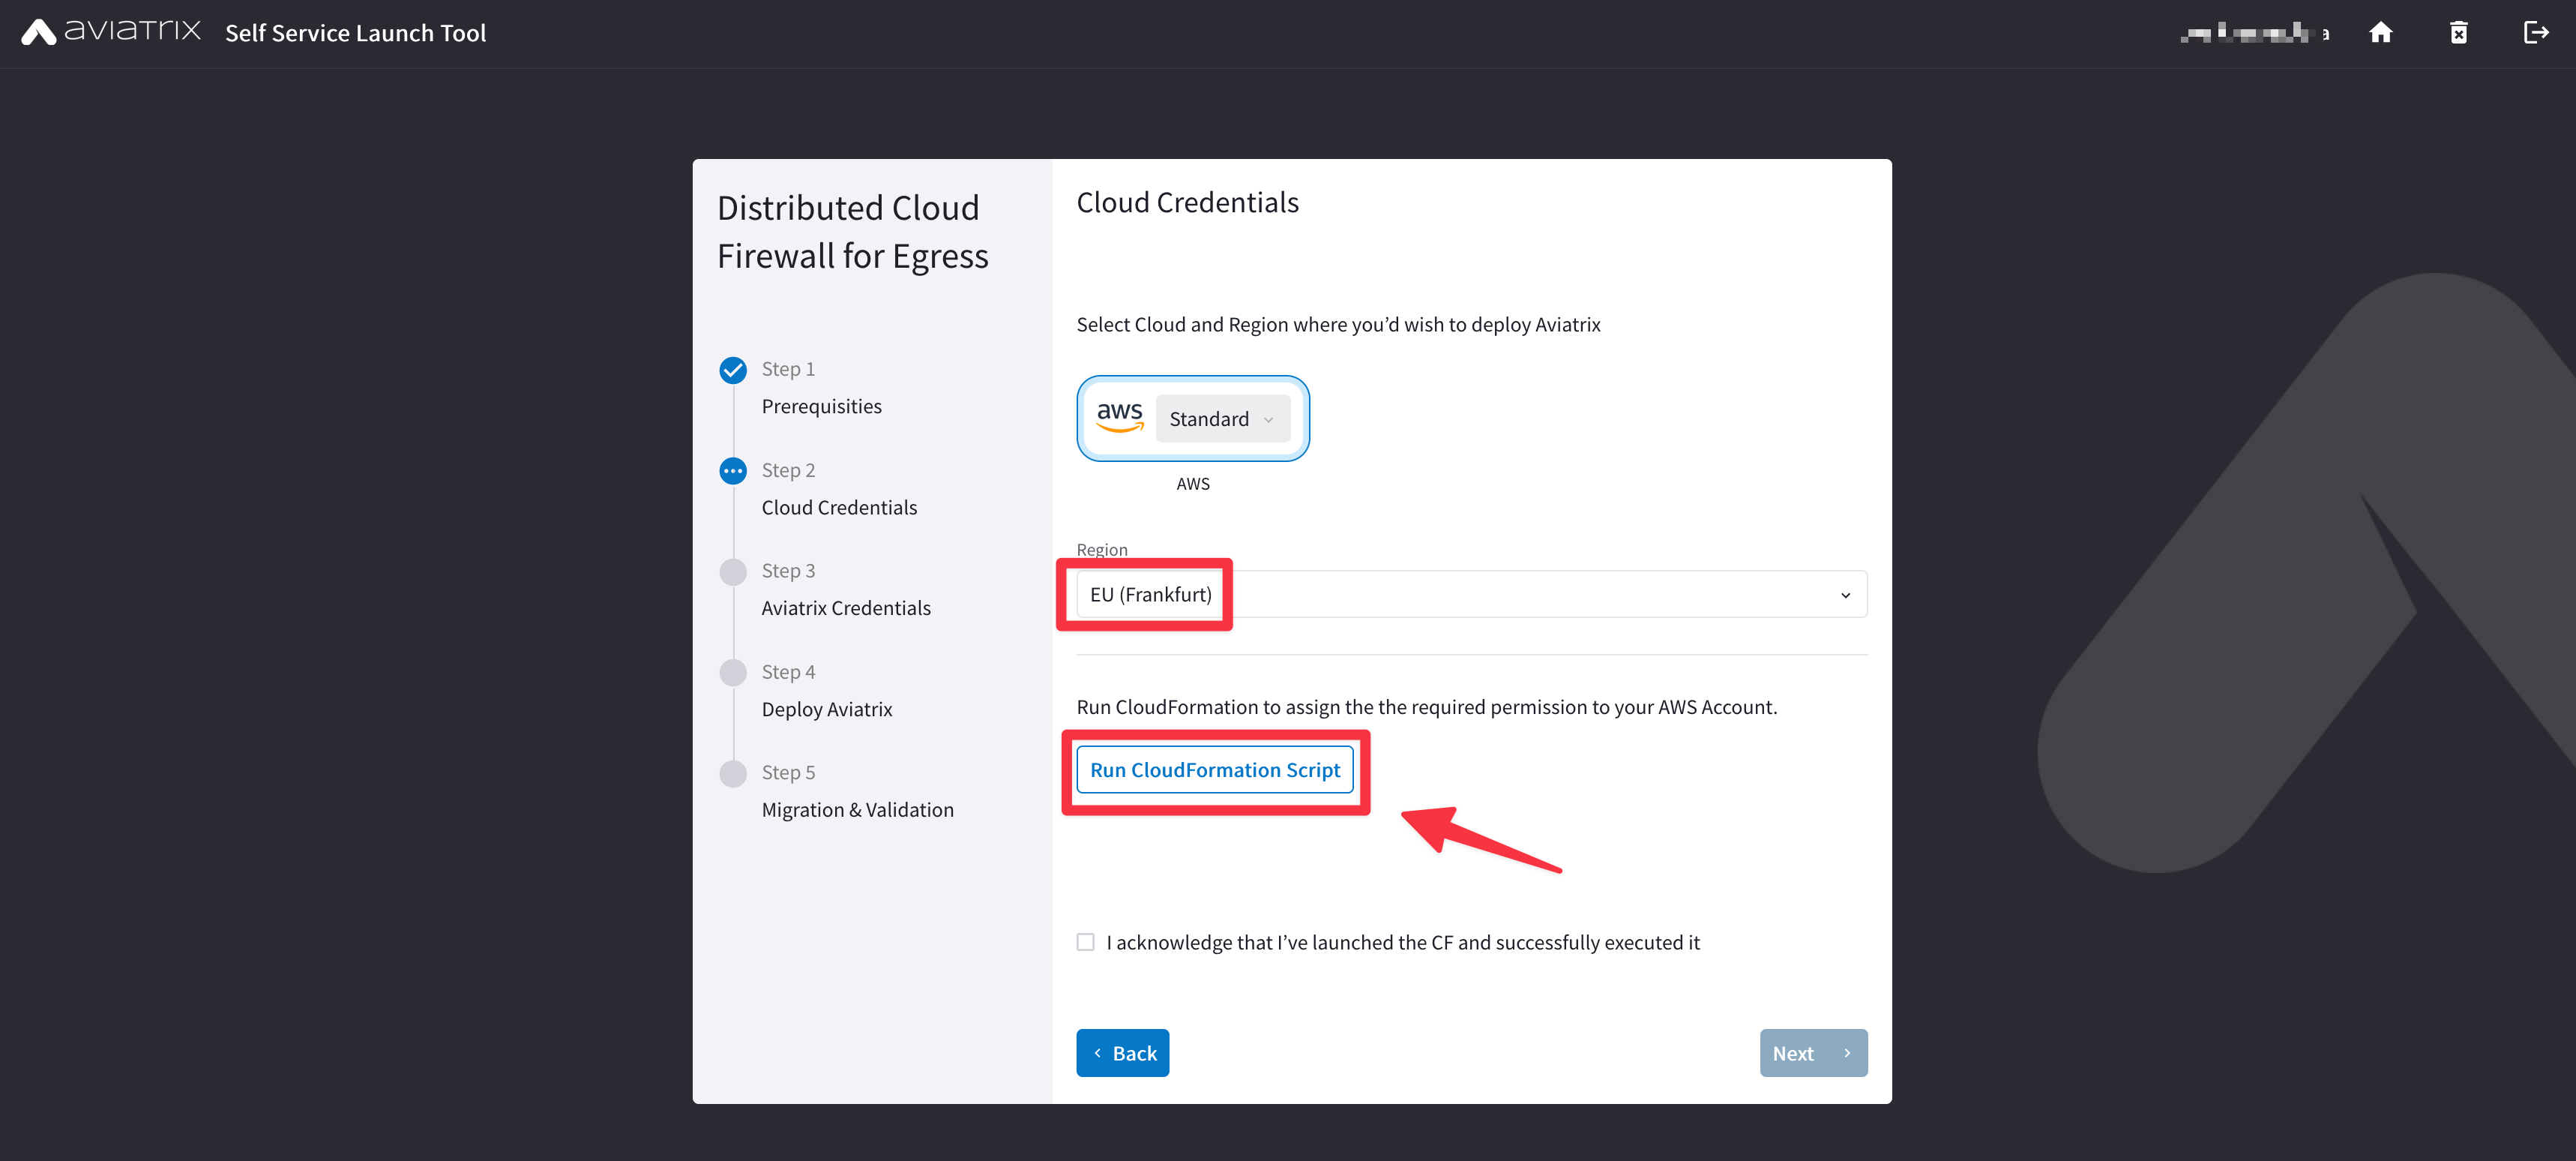
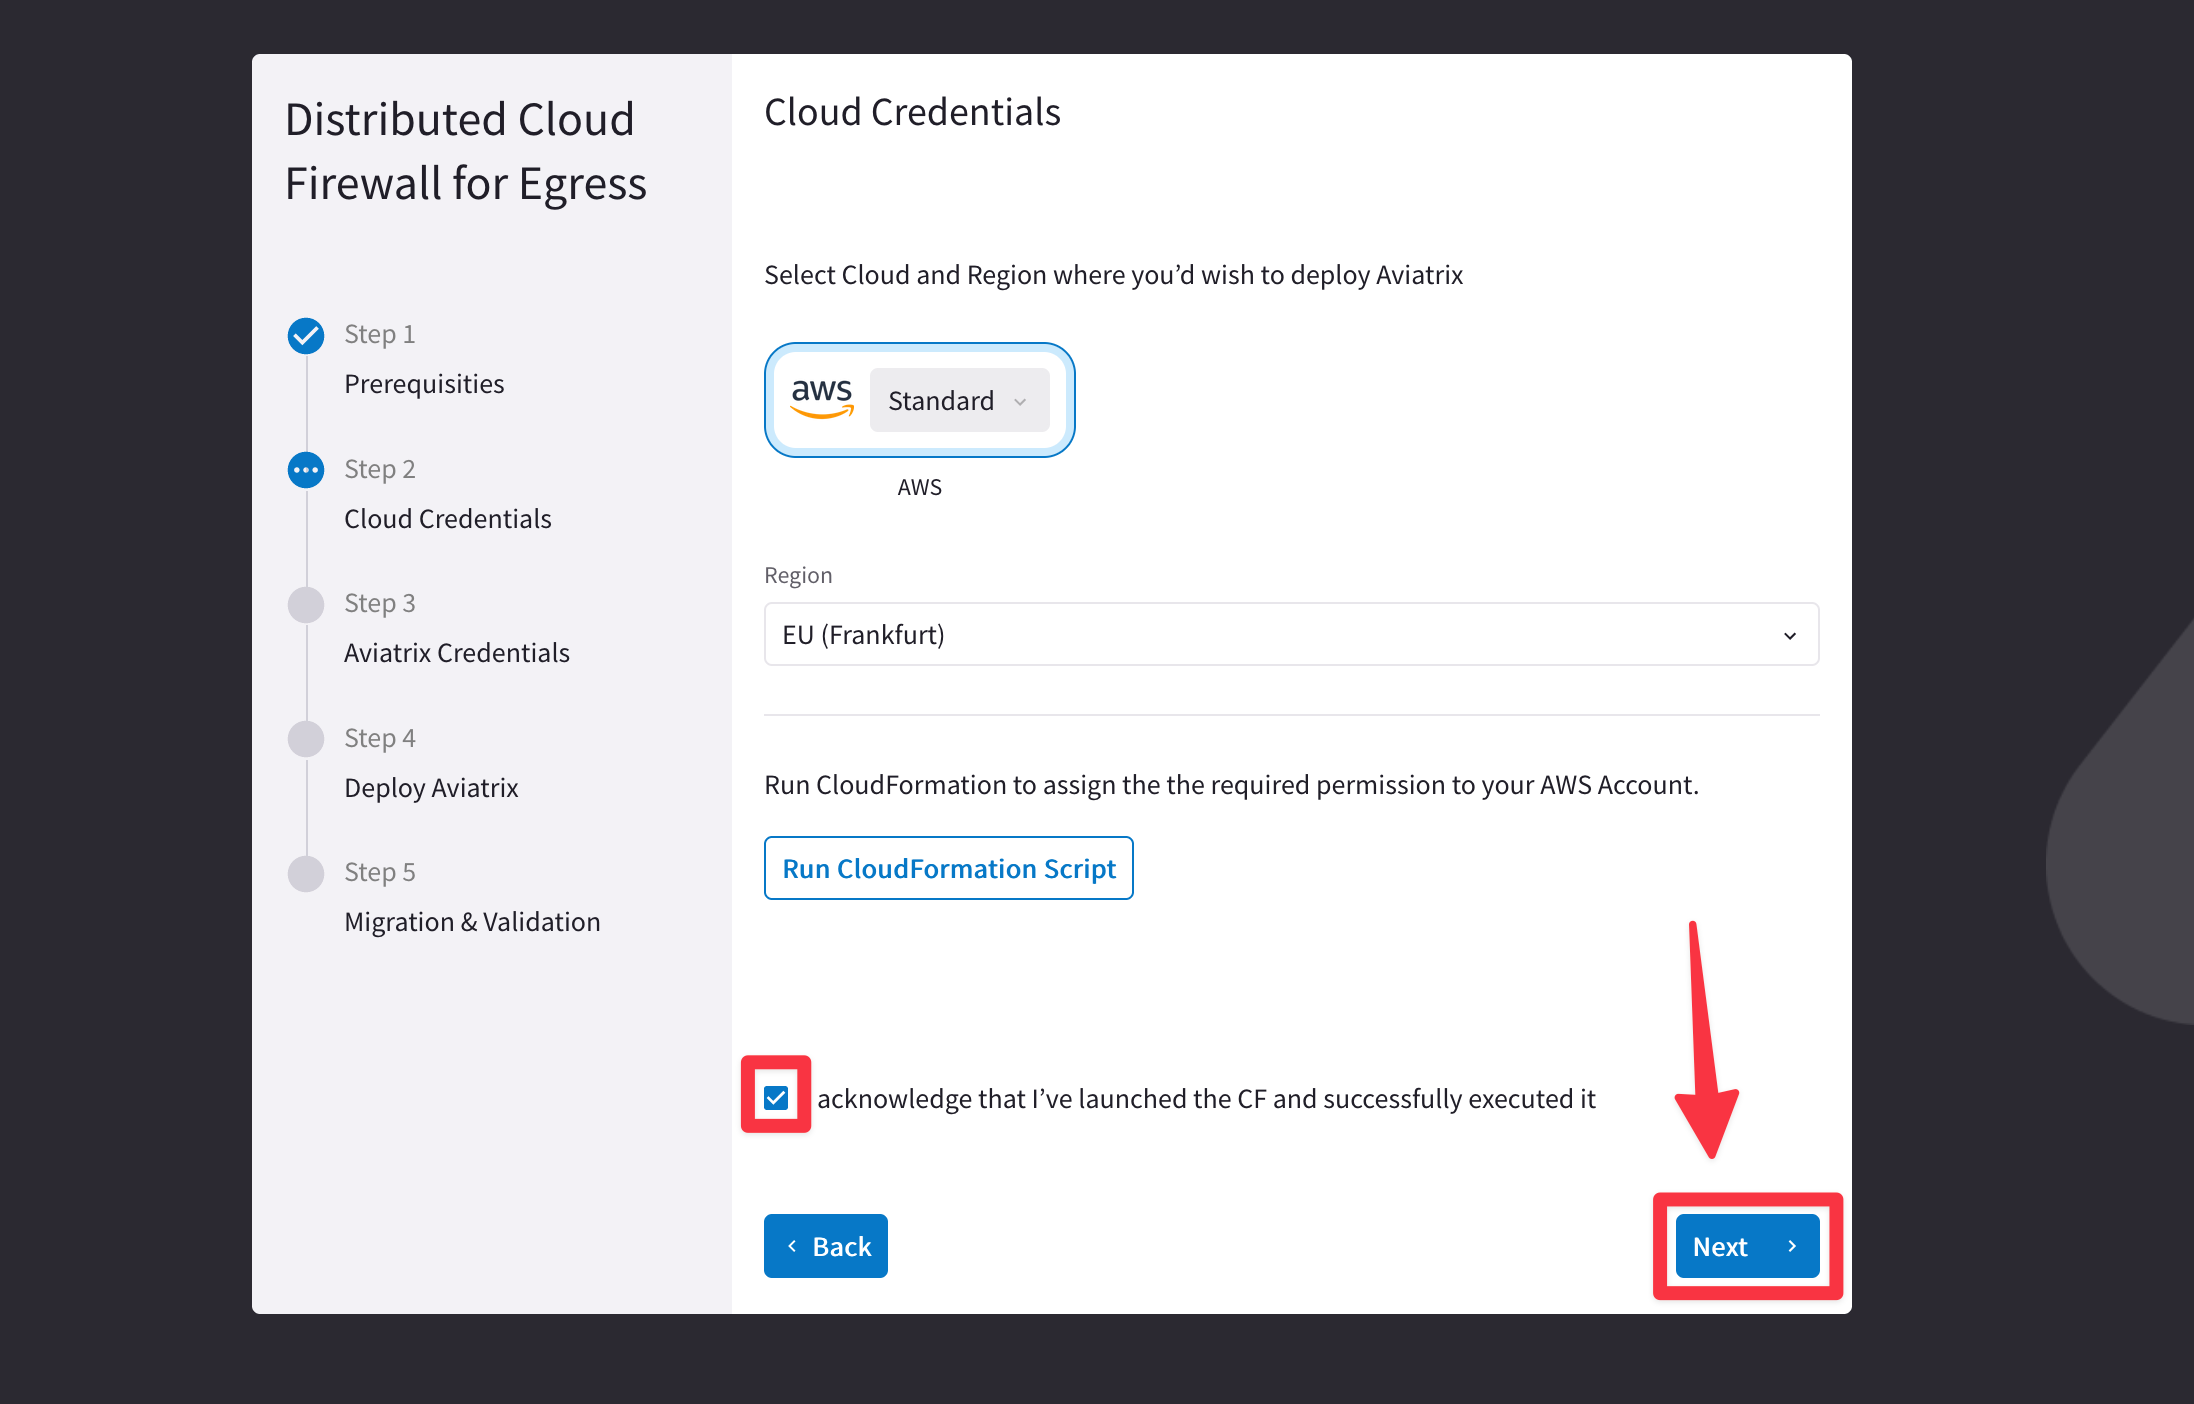
3.1.4. Step 4 - Prerequisities: Cloud Credentials
Go back on the SSLT dashboard where you have to tick the acknowledgment field and click on Next.
On the windows, choose the CSP and likewise the Region where you want to deploy the Aviatrix platform and then click on “Run CloudFormation Script” button.
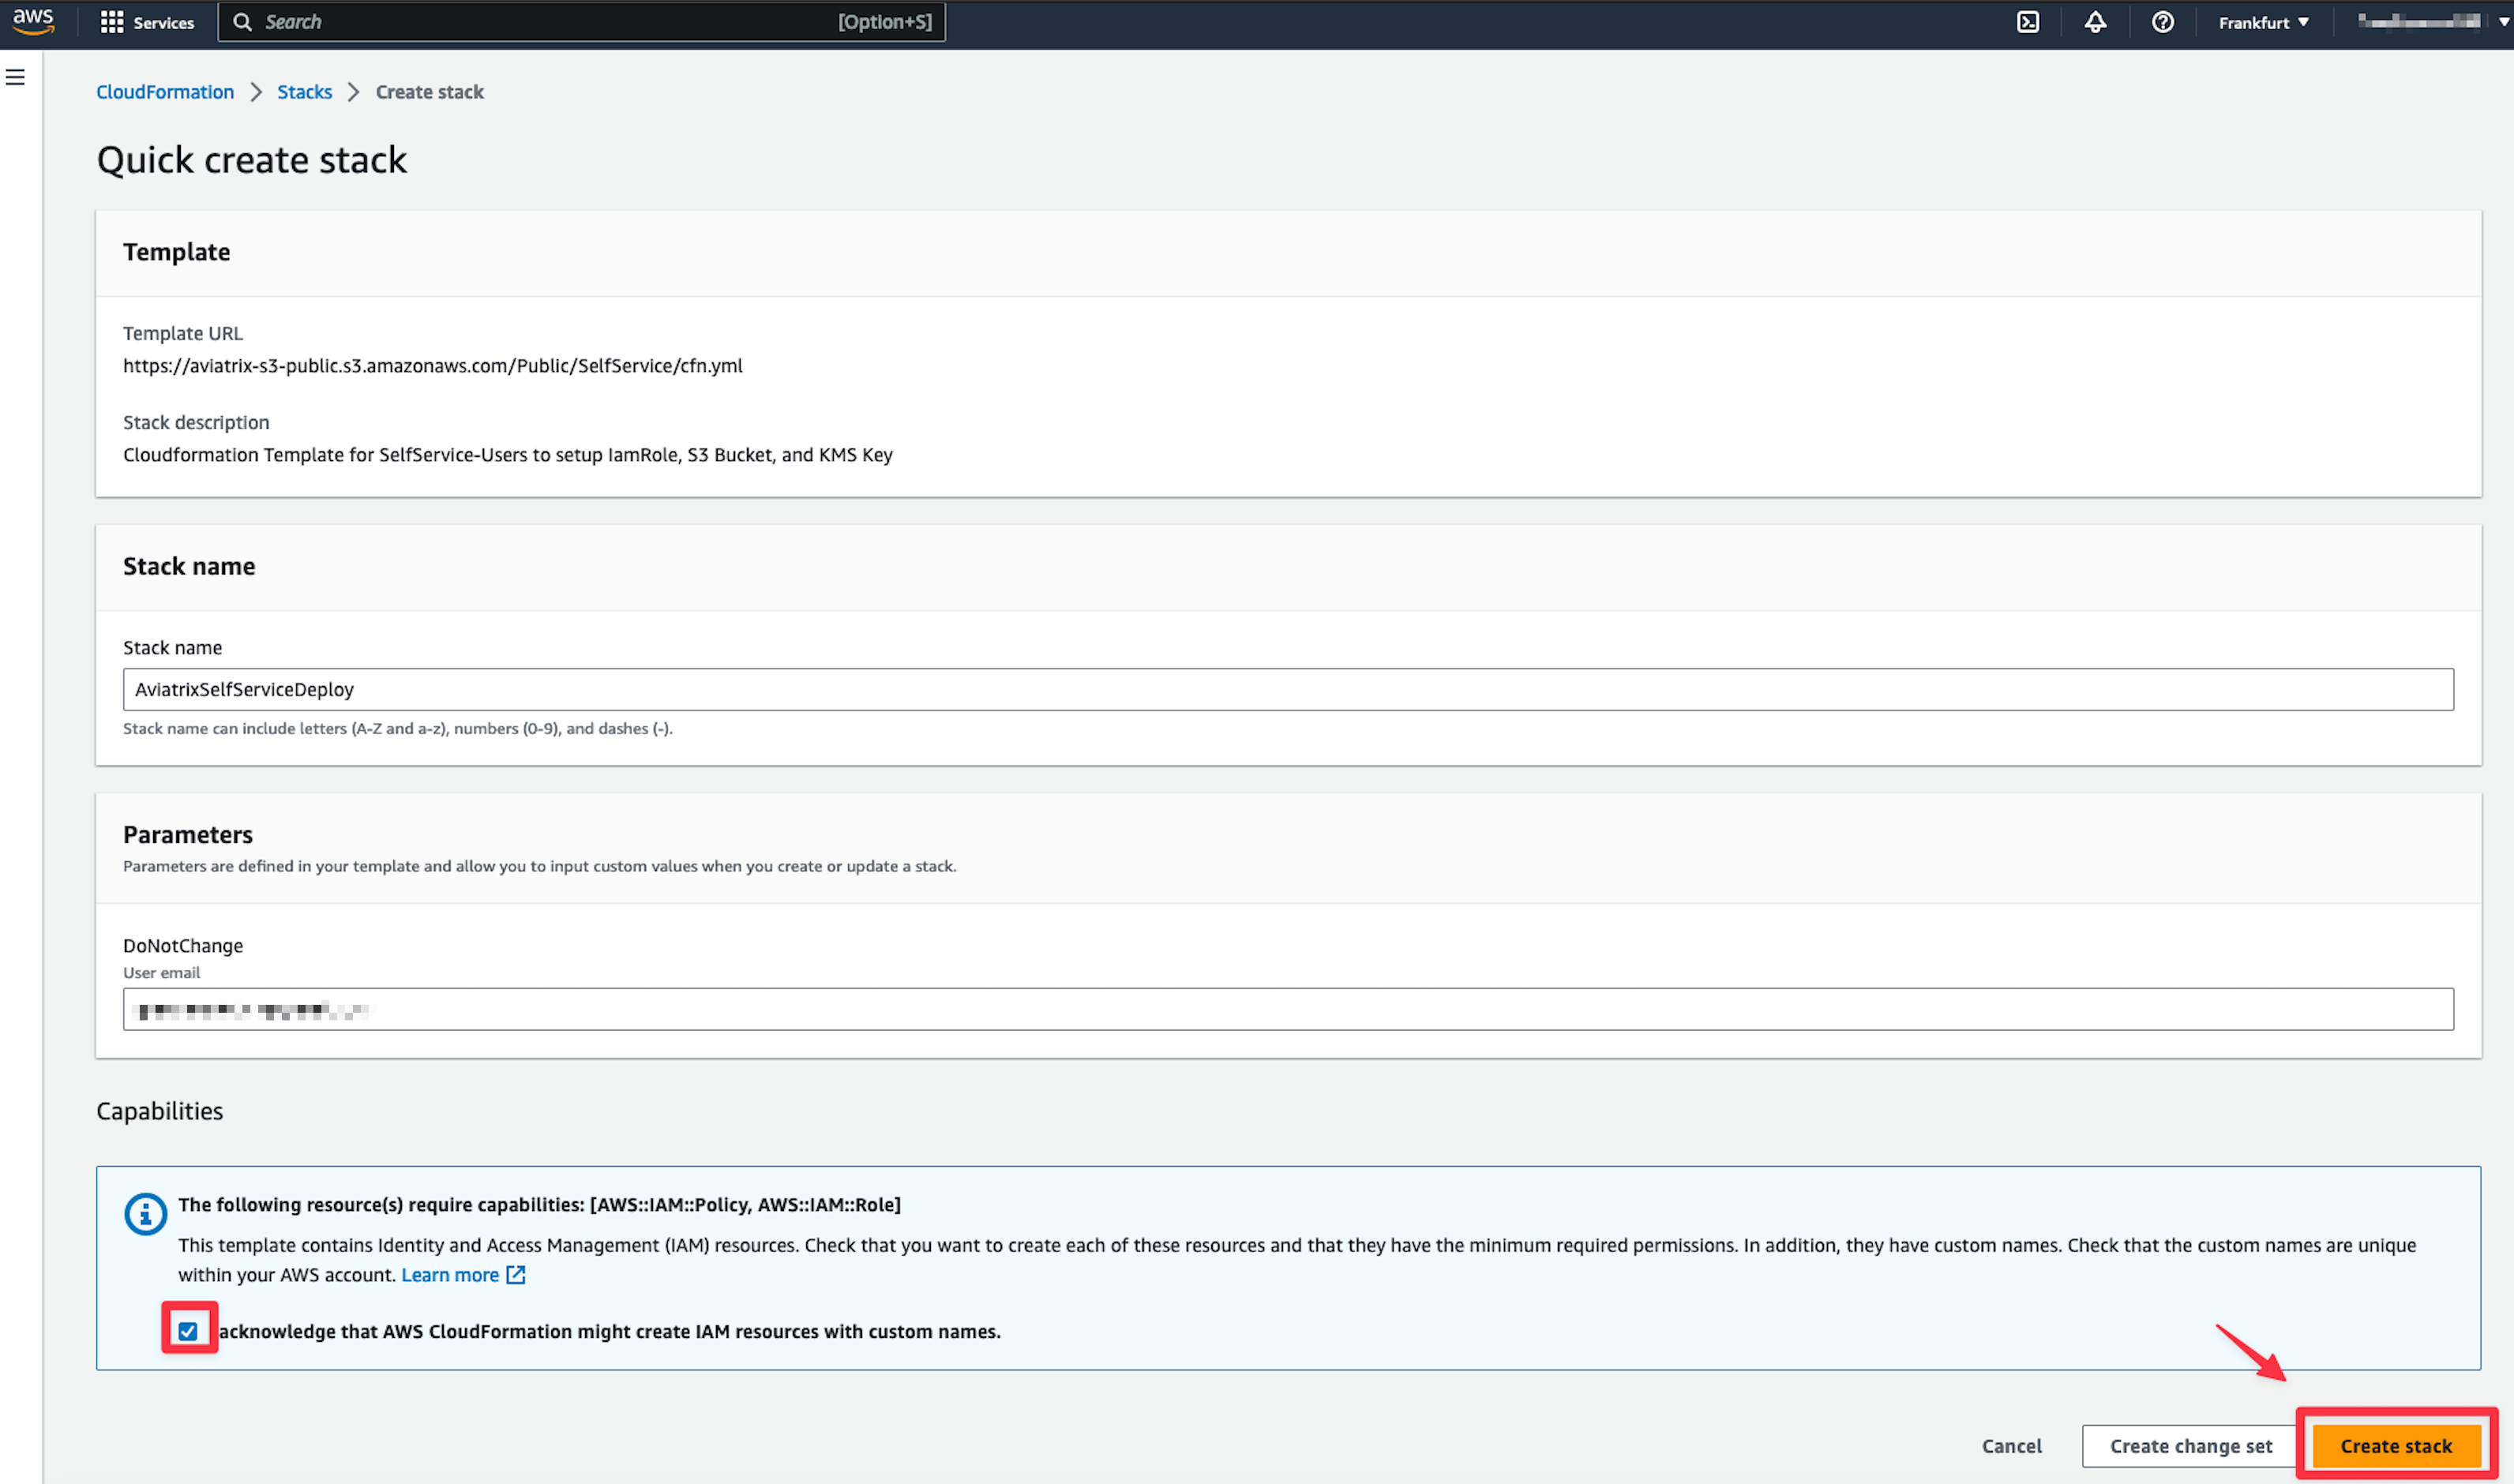
You will be redirected to the AWS console. Here you have to tick the acknowledgment field and then click on the “Create stack” button.
Wait for some minutes for the CloudFormation stack to get deployed.
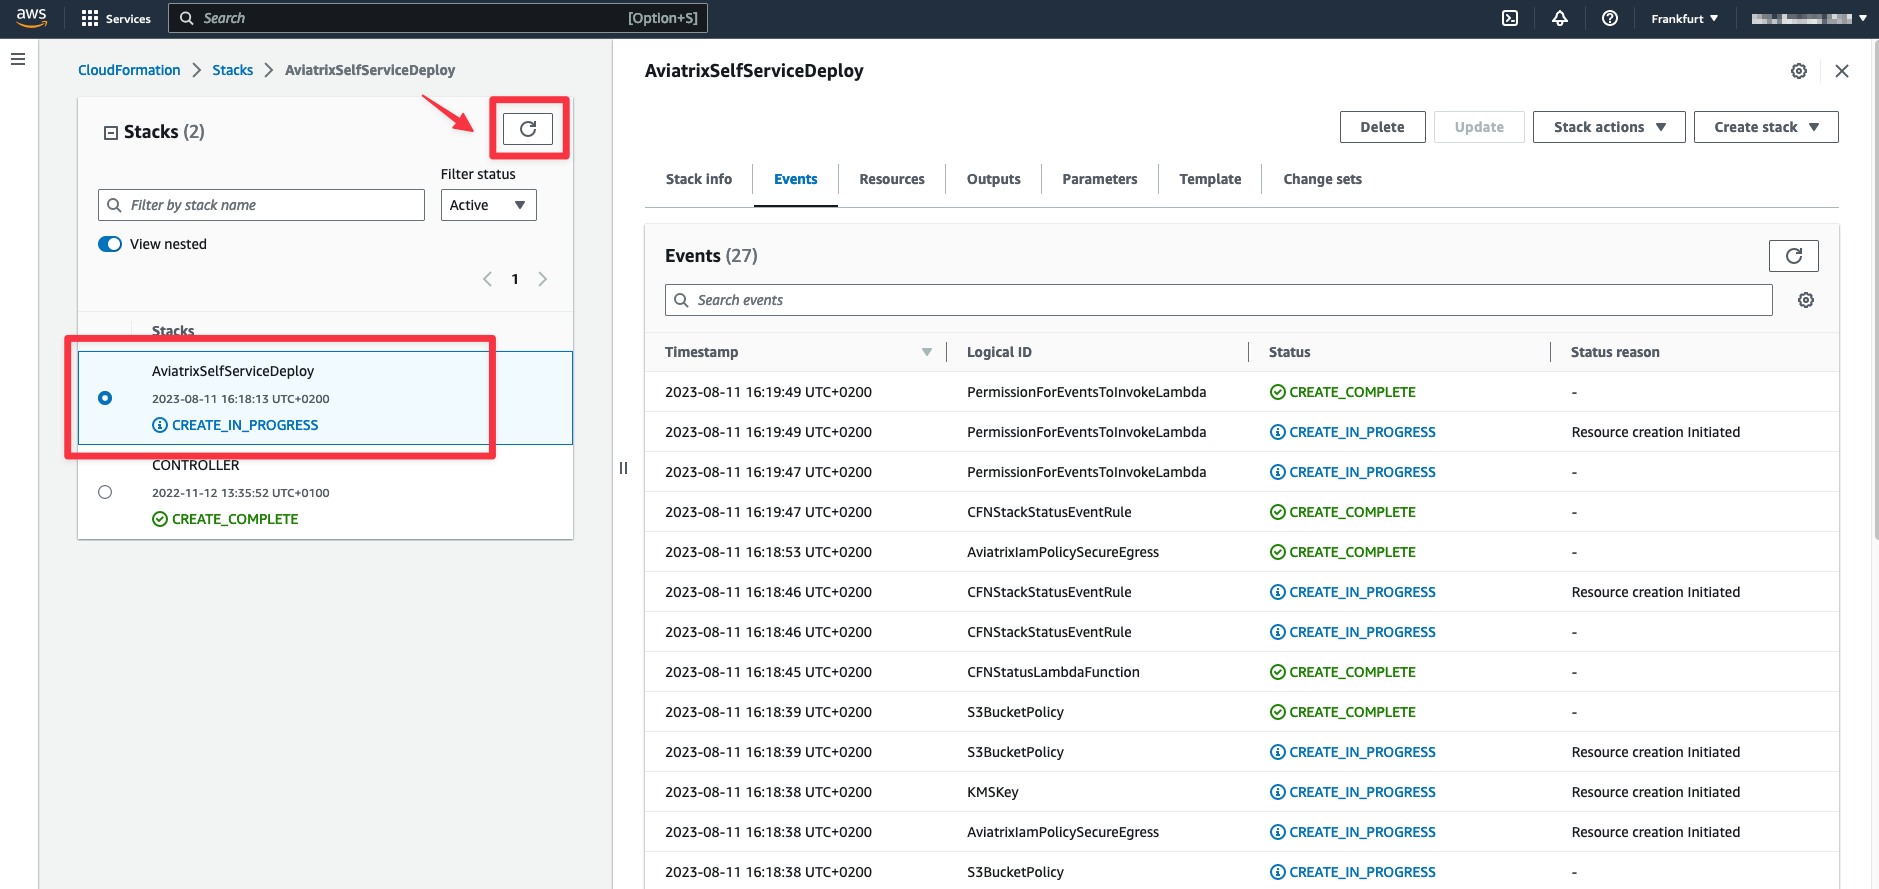
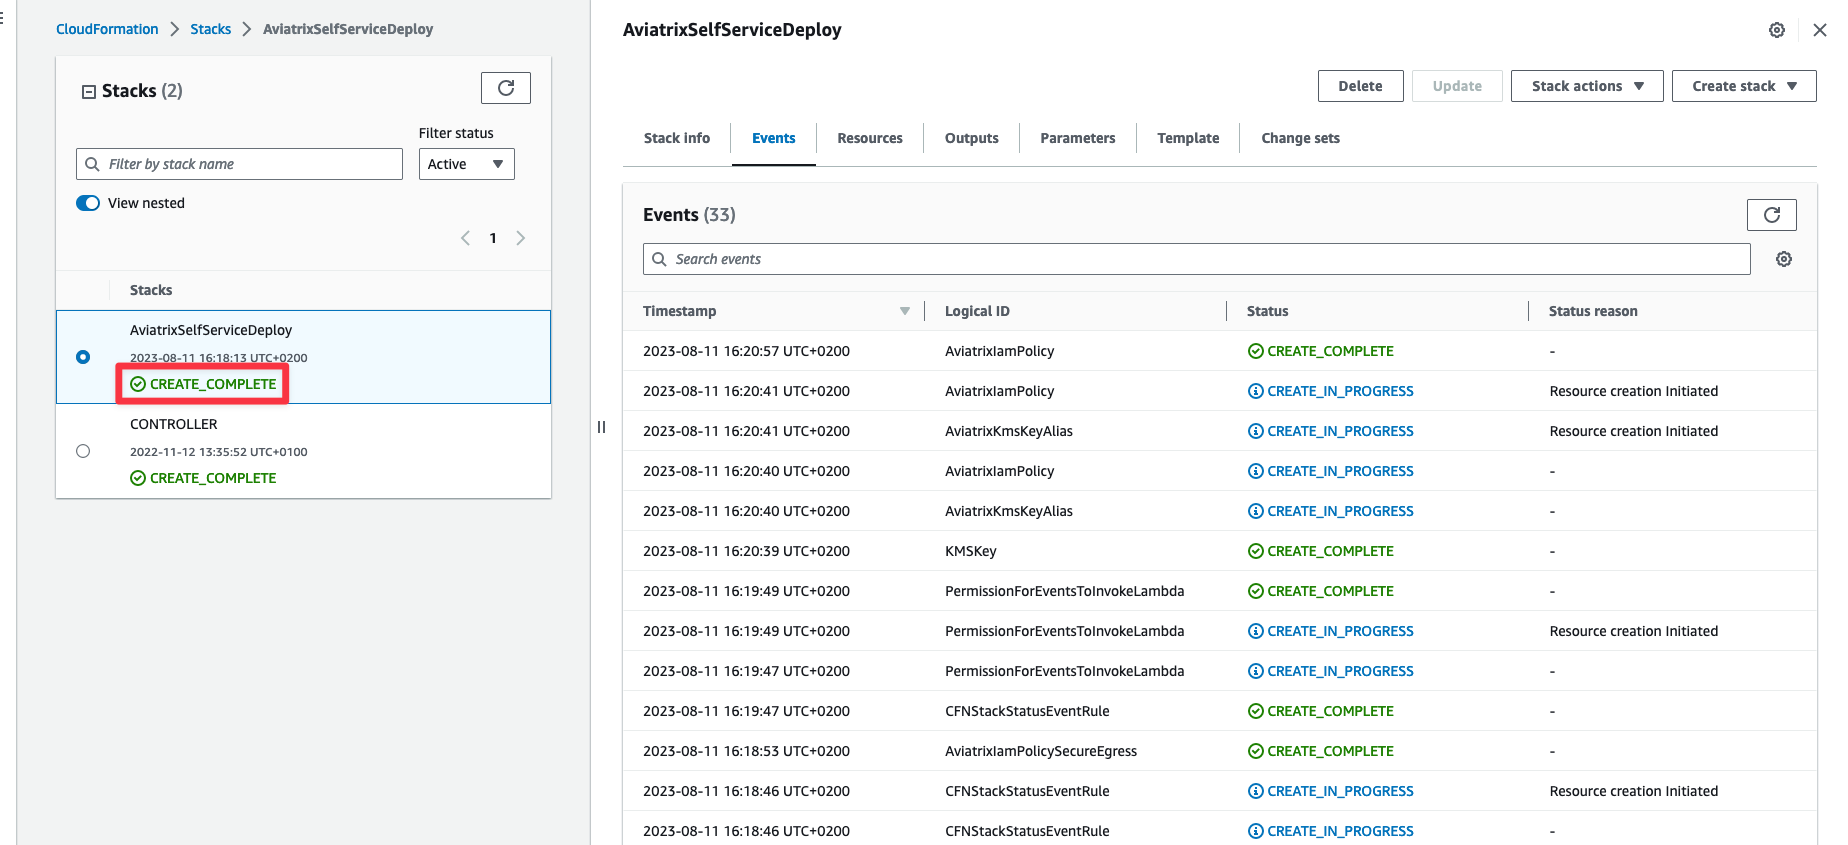
You can check the progress with the Refresh button, until you see the final state “CREATE_COMPLETE” message that will confirm the completion of the stack deployment!
3.1.5. Step 5 - Aviatrix Credentials
Go back on the SSLT dashboard where you have to tick the acknowledgment field and click on Next.
On the next window you have to insert your Email, choose and insert a strong Password, paste the Account ID (from your personal AWS account), paste the Customer ID (aka License) that you generated on step 3.1.1. and then click on Next.
The screen will blur for few seconds…
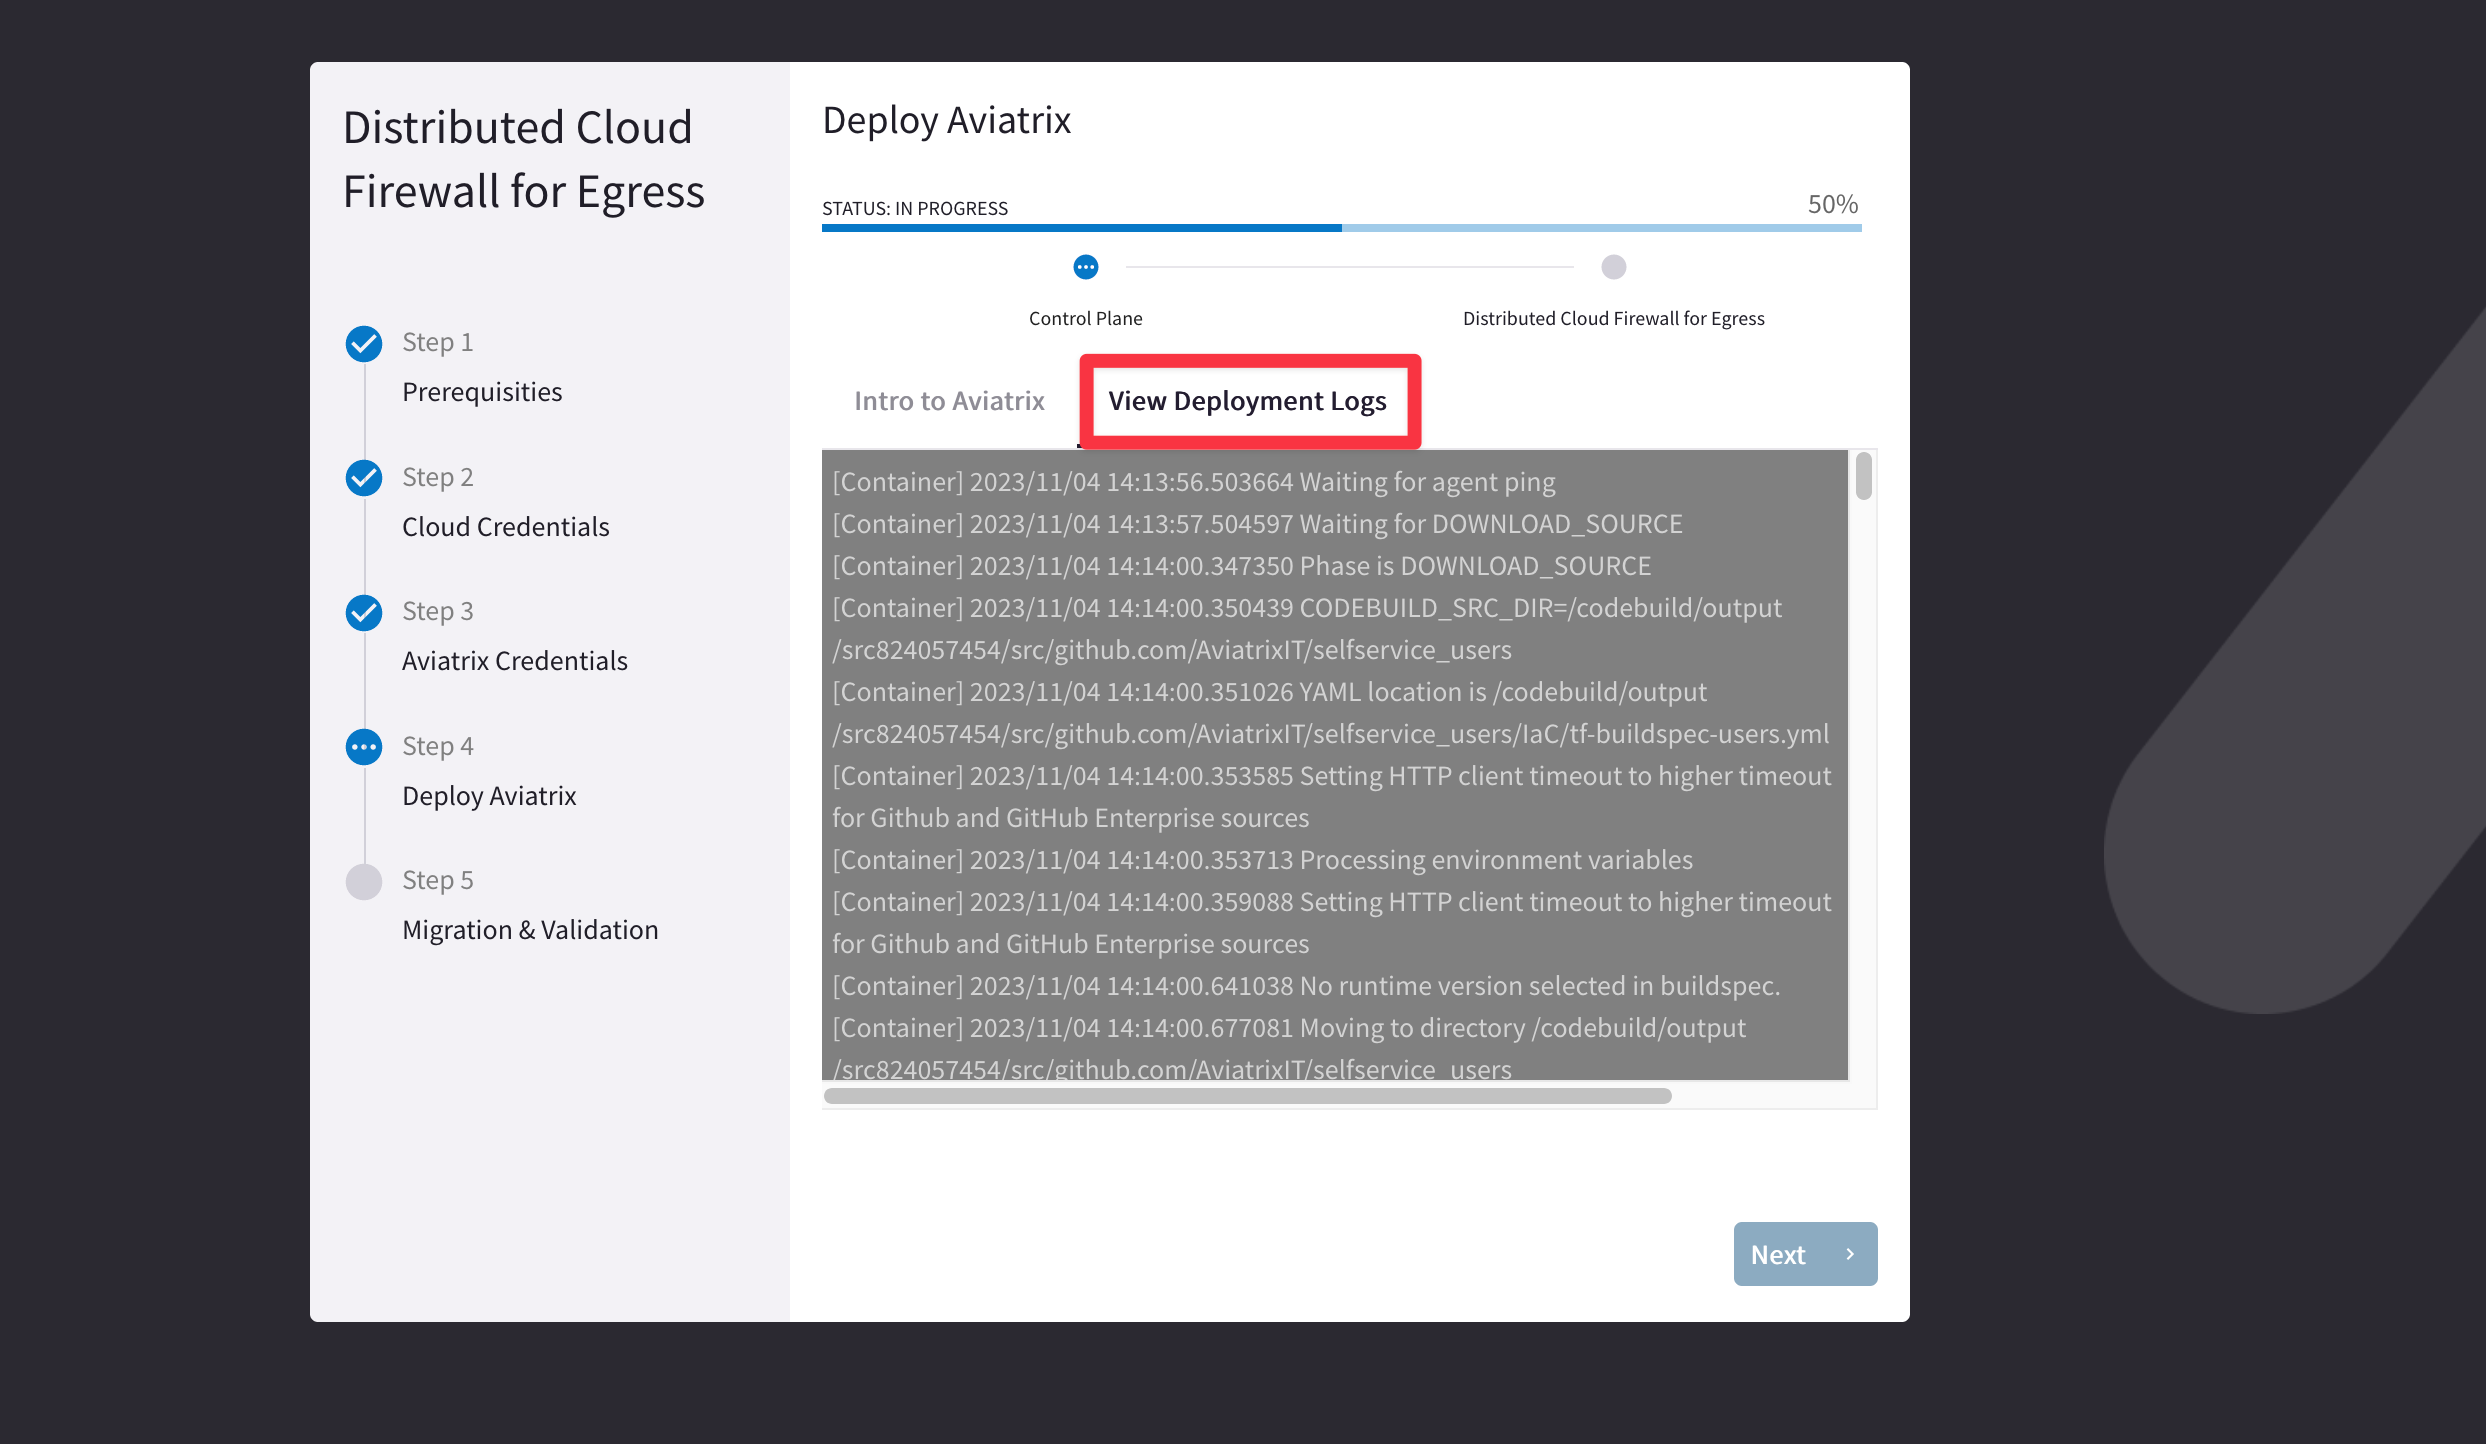
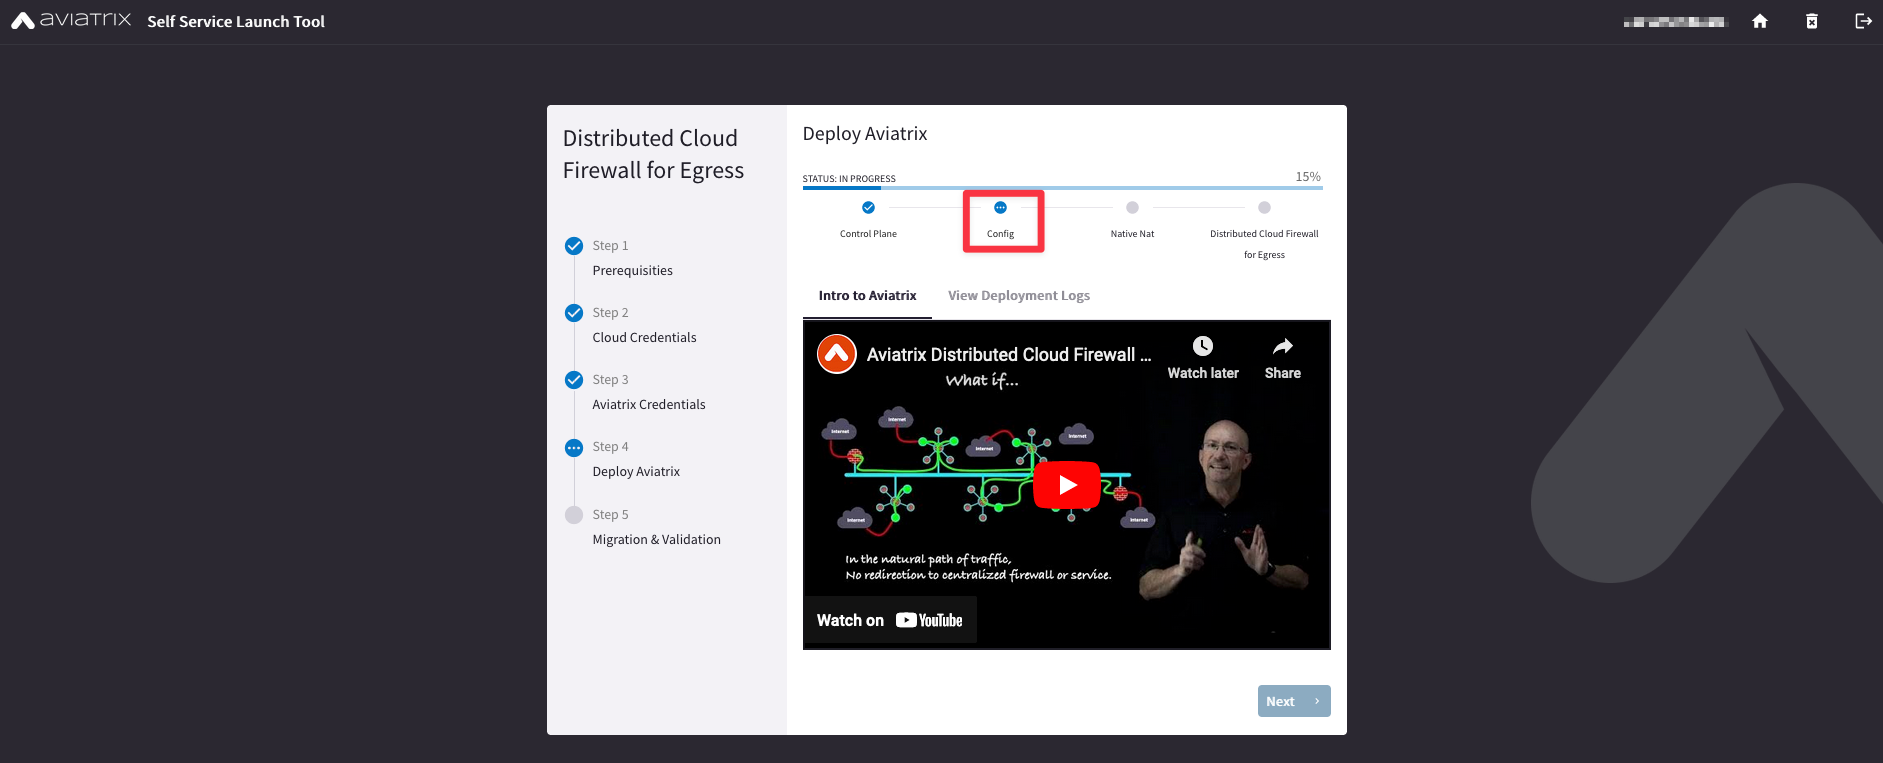
3.1.6. Step 6 - Deploy Aviatrix
Wait for some minutes for the completion of the Control Plane deployment.
Please be patient because the deployment will go through several phases. Meanwhile you can watch an interesting video on YouTube about the DCF (Distributed Cloud Firewall).
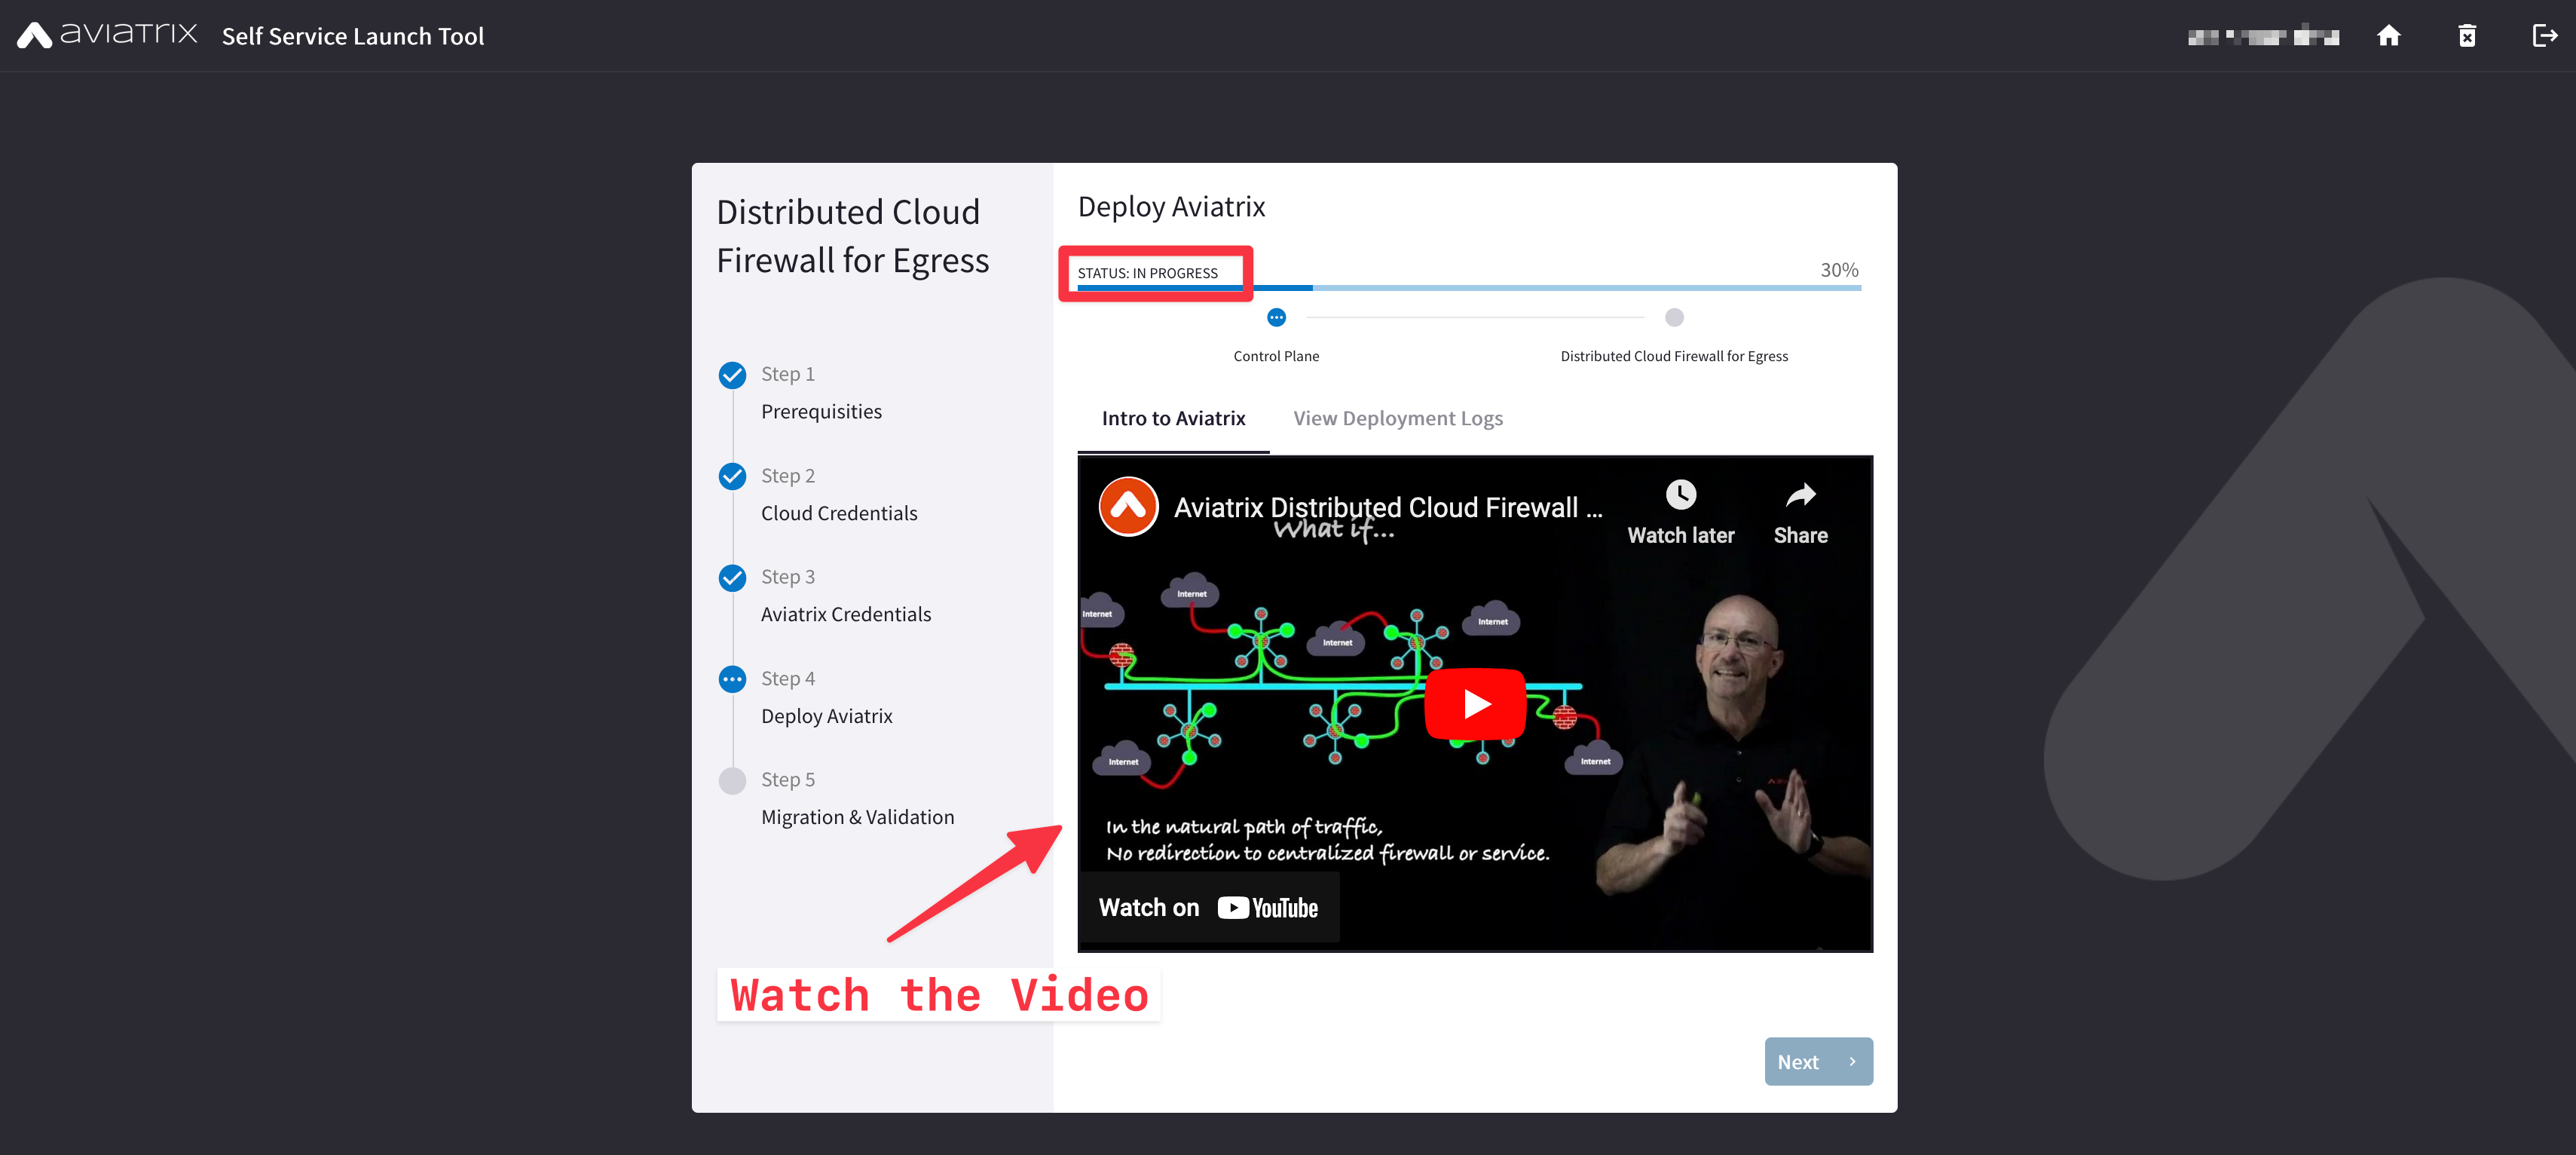
Meanwhile you can also check the Logs clicking on the “View Deployment Logs” Tab!
After the deployment of the Control Plane, wait other few minutes for the Config phase that gets completed.
Then wait for the completion of the Native Nat phase, as depicted below.
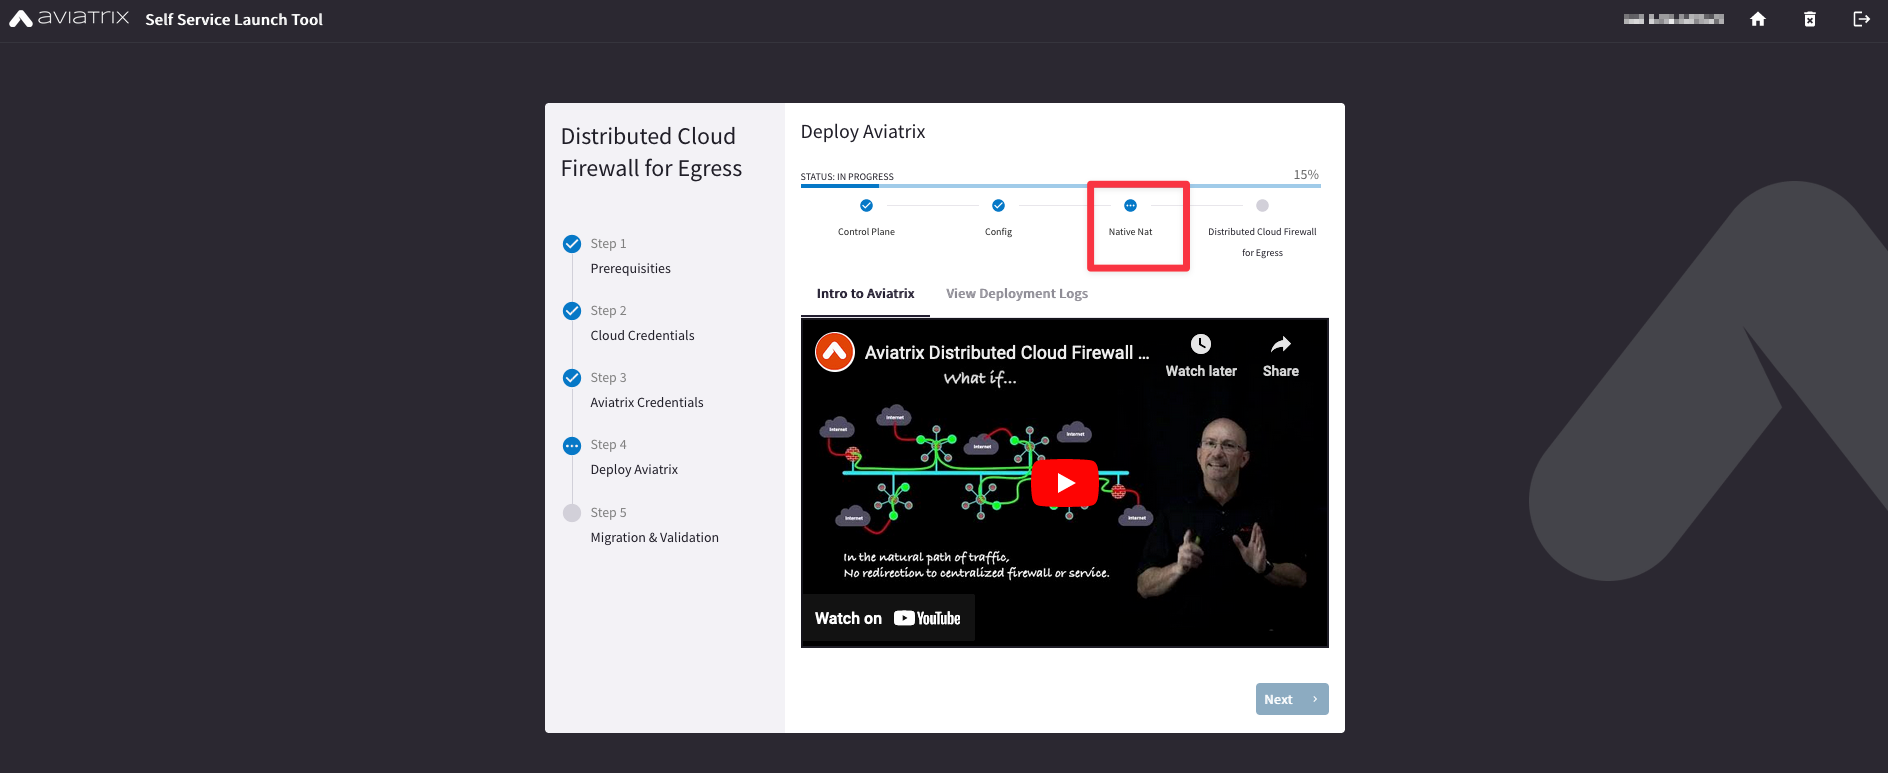
Wait until you see “Sucess 100%” and then click on Next.
Afterwards you will be able to utilize the Distributed Cloud Firewall fo Egress scenario!