Problem Statement
Enterprises and SaaS providers need to extend secure connectivity from their Aviatrix multi-cloud architectures to the IBM cloud. In cases of mergers, acquisitions, and on-prem migrations, etc., this connectivity often results in overlapping IP addresses between the IBM cloud and other CSP deployments.
Solution
Aviatrix spoke gateways deployed in any cloud can establish secure IPsec VPN connections directly to VPN Gateways deployed in the IBM Cloud. The Aviatrix spoke gateways can perform NAT to handle the overlapping IP address space. In this article, we’re using mapped NAT to translate the overlapping real CIDRs into NAT’d virtual CIDRs. This removes the need to configure individual SNAT/DNAT rules. Custom NAT is also an option for use cases where it’s required.
For more examples of mapped NAT provisioning, please refer to this article: Site2Cloud Overlapping CIDR with Branch
Architecture Diagram
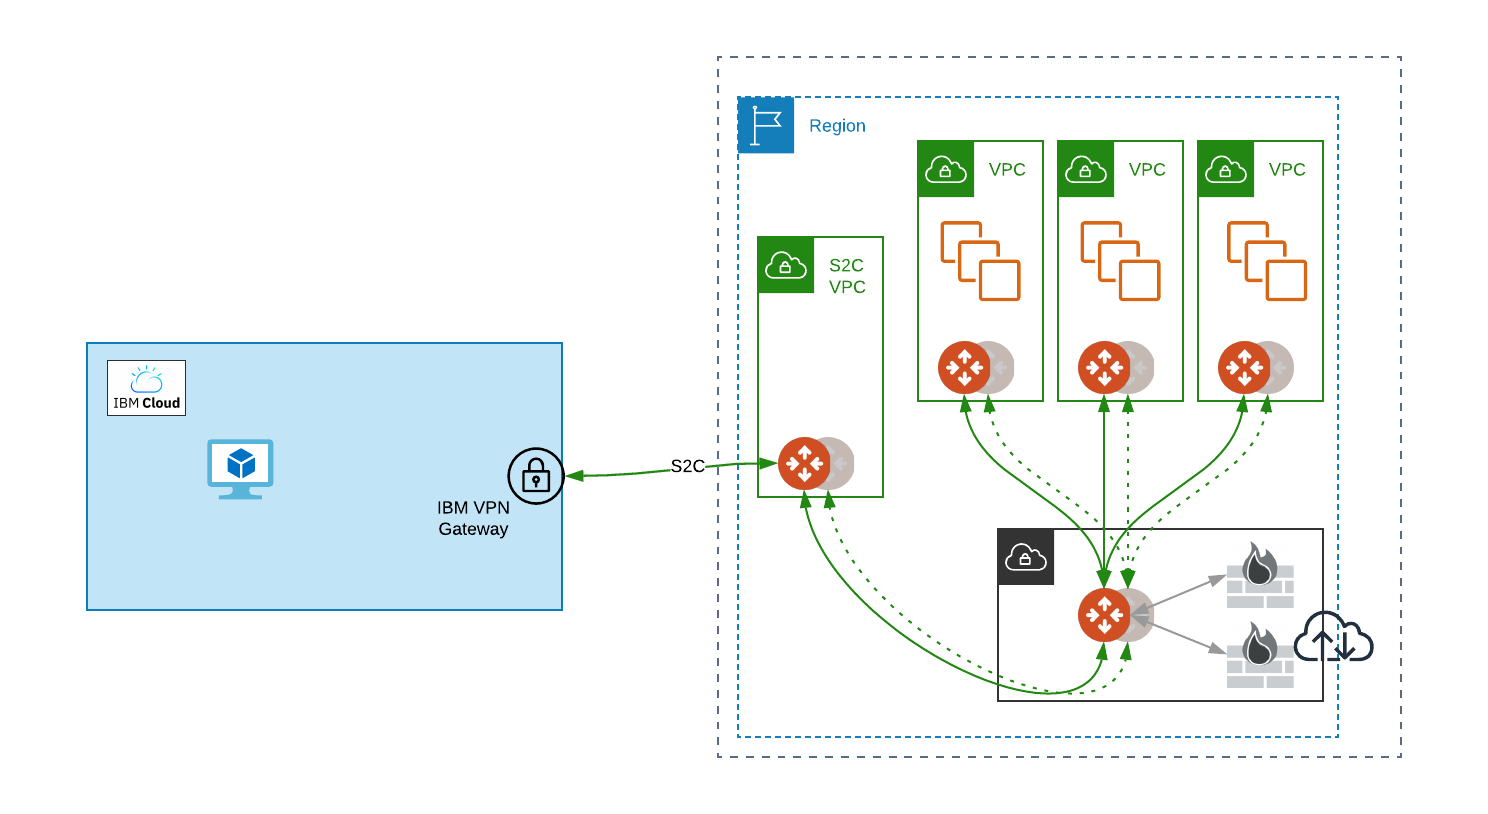
Deployment Workflow
IBM Cloud Side
-
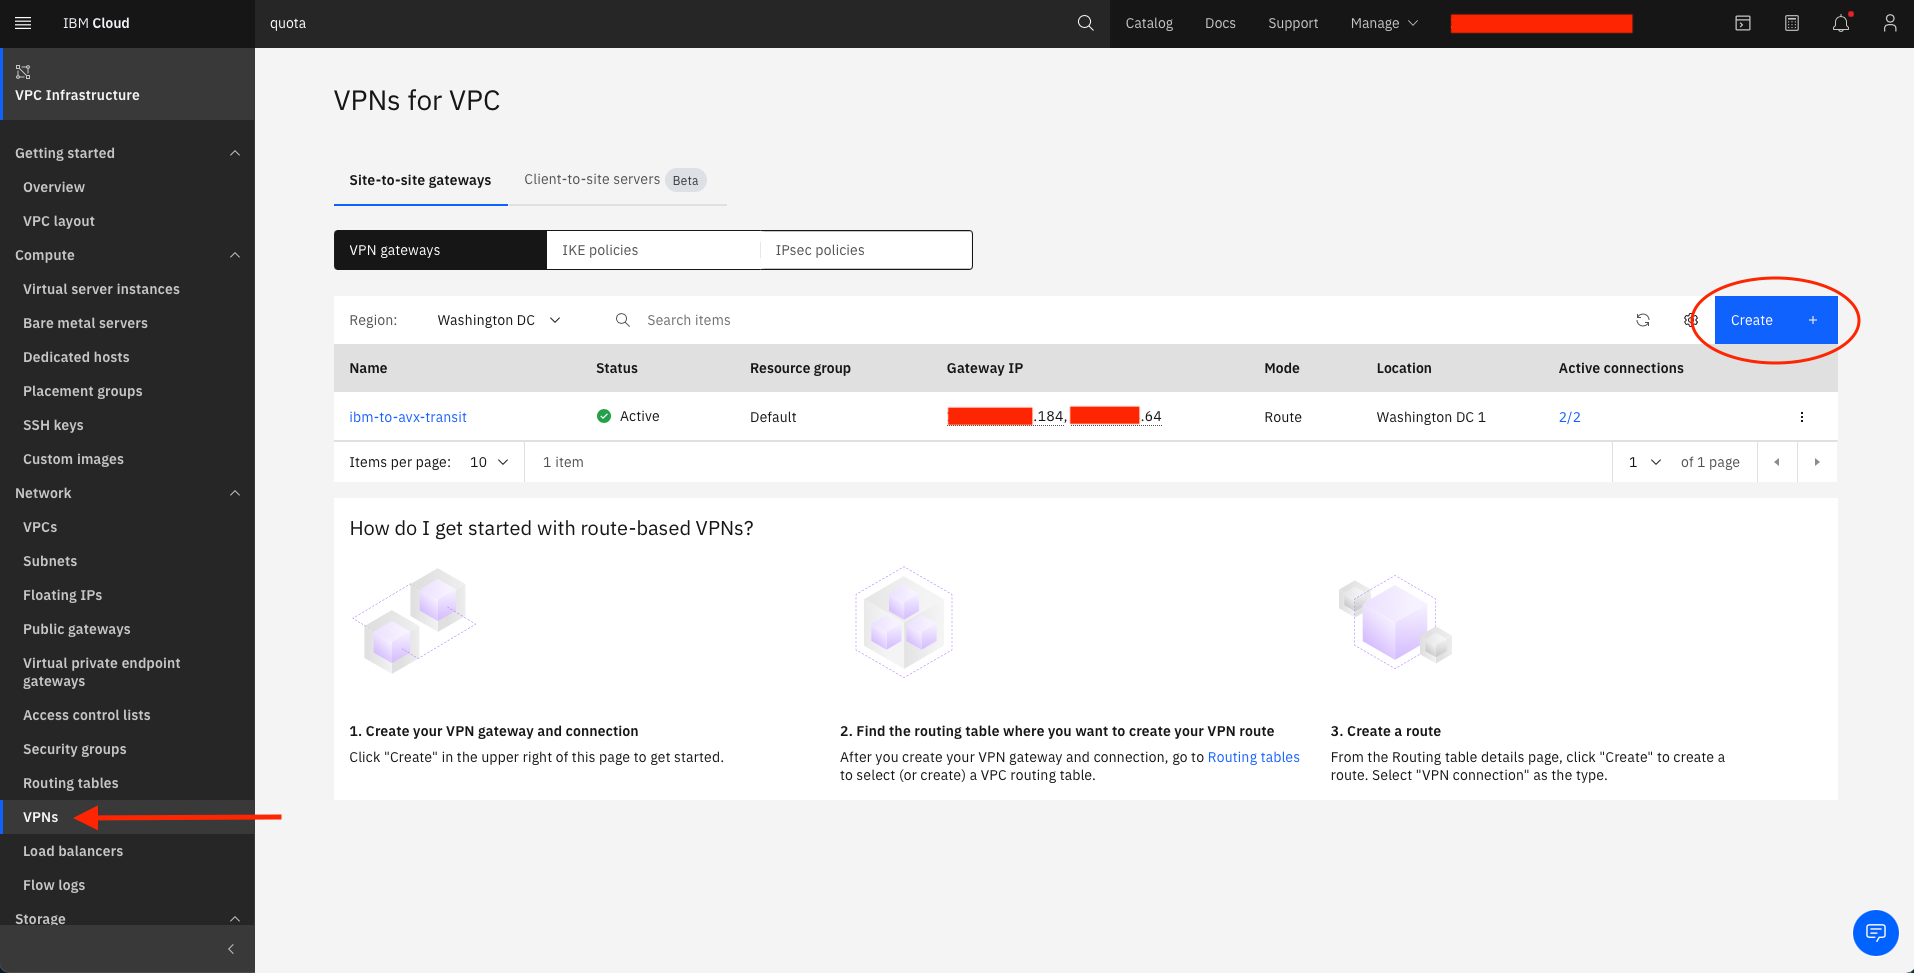
Navigate to the VPN Gateway creation page
-
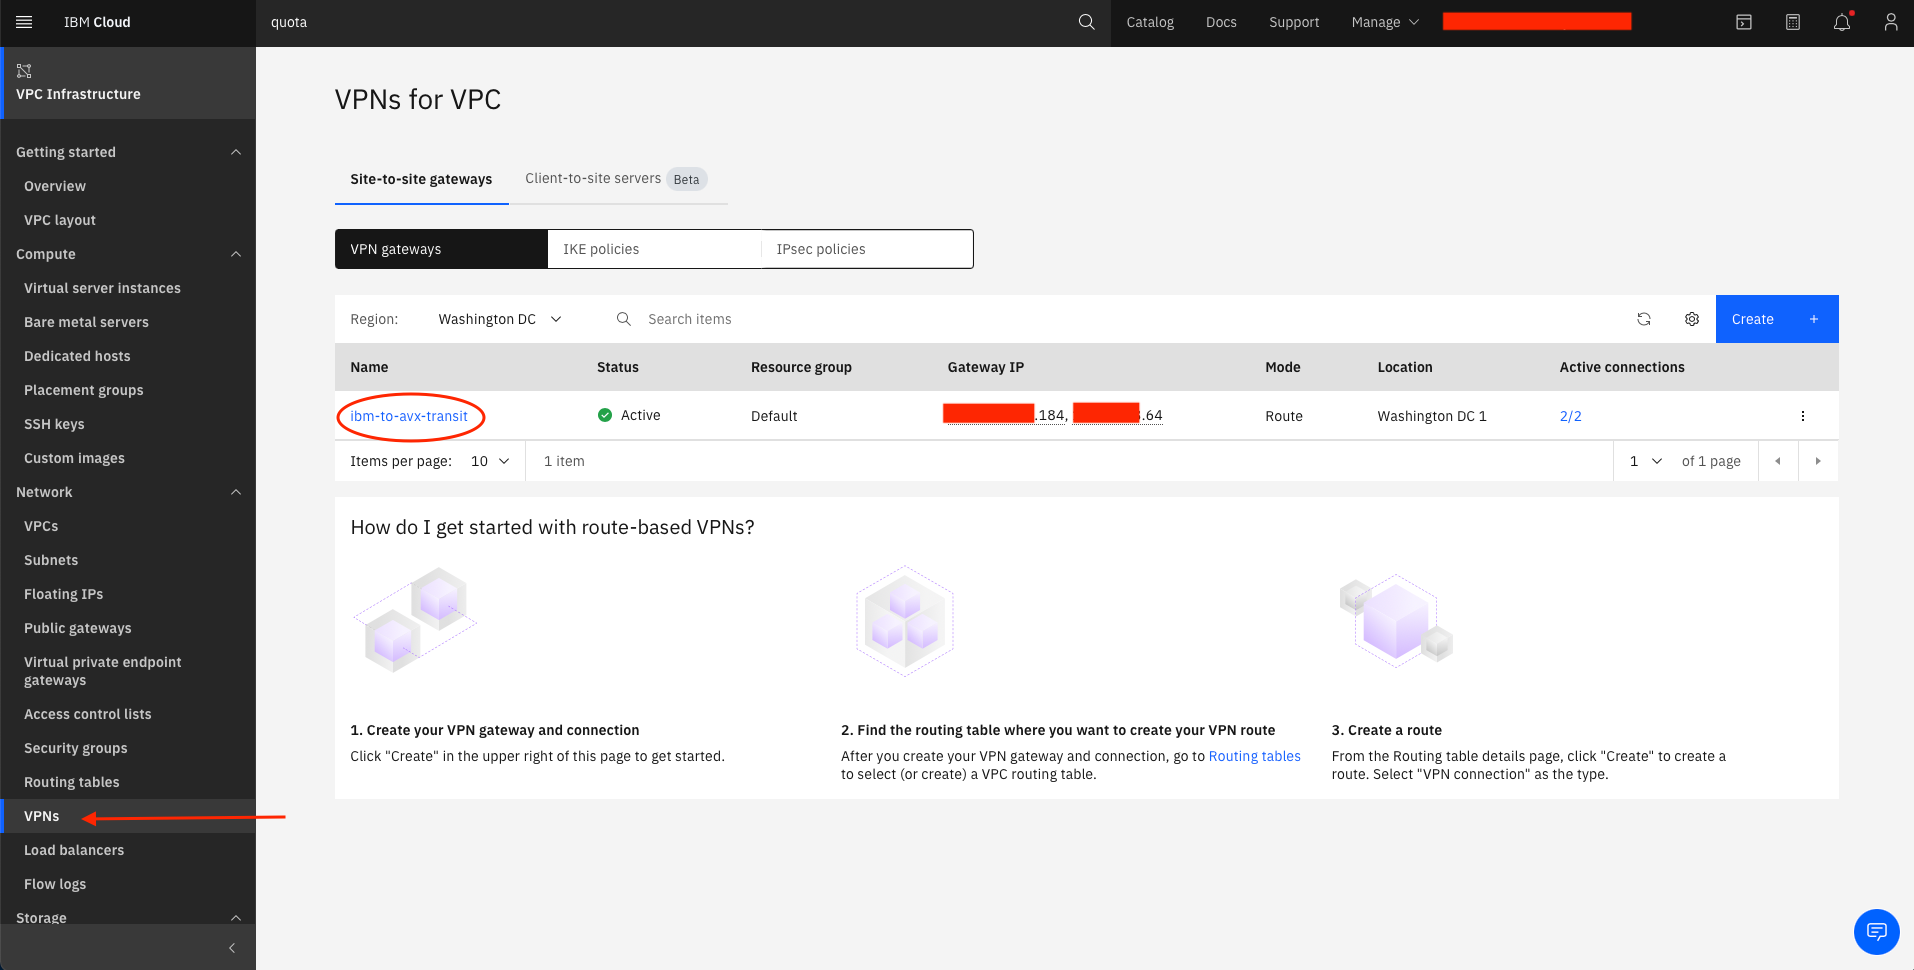
Under Network → VPNs, select Create
-
-
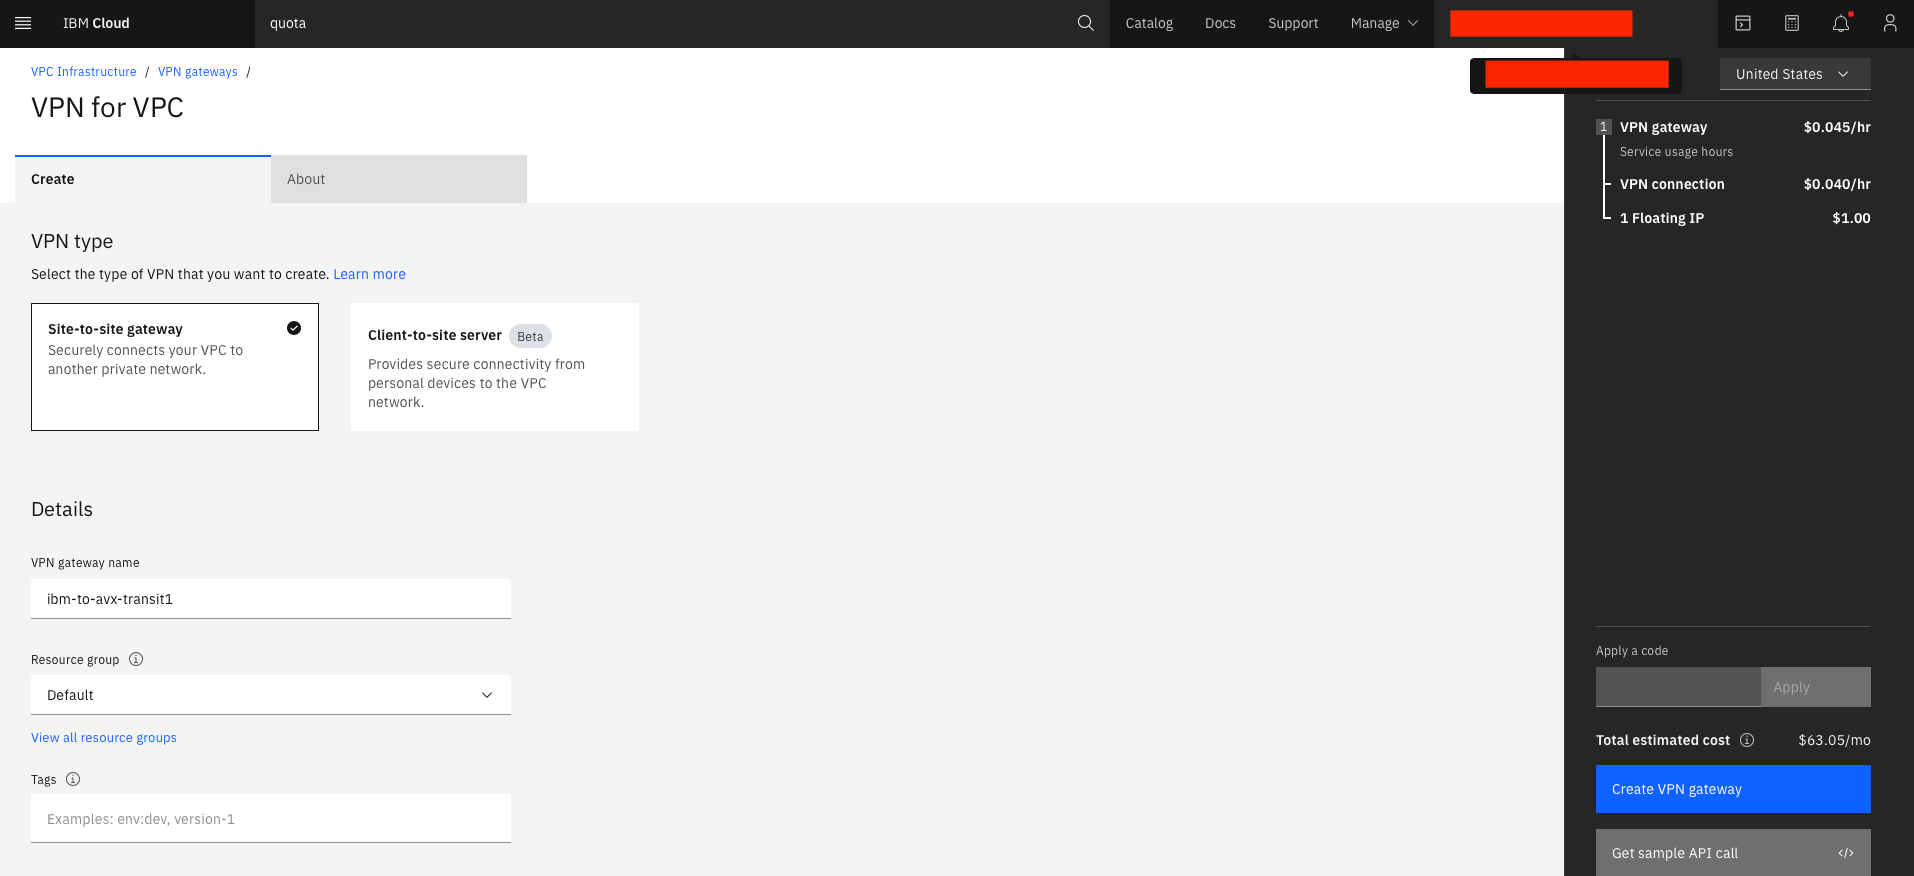
Create a Site-to-site VPN Gateway:
-
Select Site-to-site gateway
-
Enter the VPN gateway name and Resource group
-
Select the Region
-
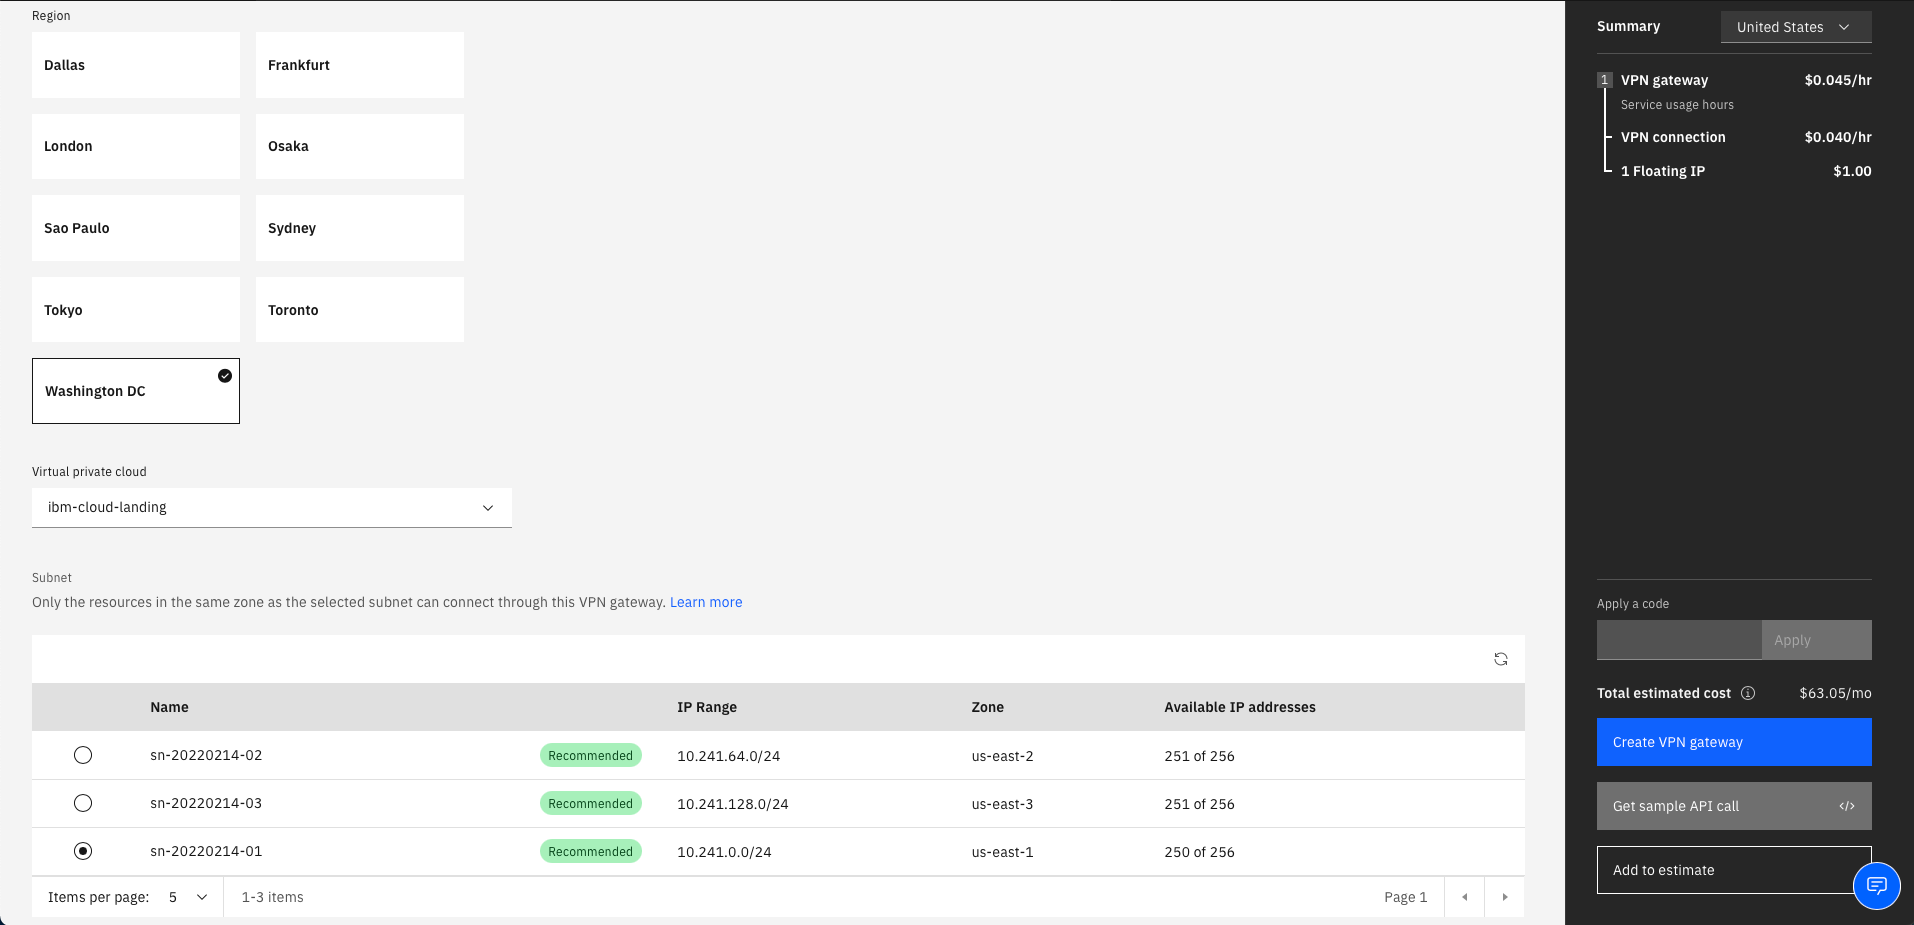
Select the Virtual private cloud and the Subnet for the VPN gateway
-
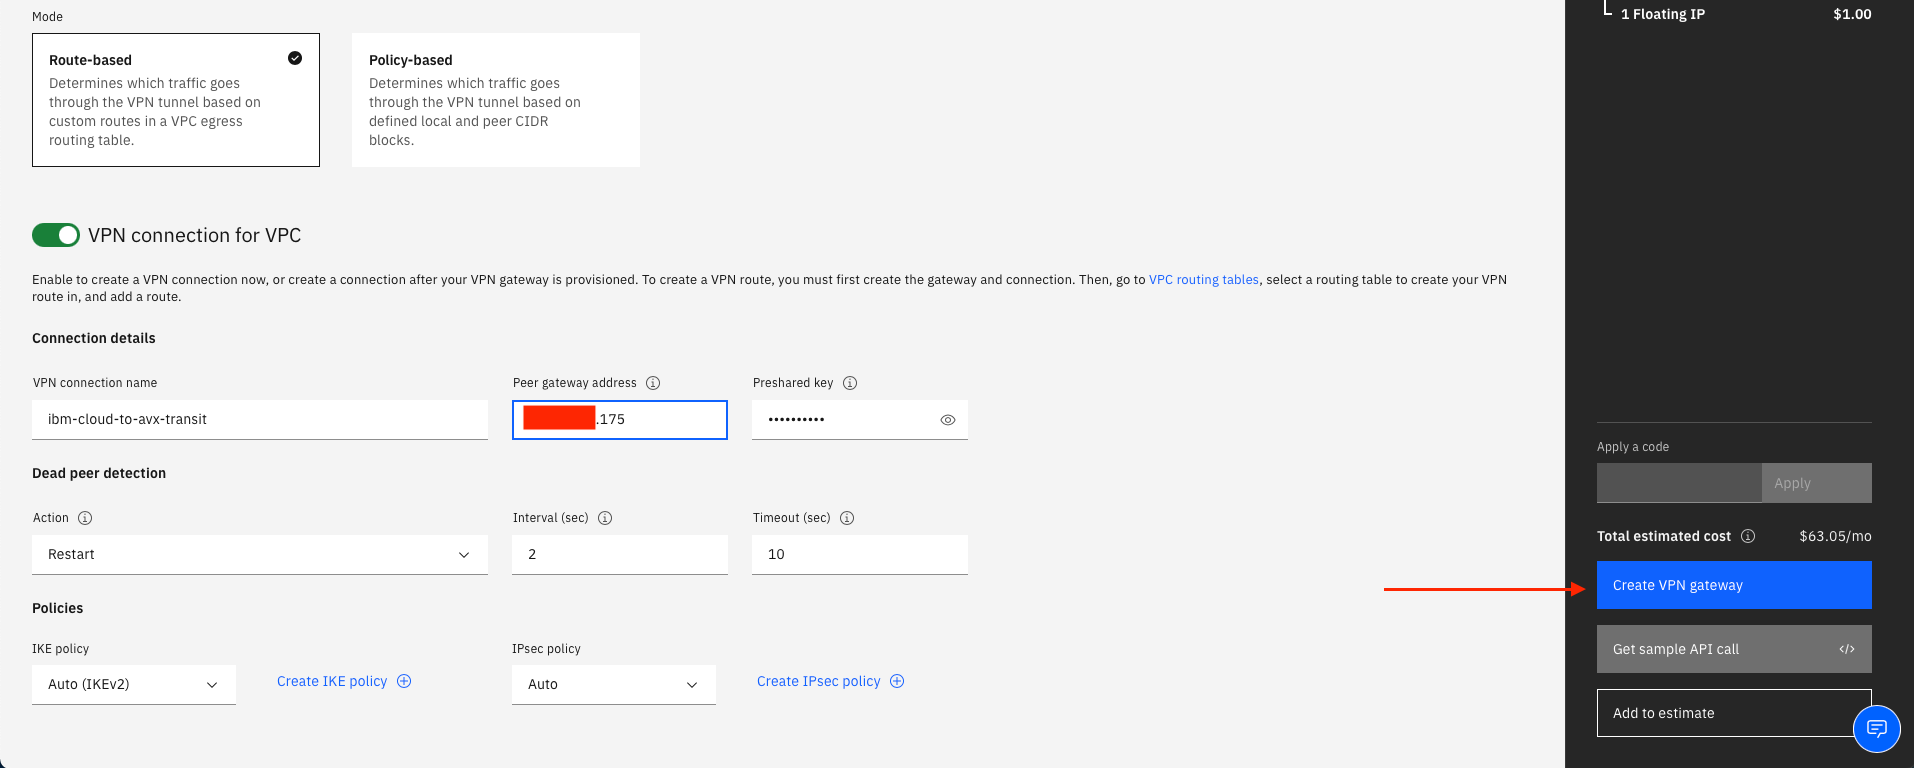
Select Route-based for Mode
-
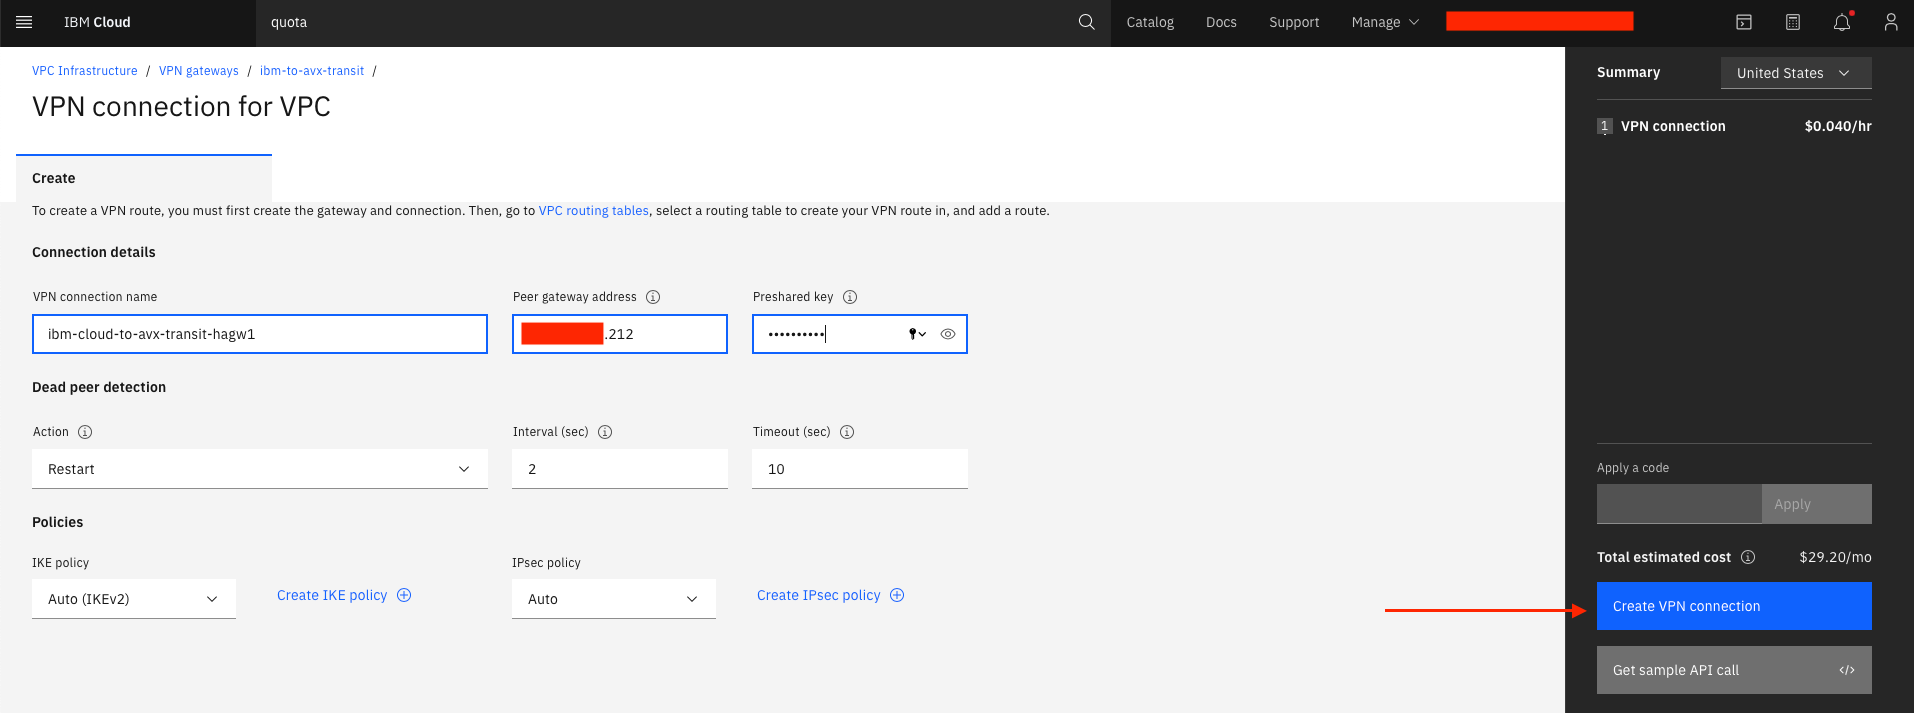
Create the first of two VPN connections for VPC (there will be one to each of the Aviatrix HA gateways)
-
Enter the VPN connection name, the Peer gateway address of the Aviatrix primary gateway, and a Preshared key of your choosing
-
Leave the other parameters as default
-
Select Create VPN gateway.
-
-
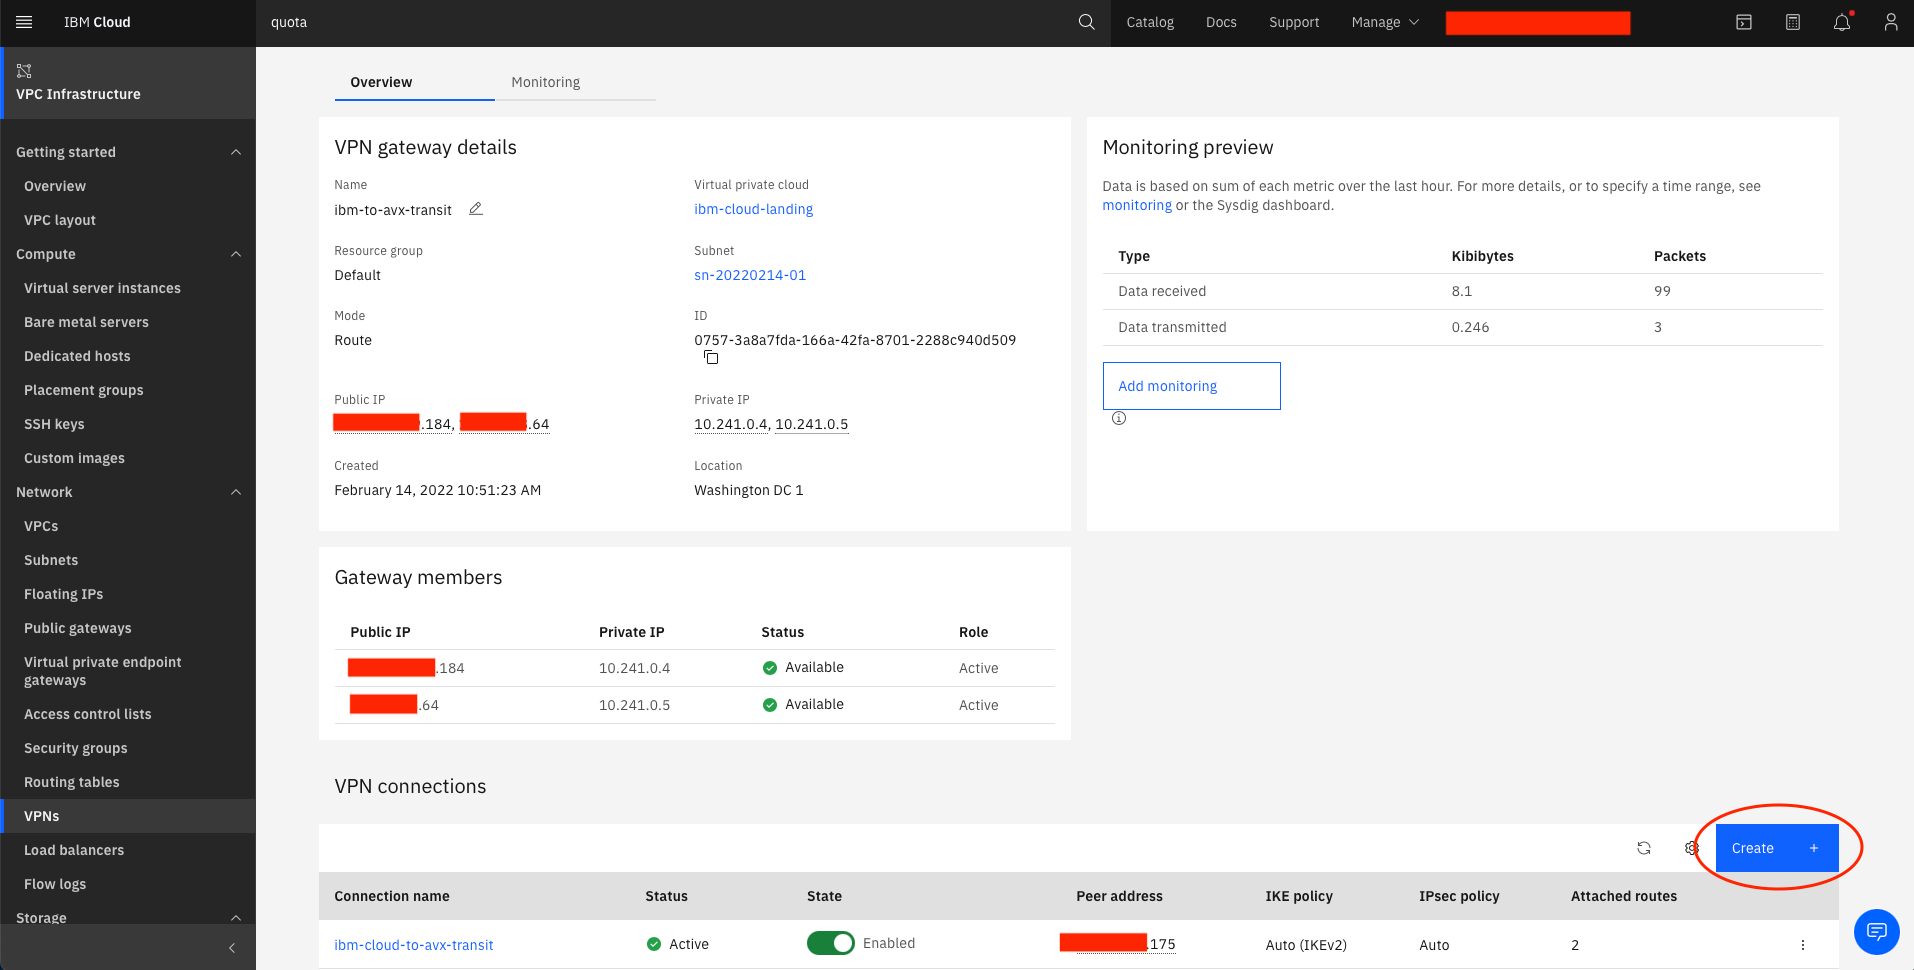
Create the second VPN connection for VPC by selecting the VPN gateway you just created
-
Under VPN connections select Create
-
Create the second VPN connection
-
Enter the VPN connection name, the Peer gateway address of the Aviatrix HA gateway, and the same Preshared key as the primary gateway
-
Leave the other parameters as default
-
Select Create VPN gateway.
-
-
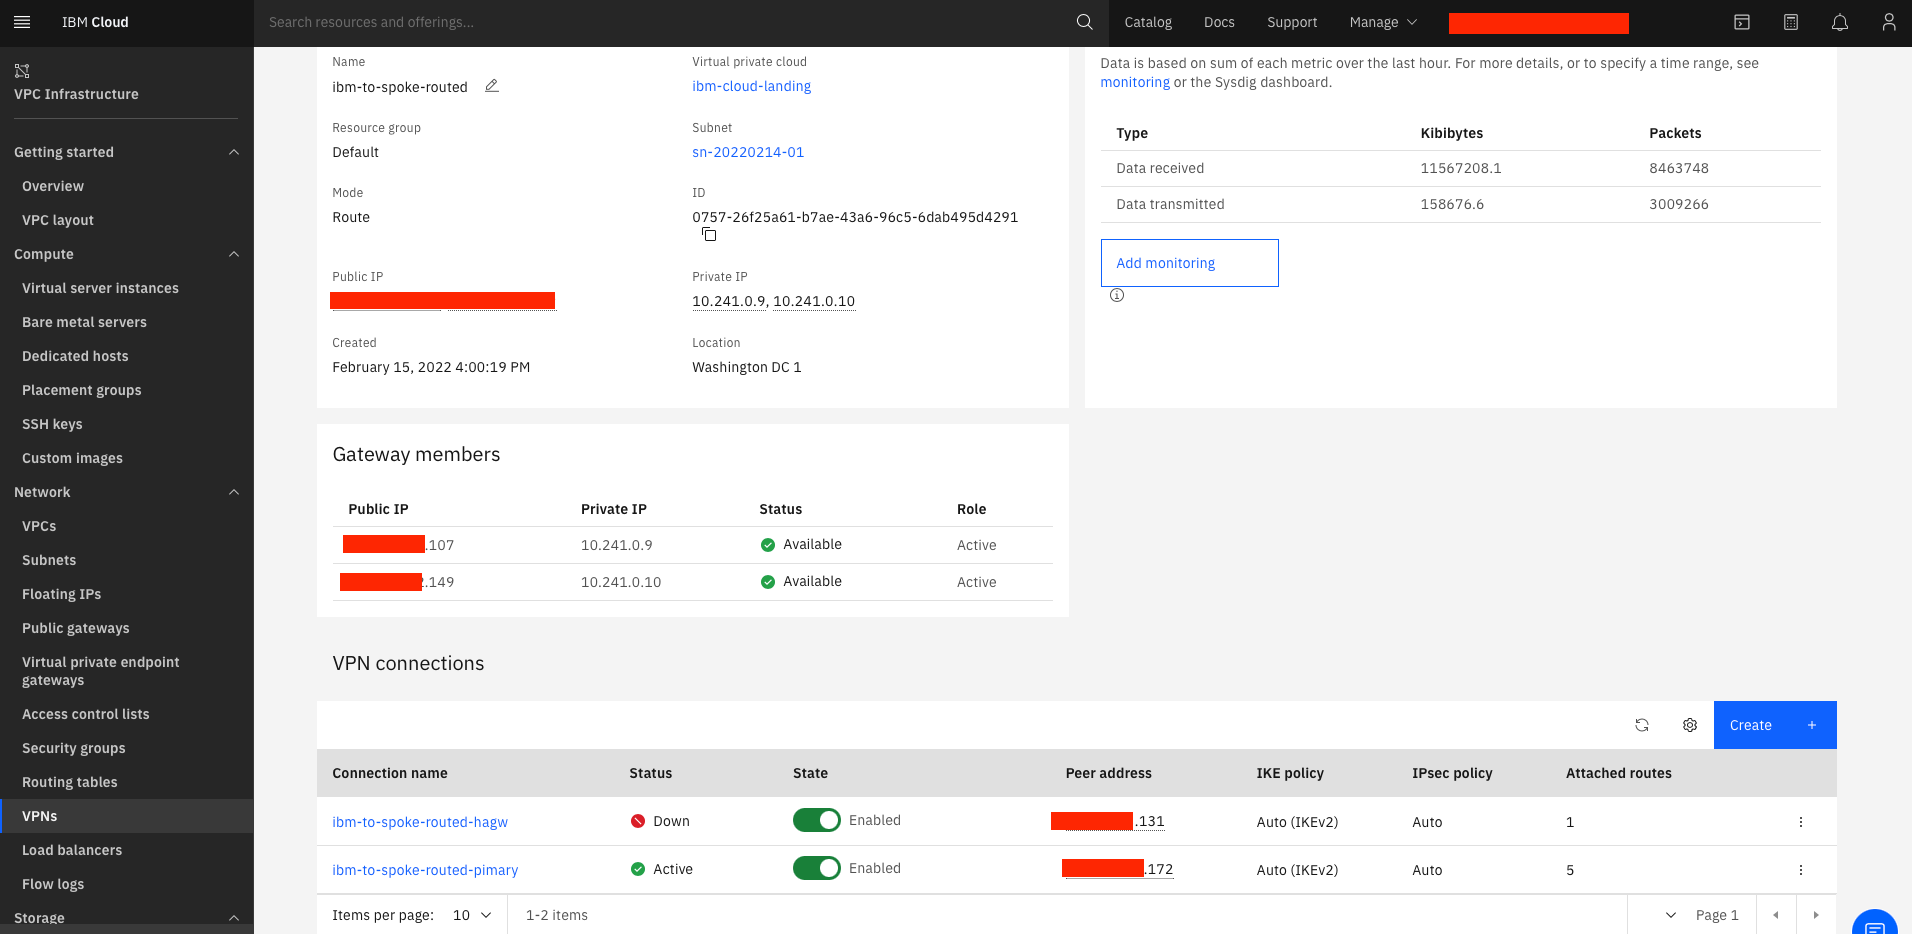
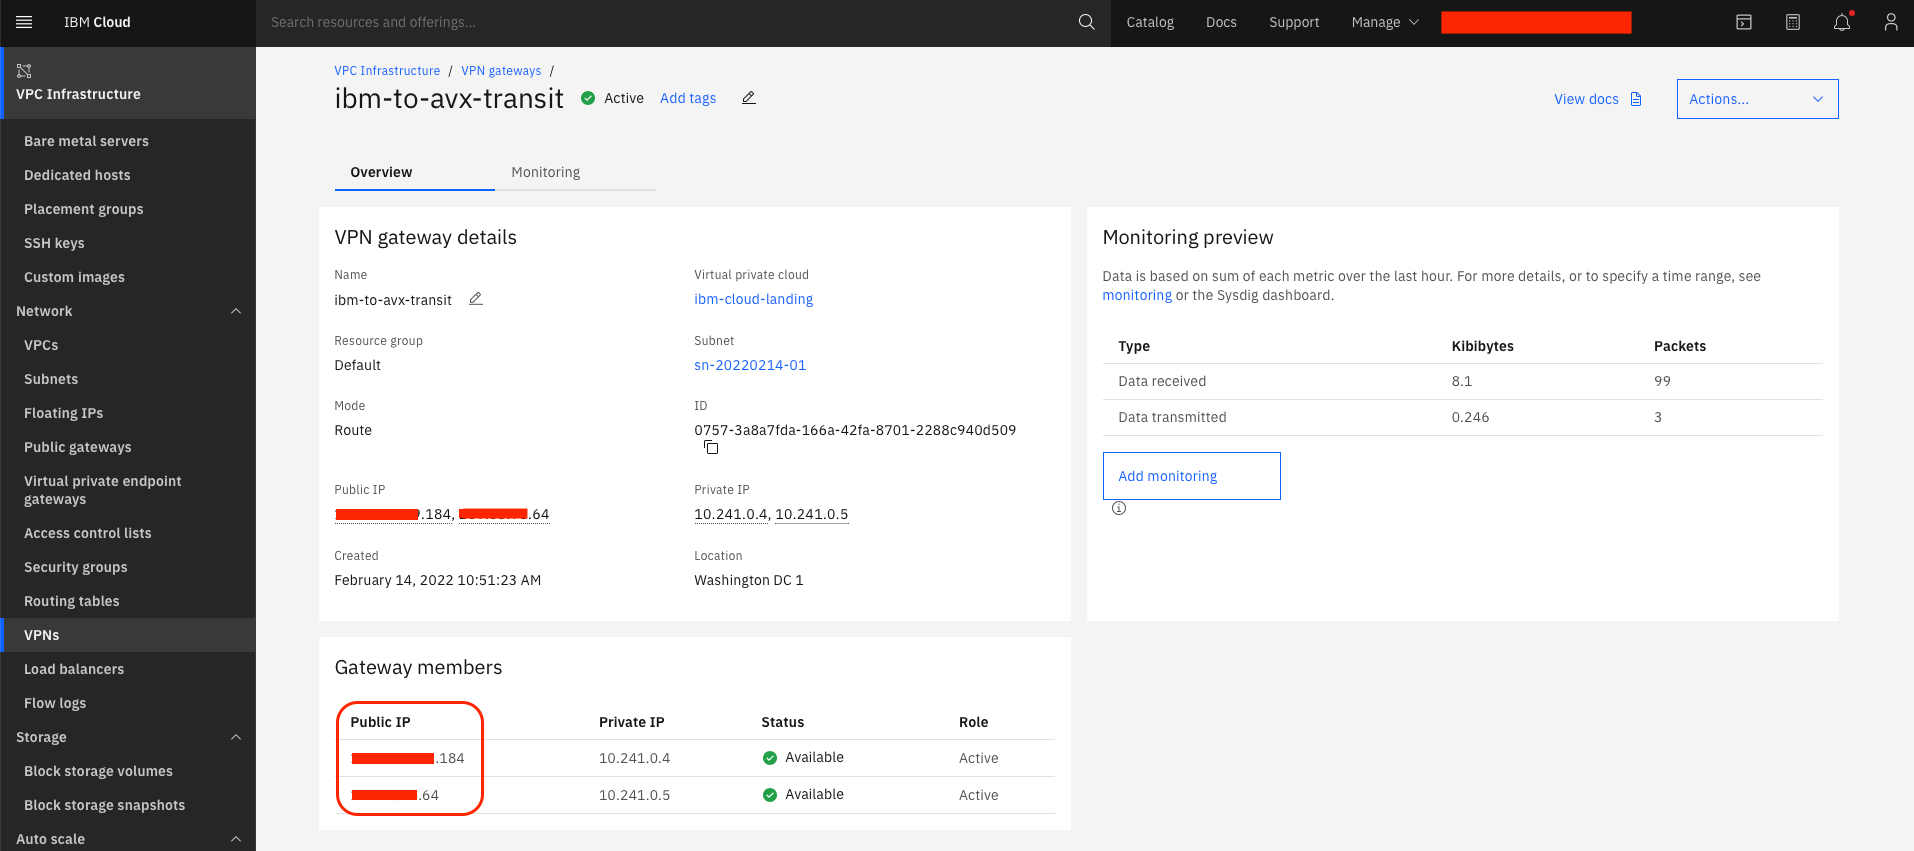
Note the Public IP addresses of the VPN gateway
-
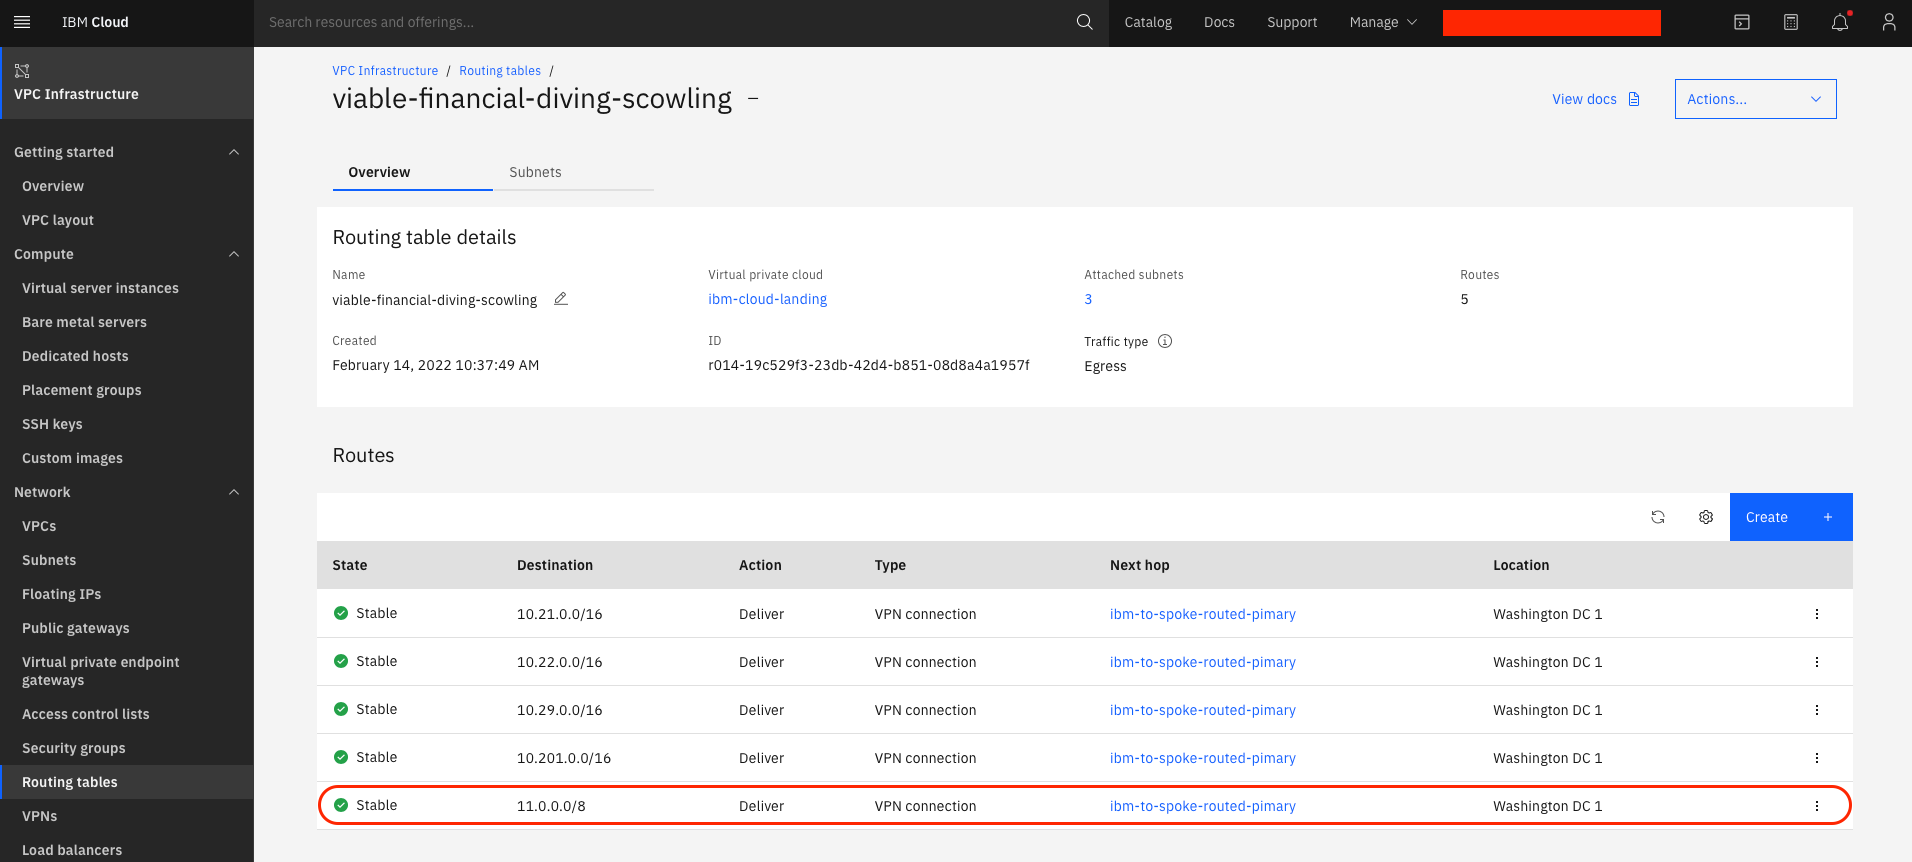
Add route entries to the IBM Cloud VPC Routing table for the mapped (virtual NAT’d subnet) that will be created from the Aviatrix controller. The route next hop will be the VPN connection to the Aviatrix spoke gateway.
Aviatrix Side
-
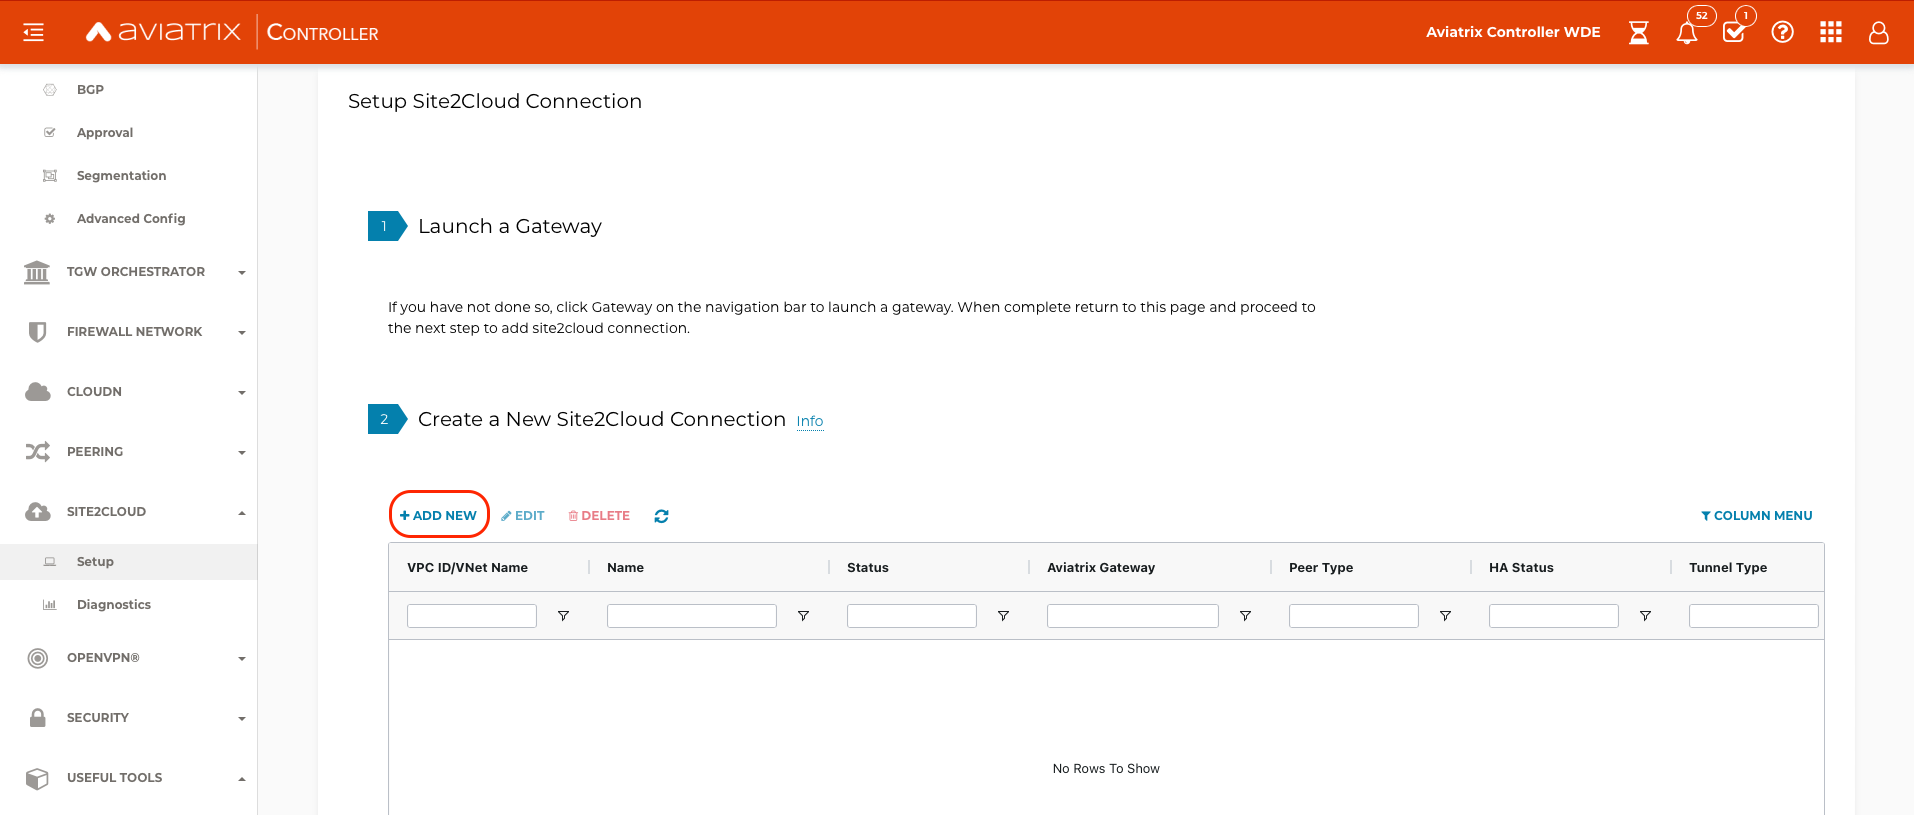
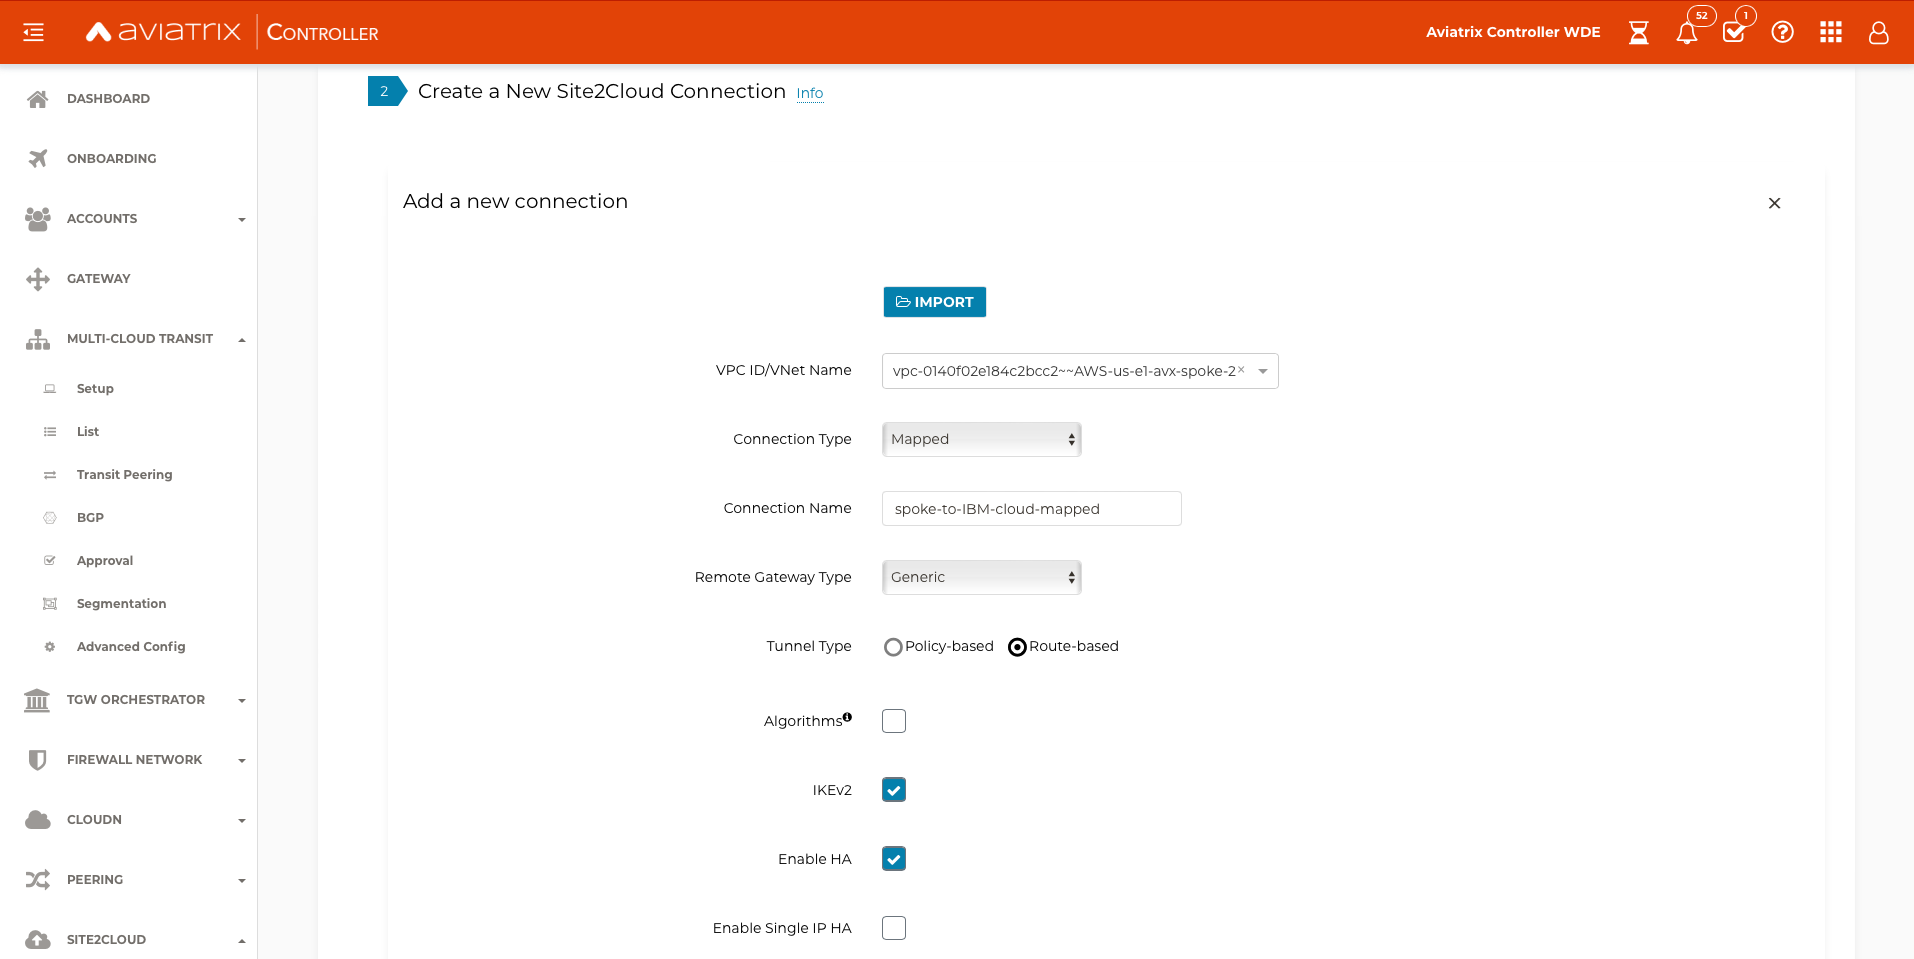
Navigate to SITE2CLOUD → Setup and select + ADD NEW
-
Create the Site2Cloud connection from the spoke landing VPC to the IBM VPN Gateway
-
Select the landing VPC ID
-
Select a Connection Type of Mapped
-
Enter the Connection Name and select Remote Gateway Type of Generic
-
Select Route-based for Tunnel Type
-
Select the IKEv2 check box
-
Select Enable HA
-
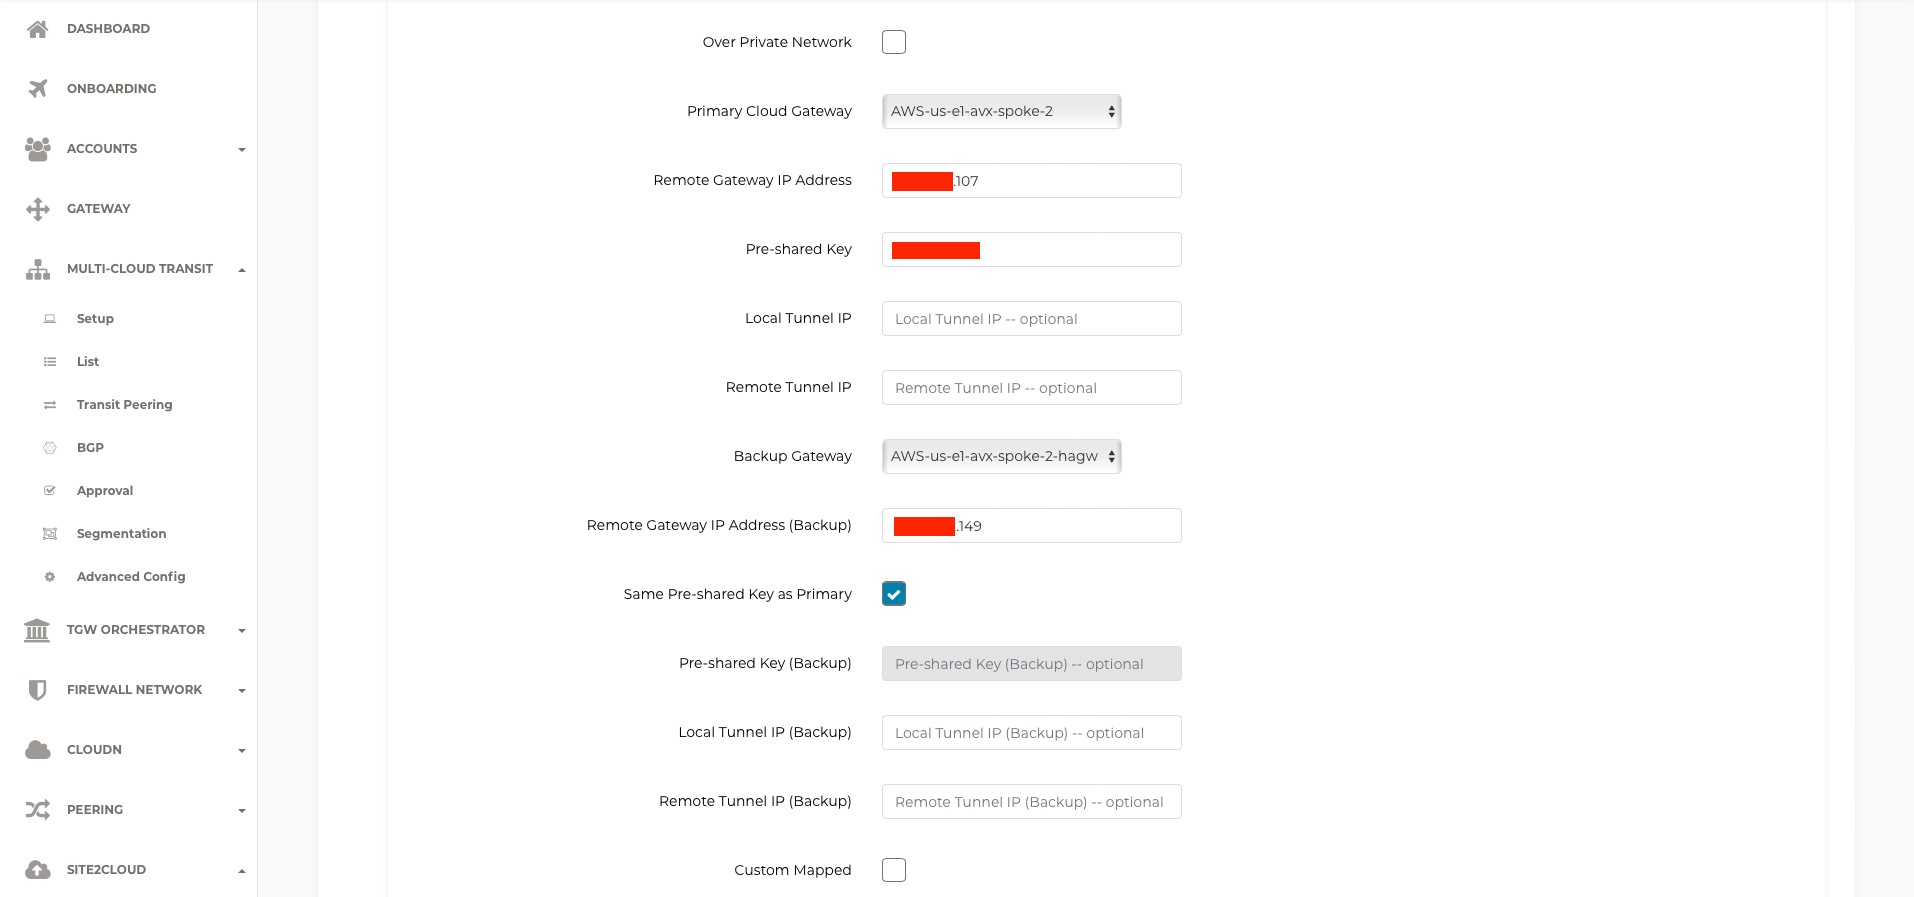
Select the primary spoke gateway for the Primary Cloud Gateway
-
In the Remote Gateway IP Address box, enter the first Public IP address from the IBM Cloud VPN Gateway
-
Enter the same Pre-shared Key used for the IBM Cloud VPN connection for VPC
-
Select the HA spoke gateway for the Backup Gateway
-
In the Remote Gateway IP Address (Backup) box, enter the second Public IP address from the IBM Cloud VPN Gateway
-
Select Same Pre-shared Key as Primary
-
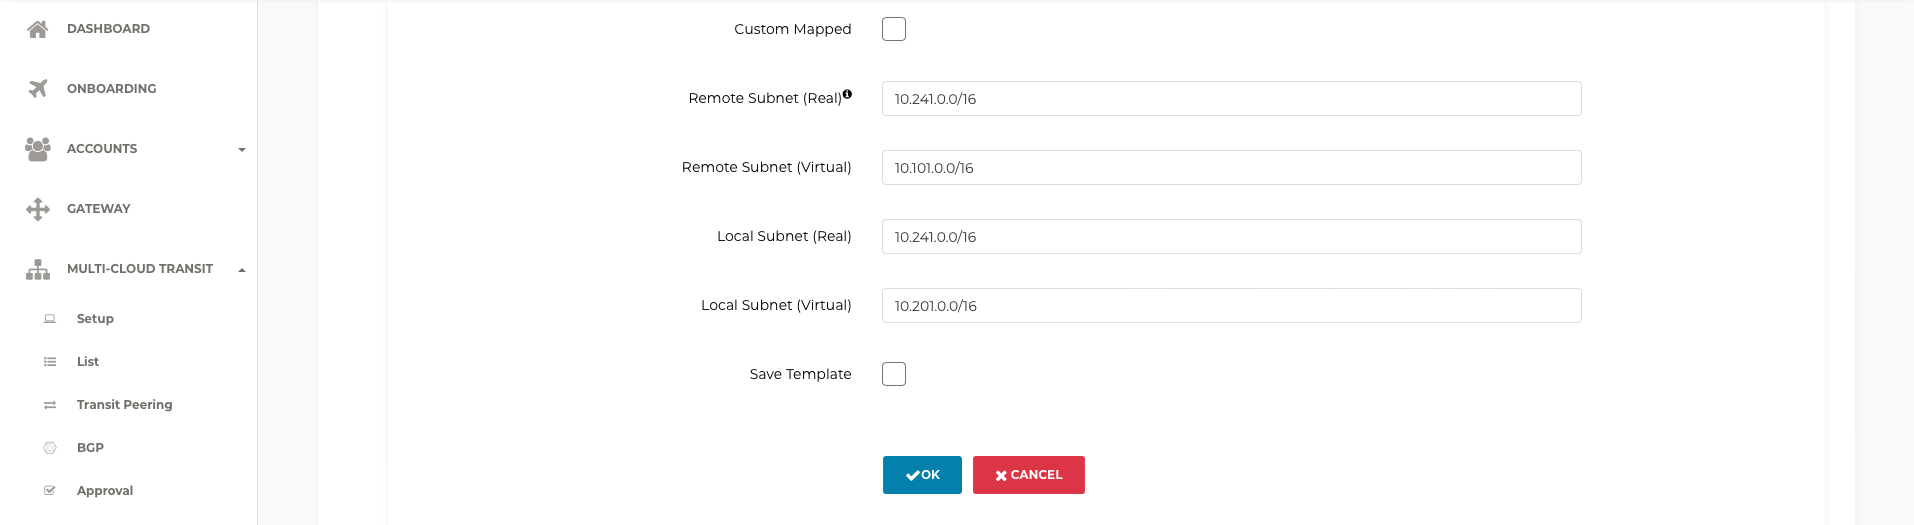
For Remote Subnet (Real), enter the real subnet of the IBM Cloud VPC
-
For Remote Subnet (Virtual), enter a virtual subnet
-
For Local Subnet (Real), enter the real subnet of the Aviatrix spoke VPC(s)
-
For Local Subnet (Virtual), enter a virtual subnet (different from the Remote Subnet (Virtual))
-
Select OK to build the connection
-
-
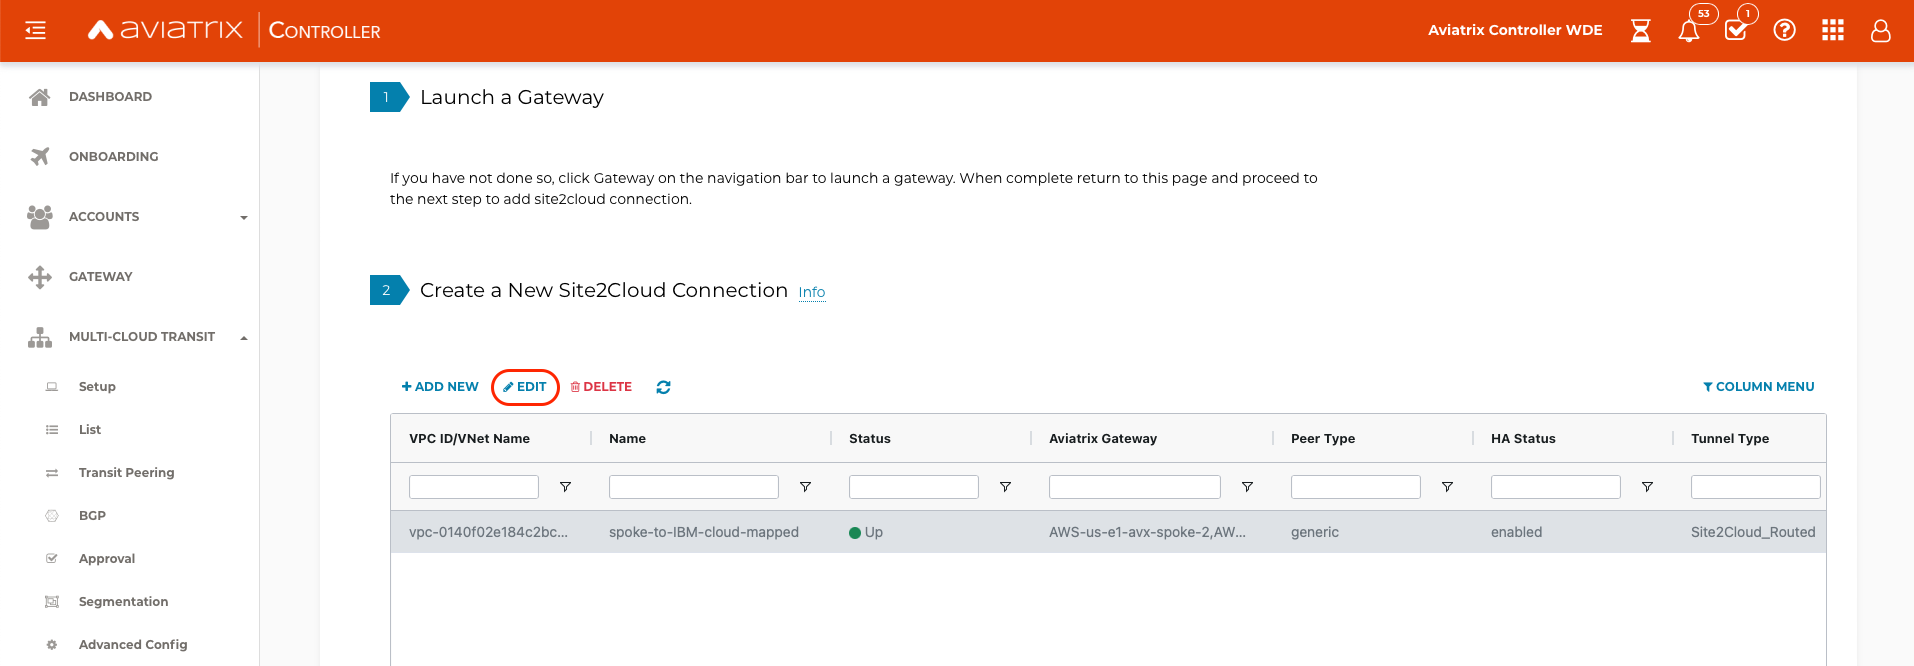
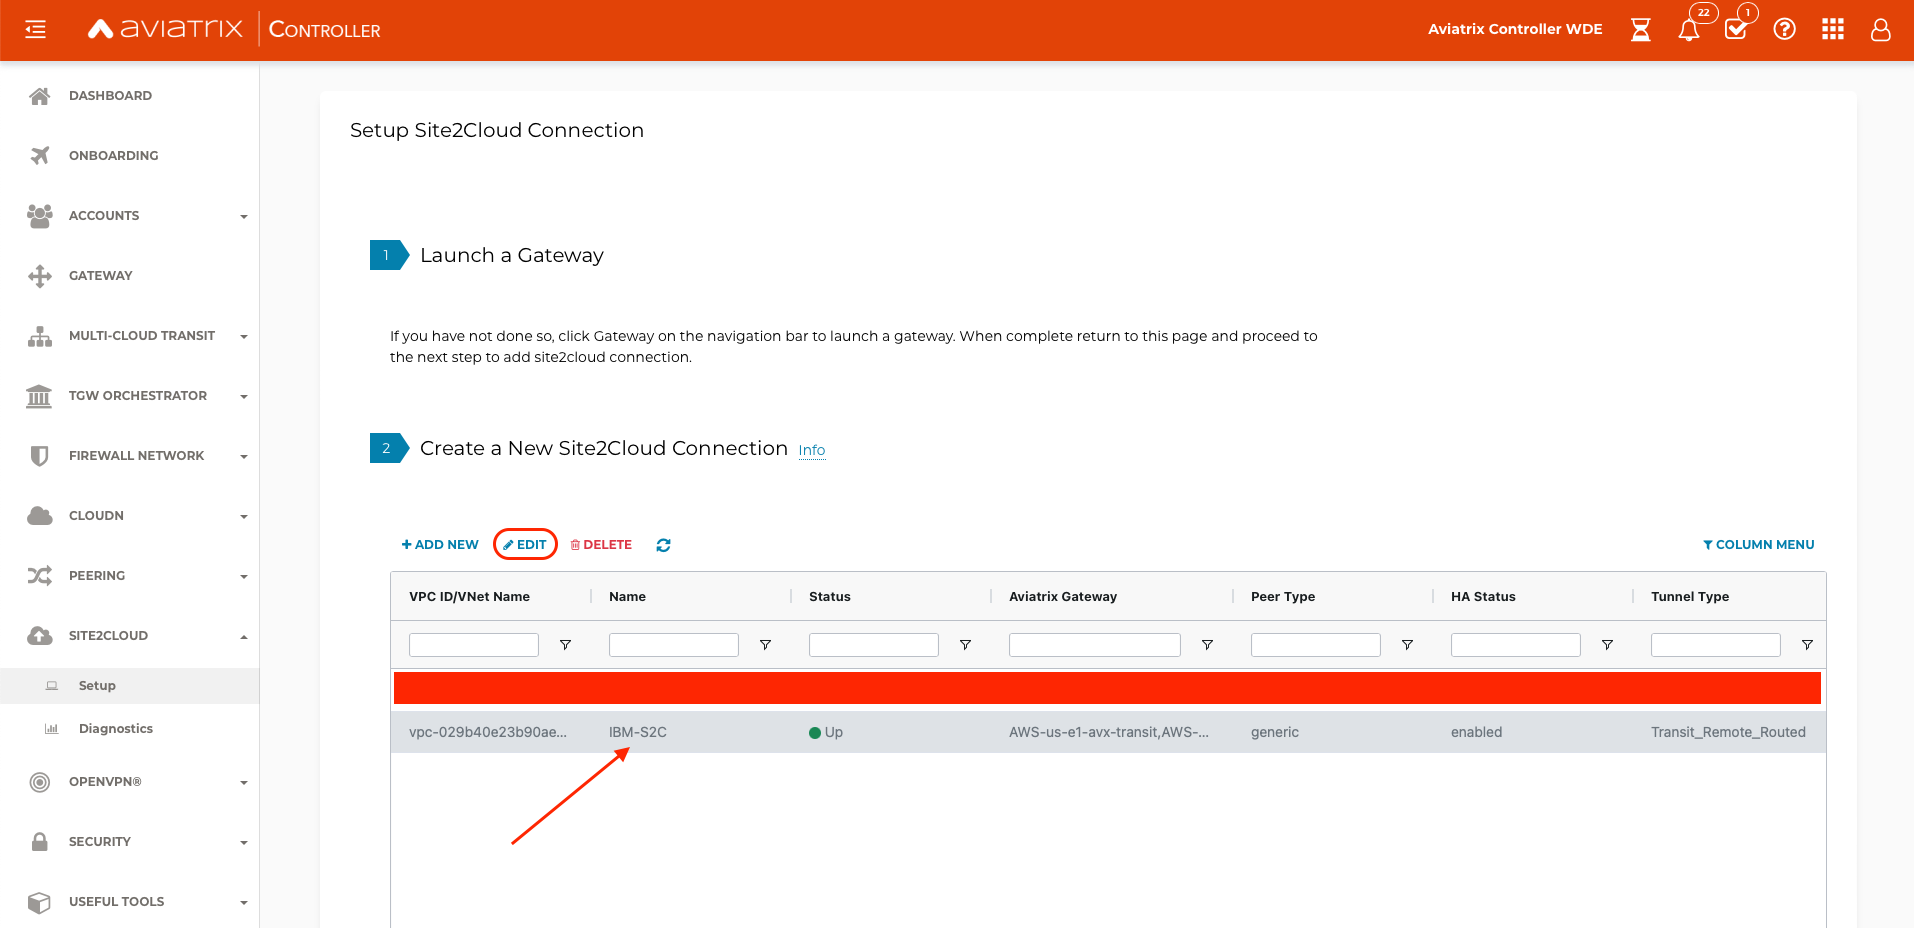
Navigate to SITE2CLOUD, select the newly created connection, and select EDIT.
-
Scroll down to Forward Traffic to Transit Gateway and select Enable

-
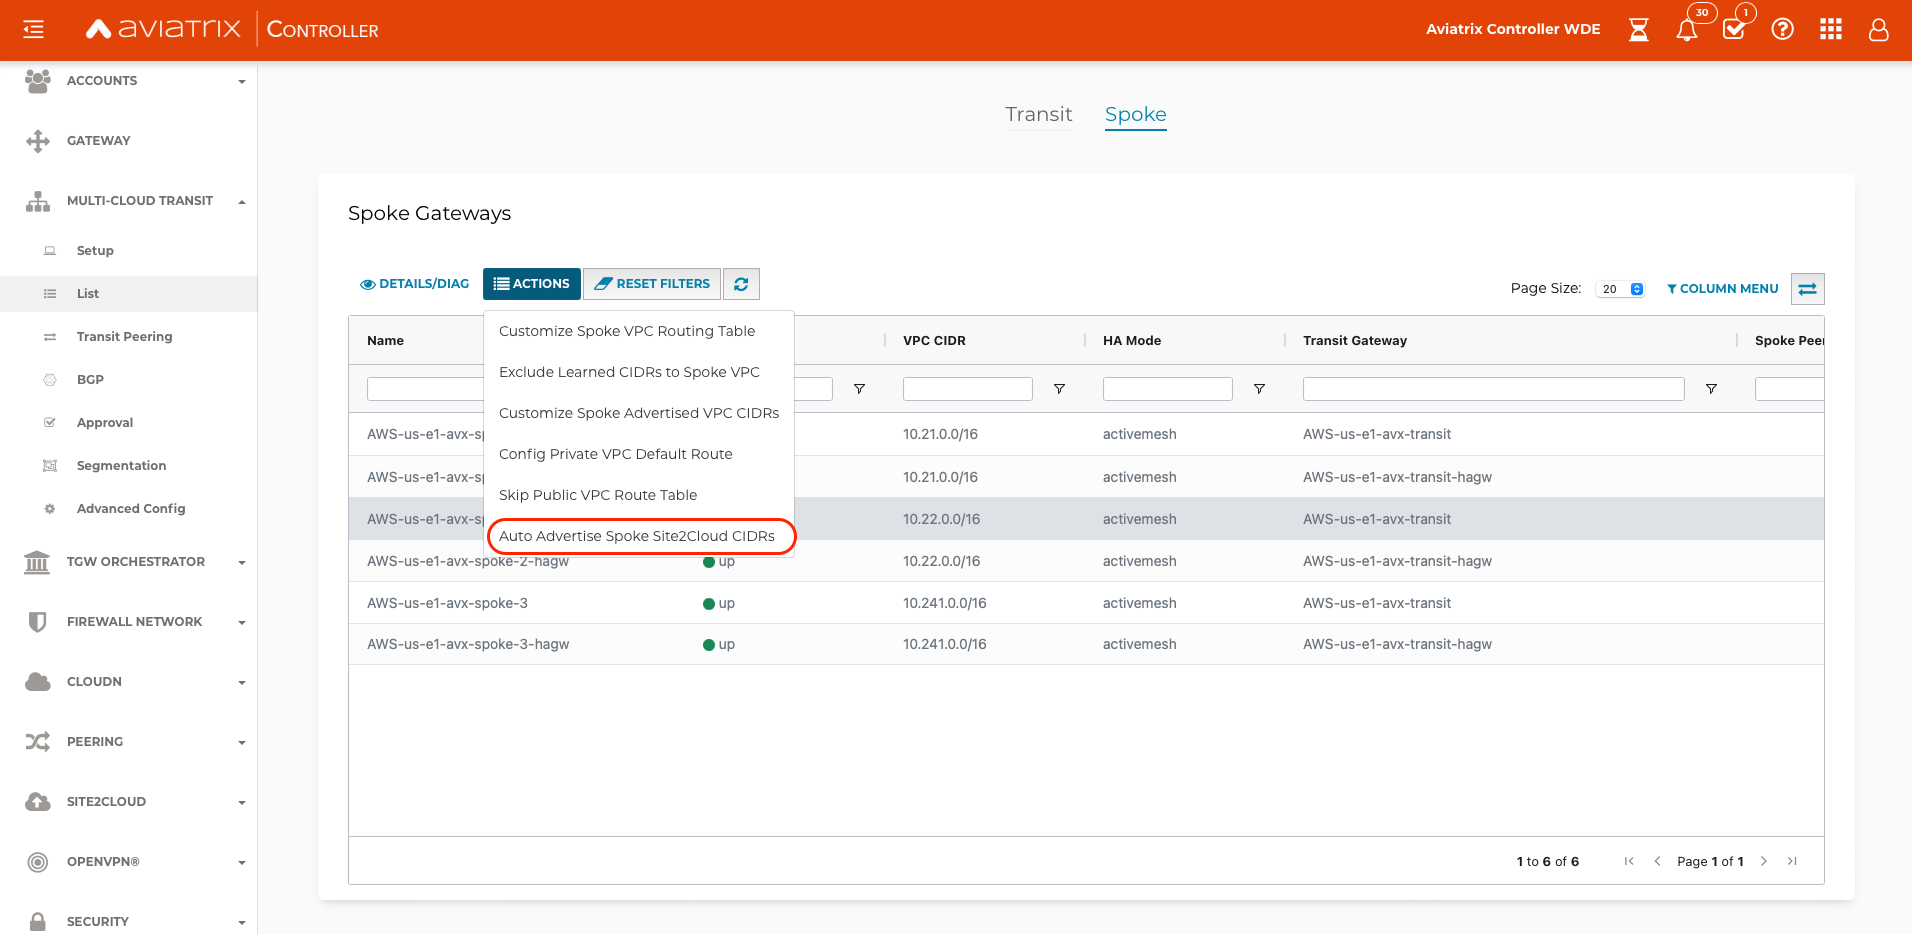
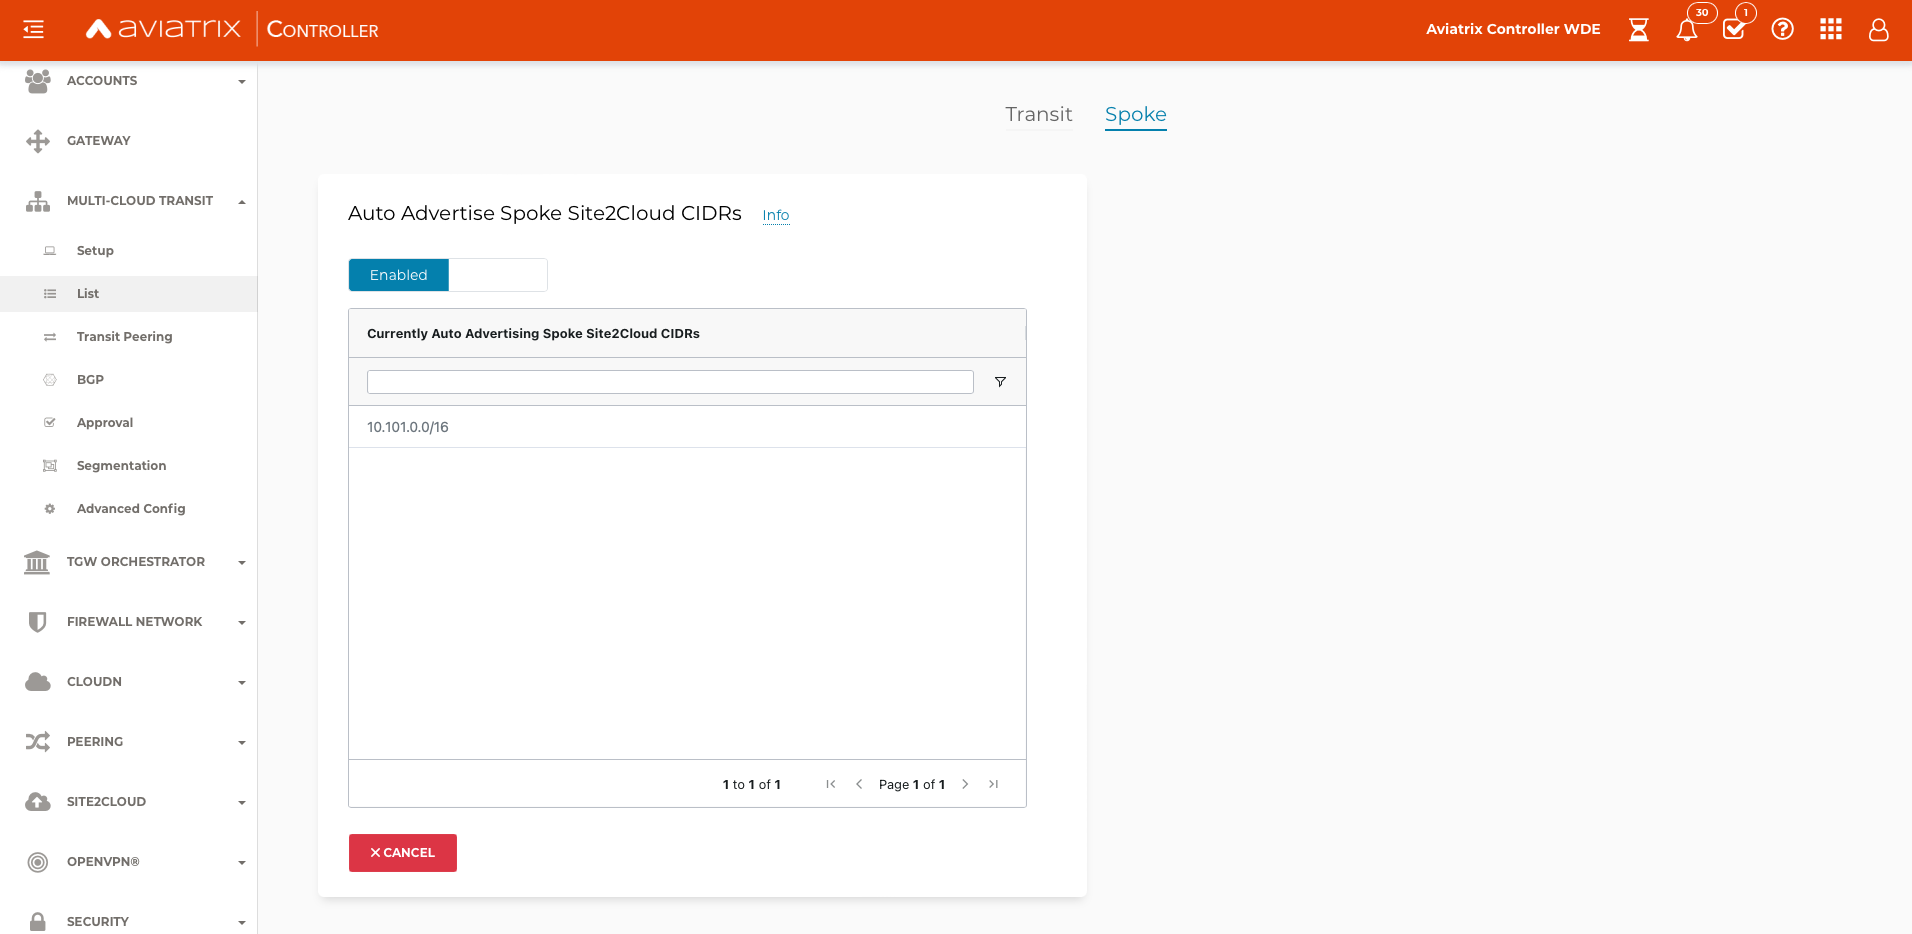
In Multi-Cloud Transit -> List -> Spoke select the spoke gateway where the S2C connection was built, then select Actions and select Auto Advertise Spoke Site2Cloud CIDRs. Select Enabled. Transit List — aviatrix_docs documentation
Validation
-
Navigate to SITE2CLOUD and verify that the Status is Up. Select the newly created connection, and select EDIT.
-
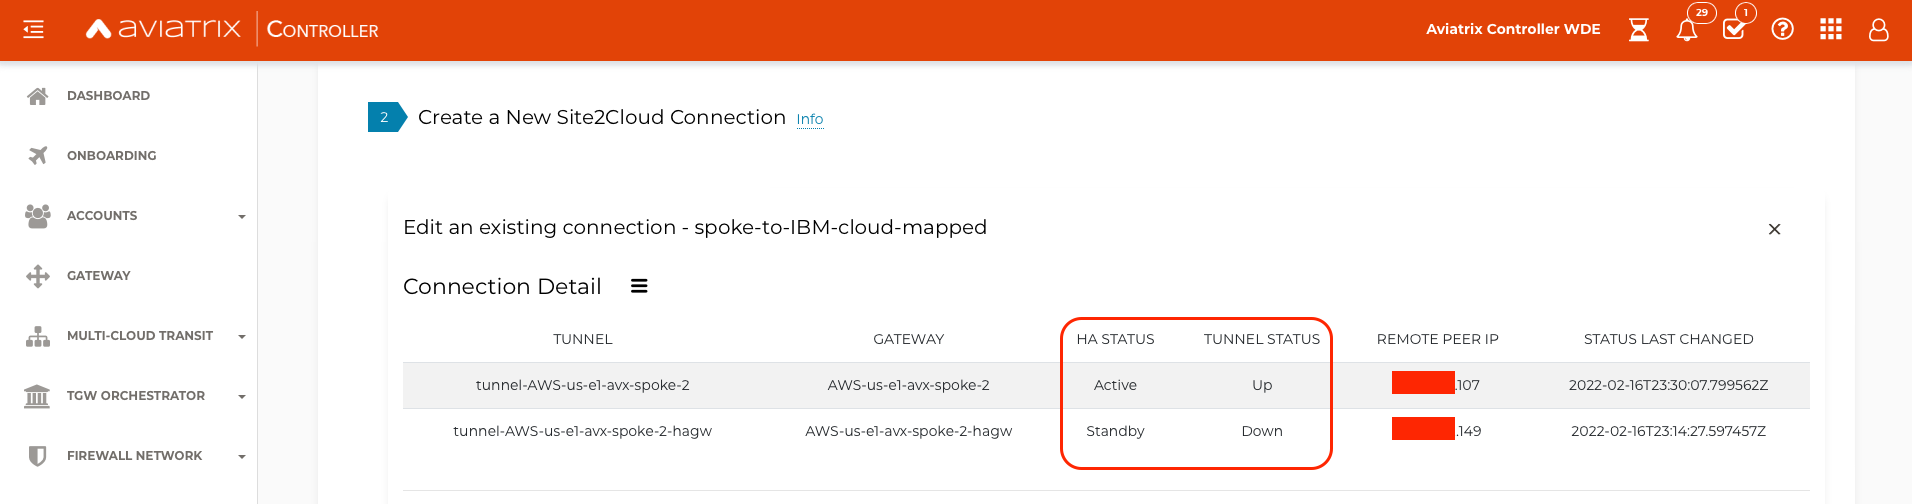
Verify one tunnel shows Active and Up. The other tunnel will show Standby and Down because IBM VPN Gateway only supports active standby (see note below).
Note from IBM Cloud Documentation: A static, route-based VPN is deployed in Active-Active redundancy mode; however, only one tunnel can be used for active tunnel traffic. The other tunnel acts as hot standby so that traffic can be easily diverted to the second tunnel if the first tunnel goes down. Both tunnels are always up on the IBM Cloud side, which gives the peer side the advantage to control the traffic on their end. The peer side needs to use either only one tunnel, or keep the status of the other tunnel down and activate it only if the first tunnel goes down.
-
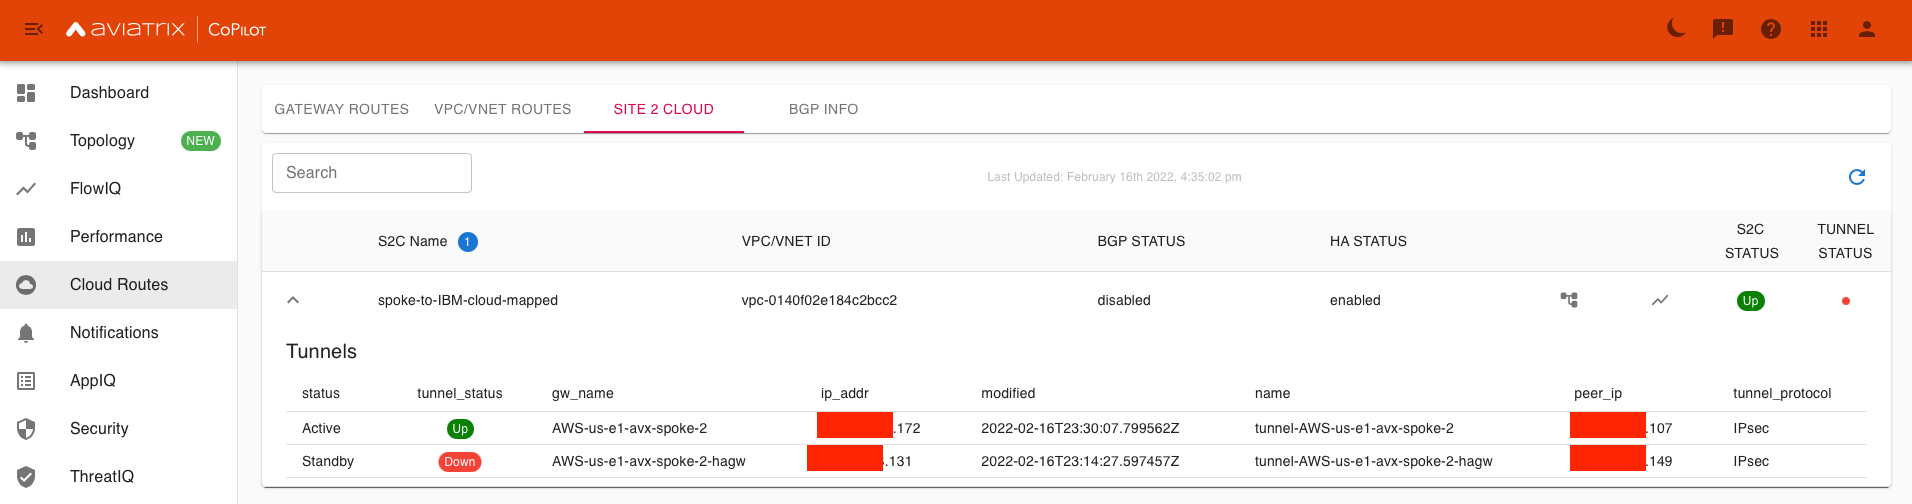
On Aviatrix CoPilot, navigate to Cloud Routes → Site 2 Cloud and verify S2C Status, Tunnel Status is Up/Green for the Active tunnel.
-
On IBM Cloud, navigate to the VPN gateway details, and under VPN connections, verify the Status is Active for one of the connections.