
Overview
The document will guide you through the requirements for onboarding an Azure account into the Aviatrix Controller. Once you have done this, you will be able to create resources (such as gateways and encrypted tunnels) in Azure from the Aviatrix platform either via the UI or Terraform.
To do this, you will be creating a Service Principal with Contributor access.
Specifically, you will need the following 4 pieces of information (aka Azure API keys).
- Subscription ID
- Tenant ID (aka Directory ID)
- Application ID (aka Client ID)
- Application Key (aka Client Secret)
Obtaining Azure API keys via Azure Portal
You can learn how to obtain Azure API keys via the Azure portal here.
Obtaining Azure API keys via Azure CLI
You can also obtain the Azure API keys via the Azure CLI. It may actually be quicker to do so in this manner as opposed to via the Azure Portal. It's a simple 2-step process.
Get Subscription ID and Tenant ID
From the Azure Portal, click on the first icon immediately to the right of the top search bar. This button will say Cloud Shell when hovered over.

If you are prompted, be sure to select Power Shell instead of Bash.
You will get a prompt the first time you run this asking if you are okay with a small monthly cost for Azure Cloud Shell.
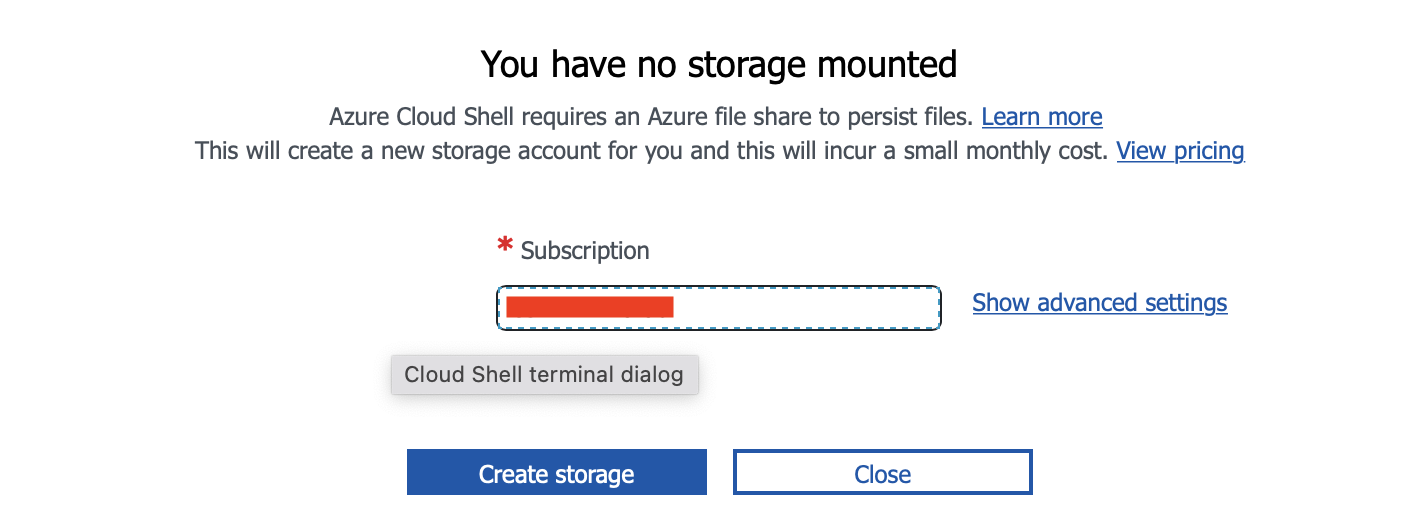
If you are prompted, click Create storage.
Once you are at the Power Shell prompt, type this command to determine your Subscription ID:
PS /home/yourName> Get-AzSubscription
Name       Id                TenantId                             State
----       --                --------                             -----
Azure PAYG xxxx-xx-xxxx-xxxx ZZZZZZZZ-ZZZZ-ZZZZ-ZZZZ-ZZZZZZZZZZZZ Enabled
The value in the Id column is your Subscription ID.
The value in the TenantId column is your Tenant ID.
Get Application ID and Application Key
Next, register an Application in Azure. This command will do that by creating a Service Principal with Contributor access for onboarding an Azure account into Aviatrix:
az ad sp create-for-rbac --name "Name of your Application" --role="Contributor" --scopes=/subscriptions/xxxx-xx-xxxx-xxxx (replace x's with Subscription ID)You will get output such as this:
PS /home/yourName> az ad sp create-for-rbac --name "Name of your Application" --role="Contributor" --scopes=/subscriptions/xxxx-xx-xxxx-xxxx (replace x's with your Subscription ID)
Creating 'Contributor' role assignment under scope '/subscriptions/xxxx-xx-xxxx-xxxx'
The output includes credentials that you must protect. Be sure that you do not include these credentials in your code or check the credentials into your source control. For more information, see https://aka.ms/azadsp-cli
'name' property in the output is deprecated and will be removed in the future. Use 'appId' instead.
{
  "appId": "XXXXXXXX-XXXX-XXXX-XXXX-XXXXXXXXXXXX",
  "displayName": "Name of your Application",
  "name": "XXXXXXXX-XXXX-XXXX-XXXX-XXXXXXXXXXXX",
  "password": "YYYYYYYYYYYYYYYYYYYYYYYYYYYYYYYY",
  "tenant": "ZZZZZZZZ-ZZZZ-ZZZZ-ZZZZ-ZZZZZZZZZZZZ"
}
PS /home/yourName>
In the output shown on your screen,
- tenant is the Tenant ID (aka Directory ID), which you already knew from the Get-AzSubscription command earlier.
- appId is the Application ID (aka Client ID)
- password is the Application Key (aka Client Secret). Keep this safe. It will not be displayed again.
You now have the 4 pieces of information needed to onboard your Azure account into the Aviatrix Controller.